Candian Home Leisure is the leading provider of hot tubs, pool tables, patio furniture and all of your home leisure goods. Anything you need for your entertainment room can be found here!
Maintaining proper water chemistry in a hot tub can feel like a never-ending chore. Testing pH levels, adding chlorine, and balancing sanitizers takes time most people would rather spend relaxing in warm water.
An automatic hot tub chemical monitor and dispenser eliminates the guesswork by continuously testing water chemistry and adding the right chemicals at the right time. These smart systems work around the clock to keep water clean and balanced. Hot tub owners can finally enjoy their spa without constant maintenance worries.
Modern chemical monitoring systems use advanced sensors to track pH, sanitizer levels, and other key factors. The technology automatically dispenses precise amounts of chemicals when needed. This article explores how these systems work, what to look for when choosing one, and tips for keeping the equipment running smoothly.
How Automatic Hot Tub Chemical Monitor and Dispenser Systems Work
These systems use digital sensors to continuously test water chemistry and automatically add the right amount of chemicals. They monitor chlorine levels, pH balance, and sanitizer concentration while dispensing treatments as needed.
Core Functions and Technology
Digital sensors measure water chemistry every few minutes throughout the day. The main control unit processes this data and compares it to pre-set target ranges.
Most systems include pH sensors and ORP (oxidation-reduction potential) sensors. The ORP sensor detects sanitizer effectiveness rather than just measuring chemical amounts. This gives a more accurate picture of water quality.
When levels fall outside the target range, the system activates chemical pumps. These pumps draw from separate chemical containers and inject precise amounts into the water circulation system.
Smart connectivity allows remote monitoring through smartphone apps. Users can check water status, adjust settings, and receive alerts about low chemical supplies or system maintenance needs.
The control unit typically mounts near the hot tub equipment area. Chemical containers connect through tubing that runs to injection points in the plumbing system.
Monitoring Sanitizer and Chlorine Levels
The ORP sensor continuously tracks sanitizer effectiveness in the water. This measurement tells the system whether there’s enough active sanitizer to kill bacteria and viruses.
Target ORP levels typically range from 650 to 750 millivolts for hot tubs. When readings drop below this range, the system automatically dispenses chlorine or bromine sanitizer.
pH sensors work alongside ORP monitoring because pH affects sanitizer performance. If pH rises above 7.6, chlorine becomes less effective even at proper concentrations.
The system adjusts both chemicals in the correct sequence. pH correction happens first since proper pH levels allow sanitizers to work efficiently. This prevents chemical waste and maintains consistent water quality.
Most units can handle liquid chlorine, granular chemicals through dissolving chambers, or mineral sanitizer cartridges depending on the model.
Water Care Automation Benefits
Automated systems eliminate daily water testing with test strips or liquid test kits. They maintain consistent chemical levels without constant manual adjustments.
Chemical efficiency improves significantly because the system adds small amounts frequently rather than large doses weekly. This approach prevents chemical spikes that can irritate skin or damage equipment.
Water stays balanced continuously rather than swinging between safe and unsafe levels. Hot tub owners spend less time on maintenance and more time enjoying their spa.
The systems reduce over-chlorination incidents that create strong chemical odours or skin irritation. Precise dosing means chemicals last longer and cost less over time.
Remote monitoring capabilities let owners check water status before arriving home. They can adjust settings or troubleshoot issues without being physically present at the hot tub location.
Choosing and Maintaining an Automatic Hot Tub Chemical Dispenser
The right dispenser matches your hot tub size, usage patterns, and preferred sanitizer type. Proper installation requires attention to plumbing connections and placement, while regular maintenance keeps the system running smoothly for years.
Selecting the Right Device for Your Spa
Hot tub owners need to match their dispenser capacity to their spa’s water volume. A 300-gallon hot tub requires different chemical delivery than an 800-gallon model. Most dispensers handle between 200-1,000 gallons effectively.
Sanitizer compatibility plays a crucial role in selection. Some units work exclusively with chlorine tablets, while others accommodate bromine or mineral systems. Multi-sanitizer models offer flexibility but cost more upfront.
Flow-through dispensers connect directly to plumbing lines. They provide consistent chemical distribution but require professional installation. Floating dispensers offer easier setup but may create uneven sanitizer levels in larger hot tubs.
Feature
Flow-Through
Floating
Inline
Installation
Professional
DIY
Moderate
Coverage
Excellent
Good
Very Good
Cost
$$$
$
$$
Digital models with WiFi connectivity allow remote monitoring of chlorine levels and water care status. Basic mechanical units cost less but require manual checking and adjustment.
Installation Considerations
Professional installation ensures proper water flow and chemical distribution throughout the hot tub system. The dispenser must connect between the heater and return jets for optimal performance.
Plumbing modifications may be necessary depending on the hot tub’s existing setup. Some systems require additional bypass valves or flow switches to regulate chemical delivery rates.
Electrical connections matter for automated dispensers. GFCI-protected circuits prevent safety hazards near water. Battery-powered units eliminate electrical work but need regular battery replacement.
Placement affects chemical mixing and system efficiency. Install flow-through units downstream from the heater but upstream from UV or ozone systems. Chemical sanitizers can interfere with these alternative water care methods.
Water pressure requirements vary by model. Most dispensers need 15-30 PSI to function properly. Low-pressure systems may require booster pumps or different dispenser types.
Ongoing Maintenance and Best Practices
Weekly refills keep sanitizer levels stable in most residential hot tubs. Heavy usage or high temperatures increase chemical consumption and require more frequent attention.
Clean the dispenser housing monthly to prevent buildup and clogs. Remove any residue from tablets or granules that didn’t dissolve completely. Calcium deposits can reduce flow rates and affect performance.
Monitor sanitizer levels with test strips or digital meters twice weekly. Automatic dispensers supplement regular testing but don’t replace it entirely. Adjust dispenser settings based on actual chlorine levels rather than manufacturer recommendations alone.
Replace worn seals and gaskets annually to prevent leaks. Most units include replacement part kits for common maintenance items. Store extra chemicals in cool, dry locations away from direct sunlight.
Winterisation procedures vary by climate and dispenser type. Drain all water from the unit before freezing temperatures arrive. Remove any remaining chemical tablets to prevent corrosion during storage periods.
Frequently Asked Questions
Automatic hot tub chemical monitors and dispensers raise many questions about their operation, maintenance requirements, and cost-effectiveness. These systems offer advanced features like smartphone connectivity, precise chemical regulation, and built-in safety measures.
How does an automated hot tub chemical dispenser regulate pH and chlorine levels?
The system uses electronic sensors to measure water chemistry every few minutes. These sensors send data to a control unit that compares current levels to preset targets.
When pH drops below the desired range, the dispenser automatically releases pH increaser into the water. If chlorine levels fall too low, it dispenses the right amount of sanitizer to restore proper balance.
Most units can adjust chemicals within 15-30 minutes of detecting changes. The control unit stores dosing history and learns the hot tub’s specific chemical consumption patterns over time.
What maintenance is required for an automatic hot tub chemical monitoring system?
Users need to refill chemical reservoirs every 2-4 weeks depending on hot tub usage. The system alerts owners when chemical supplies run low through indicator lights or smartphone notifications.
Sensor probes require cleaning every 2-3 months with a soft brush and calibration solution. This process takes about 10 minutes and ensures accurate readings.
The dispensing tubes should be checked monthly for clogs or buildup. Annual professional servicing helps maintain optimal performance and extends equipment life.
Are there smart hot tub monitors that allow for remote management via a smartphone app?
Many current models include WiFi connectivity and companion mobile apps. These apps display real-time water chemistry readings, chemical usage history, and maintenance reminders.
Users can adjust target pH and chlorine levels remotely from anywhere with internet access. The apps send push notifications when chemical levels drift outside safe ranges or when supplies need refilling.
Some advanced systems integrate with home automation platforms like Alexa or Google Home. This allows voice commands to check water status or modify settings.
What safety features should I look for in an automatic chemical dispenser for my hot tub?
Lockout mechanisms prevent chemical overdosing by limiting maximum daily dispensing amounts. These systems shut down automatically if sensors detect readings outside safe parameters.
Chemical reservoir locks keep children and pets away from concentrated chemicals. Leak detection sensors alert users immediately if dispensing lines develop problems.
Emergency stop buttons allow instant system shutdown during maintenance or emergencies. Many units include backup battery power to maintain monitoring during electrical outages.
How often do the chemical levels need to be calibrated with an automatic monitoring device?
Most systems require calibration every 3-4 months for accurate performance. The process involves testing sensor readings against manual test strips or liquid test kits.
New installations need initial calibration within the first week of operation. Heavy bather loads or extreme weather may require more frequent calibration adjustments.
Professional technicians can perform annual calibrations as part of regular maintenance visits. This ensures sensors maintain factory-level accuracy throughout their operational life.
What are the cost benefits of installing an automatic chemical monitor and dispenser in a hot tub?
Automated systems reduce chemical waste by dispensing precise amounts only when needed. Manual dosing often results in overuse, making chemicals last 20-30% longer with automated control.
The systems prevent costly water chemistry problems that require complete water changes. Maintaining proper balance extends equipment life and reduces repair expenses.
Time savings average 2-3 hours weekly compared to manual testing and chemical addition. Many owners find the convenience worth the initial investment within the first year of operation.
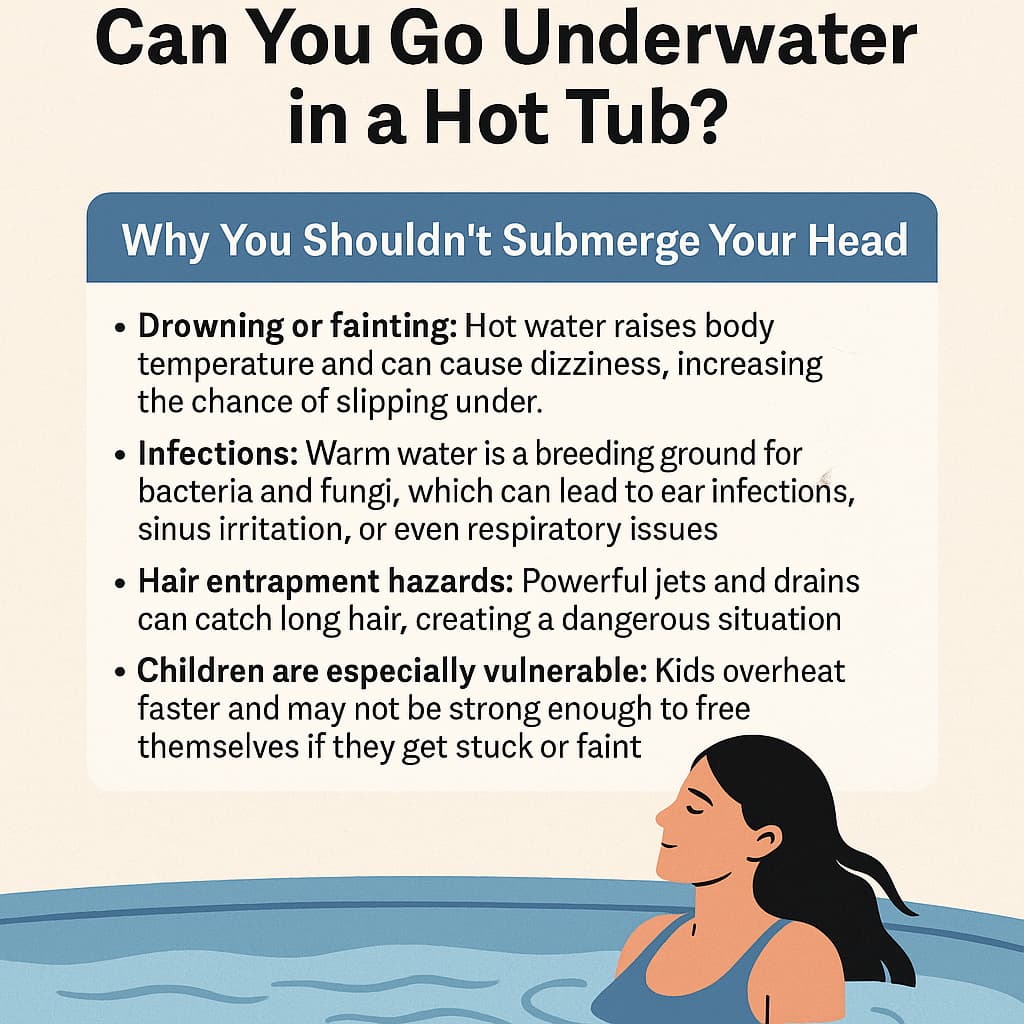
Generally, submerging your head in hot water is a bad idea—especially somewhere communal. Every hot tub owner it seems has the question: can I put my head under water? Putting your head underwater may sound harmless, but health organizations and industry professionals strongly recommend against it.
One reason is water between 102 and 104 degrees Fahrenheit breeds bacteria, a reason why hot tubs require sanitation. Thankfully, bathing your legs or torso in the water does not fully expose you to these potential bacteria.
However, your nose, eyes, ears and mouth give easy ingress to your body, meaning you are more likely to catch an illness or infection with your head underwater. There are other safety concerns as well.
Why You Shouldn’t Put Your Head Under Water:
There are valid reasons why you shouldn’t put your head underwater in a hot tub.
Drowning or losing consciousness
Since hot water heat up your body, you could get dizzy or feel faint, which is an easy way to drop under.
Brain Damage
Even in perfectly clean water, high temperatures pose a hazard to children’s brains. While children should not enter a hot tub above 95-or-so degrees anyway, those who do are at a greater risk of hindering brain development when getting their heads wet. A child’s body is more sensitive to heat and cannot regulate its temperature as effectively. The head, specifically, is vulnerable to overheating because it is a major source of heat loss.
Hair Hazards
For both adults and children, the jets in a hot tub introduce yet another danger. When you dunk your head underwater, you risk catching your hair in the jets and filters. Regardless of how shallow the spa, if your hair gets caught you might not be able to surface for air. Thus, we recommend wearing a bathing cap if you have long hair.
Warm water is a breeding ground for bacteria/fungi that could lead to ear infections, nose infections, or respiratory illnesses
Hair entrapments
Powerful jets or strong drains could entangle long hair, resulting in entrapment.
Final Thoughts…
One particularly alarming factor is that children are most at risk here: Children heat up far quicker than adults, and are also not always capable of keeping themselves safe enough to know to pull away if they are trapped or feel faint.
Thus, in accordance with the CDC, pediatricians, and hot tub safety organizations, they recommend always keeping your head above water.
A musty smell in hot tubs ruins relaxation time and signals water quality problems that need immediate attention. Most owners face this issue at some point, but the good news is that it’s completely fixable.
The key to removing musty odours is identifying the source, balancing water chemistry, and implementing proper cleaning techniques. Whether the smell comes from dirty filters, poor water circulation, or bacterial buildup, specific steps can eliminate the problem and prevent its return.
This guide walks through finding the odour source, fixing water chemistry issues, and cleaning every component thoroughly. Hot tub owners will also learn prevention strategies and troubleshooting tips to keep their spa smelling fresh year-round.
Pinpoint Where the Odour Is Coming From
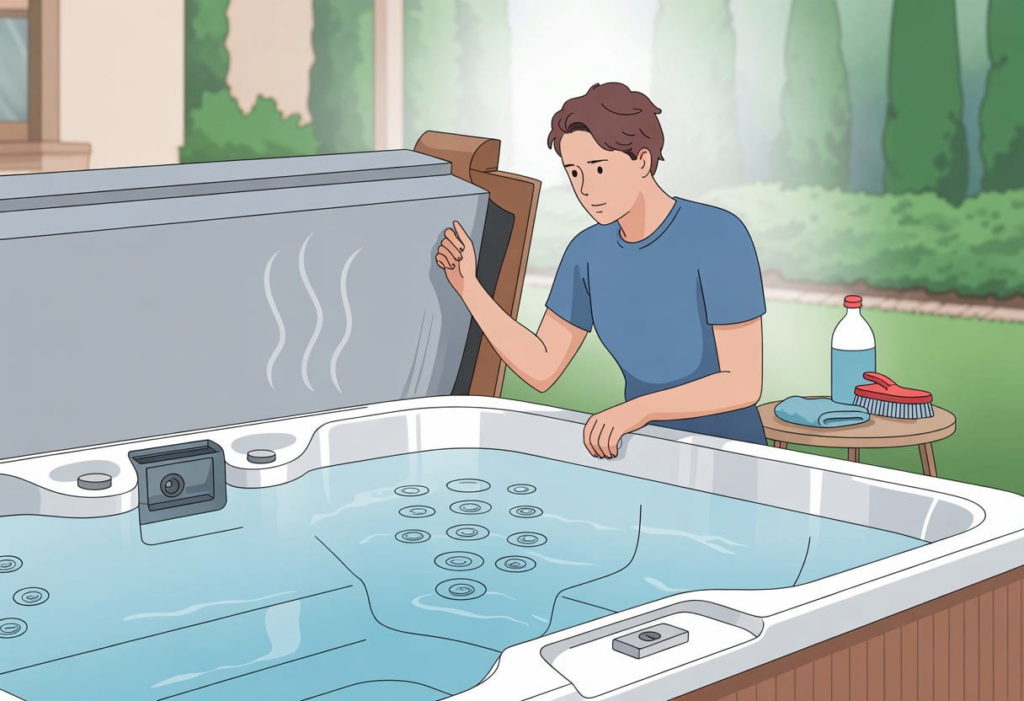
Finding the source of musty smells requires careful inspection of your hot tub. Start by lifting the cover and taking a gentle sniff near the water surface.
Chemical vs. musty odours tell different stories. Sharp chlorine scents suggest sanitizer issues. Rotten egg smells point to bacteria problems. Musty or mildew odours indicate organic buildup.
Check these key areas for visible signs of trouble:
Location
What to Look For
Cover underside
Slimy film, discolouration
Waterline
Ring of scum, oily residue
Jets
Dark spots, mineral deposits
Filter area
Clogged debris, green tinge
The cover’s underside often harbours mould and mildew. Look for dark patches or slippery surfaces that feel different from clean vinyl.
Waterline inspection reveals a lot about water quality. A visible ring around the tub shows where oils and dead skin cells collect.
Jets can trap organic matter deep inside. Remove jet covers if possible and peer into the openings with a flashlight.
Persistent musty odours typically signal biofilm development. This invisible layer of bacteria and algae coats surfaces throughout your hot tub’s plumbing system.
Temperature matters when detecting odours. Warm, humid conditions make smells stronger and easier to identify.
Take notes about which areas smell strongest. This helps target your cleaning efforts and prevents wasting time on unaffected sections.
Reinforce Water Chemistry and Sanitation Basics
Testing water chemistry weekly prevents musty odours from taking hold. pH levels between 7.2 and 7.6 create the ideal environment for sanitizers to work effectively.
Use test strips or a digital tester to check both pH and sanitizer levels. Chlorine should measure 1-3 ppm, while bromine needs 2-4 ppm for proper sanitation.
Low sanitizer levels allow bacteria to multiply quickly. These bacteria create the musty smell that plagues many hot tub owners.
High pH levels above 7.6 reduce sanitizer effectiveness by up to 80%. This dramatic drop leaves water vulnerable to bacterial growth and unpleasant odours.
Parameter
Ideal Range
pH
7.2 – 7.6
Chlorine
1 – 3 ppm
Bromine
2 – 4 ppm
Add pH decreaser if levels exceed 7.6. Increase sanitizer immediately when readings fall below recommended ranges.
After adjusting chemicals, run jets for 15-20 minutes to circulate treated water. This ensures even distribution throughout the entire system.
Retest water after two hours to confirm adjustments worked properly. Make additional changes if readings still fall outside target ranges.
Daily sanitizer checks during heavy use periods catch problems before odours develop. Summer months and frequent entertaining require extra attention to water balance.
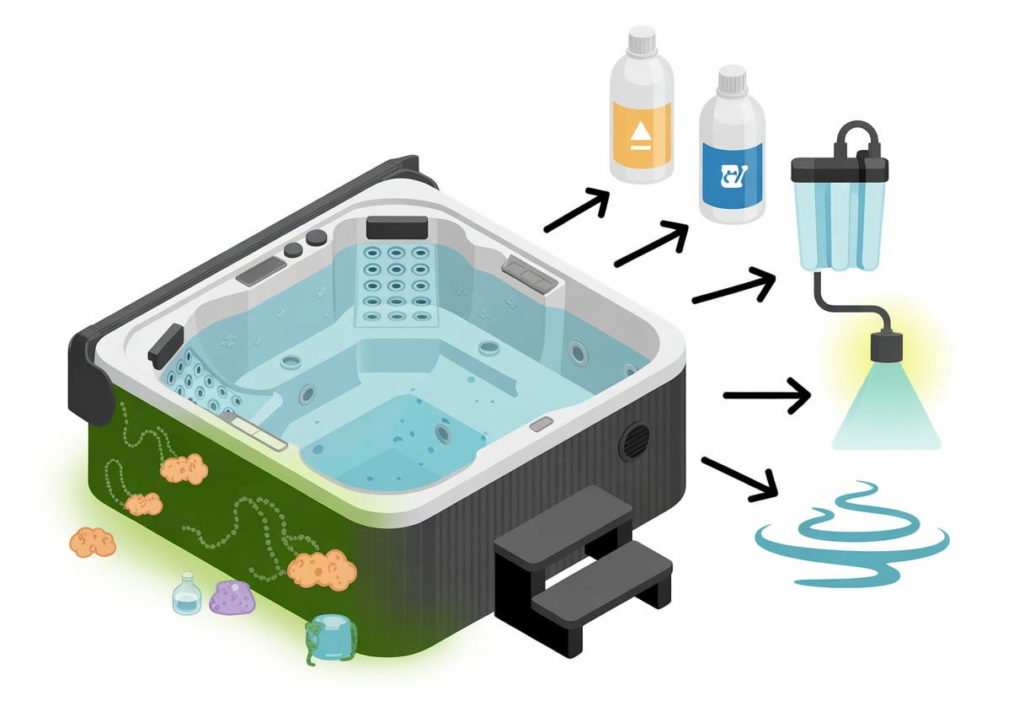
Break Down Odour Sources with Treatment
Musty smells in hot tubs come from bacteria, oils, and organic waste that build up over time. These contaminants need direct treatment to eliminate the source of bad odours.
Shock treatments work fast to break down chloramines and organic matter. Non-chlorine shock (MPS) oxidizes contaminants without adding more chlorine to the water. Chlorine shock kills bacteria and burns off oils from lotions and body products.
Apply shock treatment when the hot tub isn’t in use. Follow the package directions for your water volume. Most treatments need 15-30 minutes to work properly.
Enzyme cleaners target stubborn oils and lotions that stick to surfaces. These natural cleaners break down organic waste that regular sanitizers miss. They work slowly but clean deeply into the water system.
Spa purge products remove biofilm from pipes and jets. This slimy buildup hides bacteria and creates ongoing odour problems. Purge treatments flush out contamination from hard-to-reach areas.
Treatment Type
Best For
Application Time
Non-chlorine shock
General oxidation
15-30 minutes
Chlorine shock
Heavy contamination
30-60 minutes
Enzyme cleaner
Oil and lotion buildup
2-8 hours
Spa purge
Biofilm removal
1-2 hours
Run the jets for at least 30 minutes after any treatment. This circulates the product through all the plumbing. Test water chemistry again before the next use to ensure proper sanitizer levels.
Dive Deeper: Cleaning Filters, Surfaces, and Pipes
Hot tub filters trap dirt and oils that cause musty odours. Rinse filters weekly under cool water to remove loose debris.
Deep-clean filters monthly or when changing water. Soak them in filter cleaning solution overnight. Replace filters every 12-18 months for best results.
Surface Cleaning Steps:
Drain the hot tub completely
Mix equal parts isopropyl alcohol and demineralized water
Wipe all surfaces with a clean cloth
Clean jets and crevices thoroughly
Remove biofilm buildup around waterline
The plumbing system holds the most bacteria and biofilm. These hidden areas create strong musty smells that regular cleaning cannot reach.
Run a specialized pipe cleaner through the system during each drain and refill cycle. Spa purge products work best for this job.
Component
Frequency
Method
Filters
Weekly rinse, monthly deep-clean
Rinse + overnight soak
Surfaces
Each water change
50/50 alcohol solution
Plumbing
Each drain/refill
Spa purge product
Fill the hot tub above the jets before adding pipe cleaner. Run pumps for the recommended time on the product label. This process breaks down biofilm in hard-to-reach areas.
Drain completely after the purge cycle. Refill with fresh water and proper chemical balance.
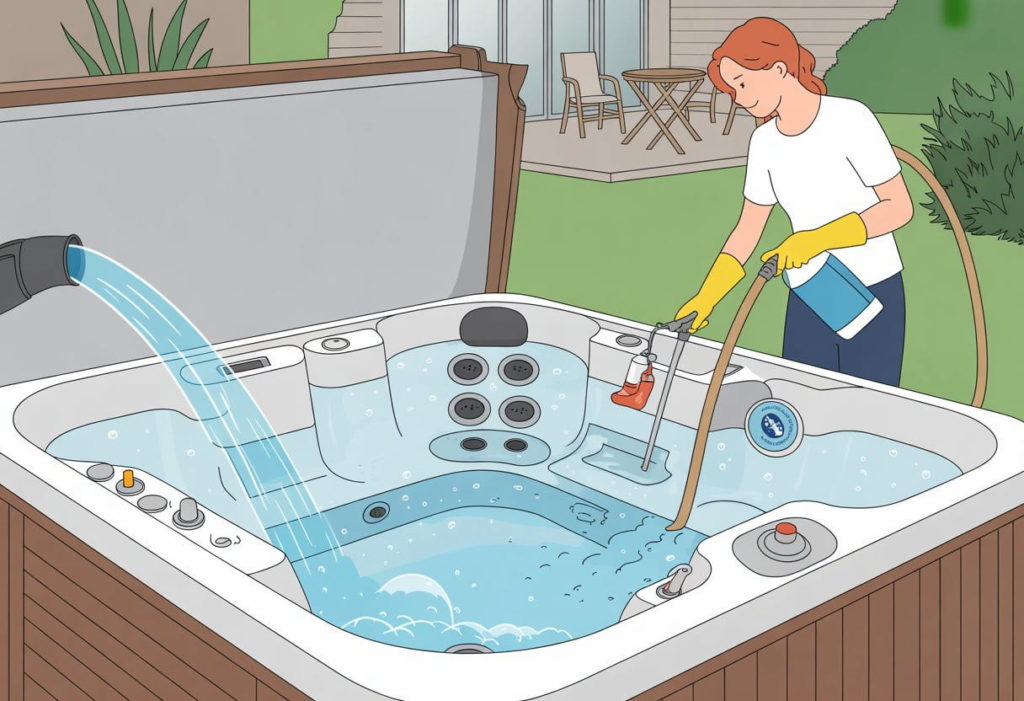
Reset Completely: Drain, Clean, and Refill
Sometimes a musty smell needs a complete fresh start. A full reset eliminates stubborn odours that surface treatments cannot fix.
Safety comes first. Turn off all power to the hot tub before draining. This protects the heating elements and pumps from damage.
Open the drain valve and let the water flow out completely. Most hot tubs take 1-2 hours to empty fully.
Clean every surface thoroughly. Use a hot tub cleaner or mild bleach solution to scrub:
Shell walls and floor
Headrests and pillows
Filter compartments
Jets and fittings
Cover underside
Pay special attention to the waterline where oils and bacteria collect. Rinse everything multiple times with fresh water.
Replace or deep clean the filters. Old filters trap contaminants that cause musty odours. Soak reusable filters in filter cleaner overnight.
Refill the hot tub with fresh water. Fill slowly to avoid air bubbles in the plumbing lines.
Balance the water chemistry immediately. Test and adjust these levels:
Chemical
Target Range
pH
7.2 – 7.6
Total Alkalinity
80 – 120 ppm
Sanitizer
Per product instructions
Add sanitizer and run the circulation system for at least 30 minutes. Apply shock treatment if the musty smell was severe.
This complete reset gives your hot tub a fresh start with clean water and balanced chemistry.
Establish a Simple Routine to Prevent Future Odours
A consistent maintenance schedule keeps musty smells from returning to your hot tub. Regular care prevents bacteria buildup and chemical imbalances that cause unpleasant odours.
Weekly Tasks
Test water chemistry levels using test strips
Add shock treatment if chlorine levels drop below 3 ppm
Rinse the filter with clean water to remove debris
Monthly Maintenance
Hot tub owners should perform deeper cleaning once per month. Remove filters and soak them in filter cleaner solution overnight.
Wipe down all surfaces above the waterline with a mild cleaner. Apply enzyme treatments or purge products to break down organic waste.
Quarterly Deep Clean
Every 3-4 months, drain the hot tub completely. Scrub the shell with non-abrasive cleaner and rinse thoroughly before refilling.
This process removes built-up chemicals and organic matter that regular treatments cannot eliminate.
Annual Filter Replacement
Replace hot tub filters every 12-18 months regardless of their appearance. Old filters lose effectiveness and harbour bacteria even after cleaning.
Mark replacement dates on your calendar to stay on track.
Water Chemistry Targets
Chemical
Ideal Range
pH
7.2 – 7.6
Alkalinity
80 – 120 ppm
Chlorine
1 – 3 ppm
Following this routine eliminates most odour problems before they start. Consistent care saves money on expensive treatments and extends your hot tub’s lifespan.
Optional Add-Ons for Further Protection
Several additional systems can boost your hot tub’s odour-fighting power. These products work alongside your regular cleaning routine.
Ozone and UV Systems provide extra sanitation without heavy chemical use. They kill bacteria and other microorganisms that cause musty smells. These systems reduce your reliance on chlorine or bromine.
UV systems use light to destroy harmful organisms. Ozone generators create ozone gas that breaks down contaminants. Both options help keep water fresh between regular treatments.
Mineral-based products like O-Care support your main sanitizer. These systems release minerals that prevent buildup on surfaces. They also help maintain balanced water chemistry.
Mineral cartridges typically last 3-4 months. They work best when combined with proper chemical balance. Many hot tub owners find these products reduce maintenance time.
Some persistent odour problems need professional help. A qualified technician can identify issues that home treatments cannot fix. They may recommend specific products for your hot tub model.
These add-ons work best as prevention tools. Install them when your hot tub smells fresh. They help maintain clean conditions rather than fix existing problems.
Quick-Look Troubleshooting Table
This table helps pinpoint common causes of musty hot tub odours. Use it to identify problems quickly before they worsen.
Some situations require expert help. Contact a hot tub technician if odours persist after multiple treatments.
Warning Signs
Green or black water indicates serious contamination. Drain the hot tub immediately and disinfect all surfaces.
Prevention Notes
Most musty smells develop from poor maintenance habits. Regular water testing prevents these problems from starting.
Frequently Asked Questions
Hot tub owners commonly face musty odours that require specific solutions based on the underlying cause. These questions address the most frequent smell-related issues and their proven remedies.
What are effective methods for eliminating a musty odour in spa water?
Shock treatment with chlorine or bromine provides the fastest solution for musty smells. Users should add 2-3 times the normal sanitizer amount and run the pump for 30 minutes.
Complete water drainage and refill eliminates persistent odours when chemical treatments fail. Fresh water removes accumulated contaminants that cause musty smells.
Filter cleaning or replacement removes trapped bacteria and debris. Dirty filters circulate contaminated water that creates ongoing odour problems.
Why does my spa water have a clear appearance but emit a foul smell?
Clear water can harbour invisible bacteria and dissolved organic compounds that produce unpleasant odours. These contaminants remain below visual detection levels while creating strong smells.
Low sanitizer levels allow bacteria growth without visible cloudiness. The bacteria produce waste products that smell musty or sour.
High pH levels above 7.6 reduce sanitizer effectiveness. This allows odour-causing microorganisms to multiply while water stays clear.
What can I add to my hot tub to improve the water’s scent?
Proper sanitizer levels between 3-5 ppm chlorine or 4-6 ppm bromine eliminate odour sources naturally. Balanced chemicals prevent smell formation rather than masking existing problems.
Enzyme products break down oils and organic matter that cause smells. These treatments work over 24-48 hours to eliminate odour sources.
Clarifying agents remove dissolved particles that contribute to musty smells. Monthly clarifier treatments keep water fresh-smelling between water changes.
What causes a hot tub to smell similar to a wet dog, and how can it be resolved?
Biofilm buildup on surfaces creates wet dog odours in hot tubs. These bacterial colonies form on jets, pipes, and shell surfaces where water circulation is limited.
Biofilm remover products dissolve these bacterial colonies effectively. Users should circulate the treatment for 2 hours before shocking with sanitizer.
Weekly jet cleaning prevents biofilm formation. Running jets on high speed for 15 minutes after each use removes organic matter before it accumulates.
Why does my hot tub have a fishy smell, and what steps should I take to address it?
Fishy odours indicate excessive organic contamination from body oils, lotions, or environmental debris. These compounds interact with sanitizers to create ammonia-like smells.
Immediate shock treatment neutralizes the organic compounds causing fishy odours. Triple the normal sanitizer dose and run circulation for one hour.
Pre-shower requirements for bathers prevent organic contamination. Removing lotions, perfumes, and body oils before soaking reduces odour formation significantly.
What should I do if my hot tub water becomes cloudy and develops an unpleasant odour?
Cloudy, smelly water requires immediate drainage and thorough cleaning. This combination indicates severe bacterial contamination that poses health risks.
System flush treatments clean internal plumbing before refilling. These products remove biofilm and bacteria from pipes where standard cleaning cannot reach.
Professional water testing identifies specific contamination sources. Local dealers can analyze water samples to prevent recurring problems with customized treatment plans.
Hot tubs bring years of relaxation and fun to your backyard, but they don’t last forever. How long do hot tubs last? Most hot tubs last between 15 to 20 years with proper care and maintenance. The actual lifespan depends on several key factors that every owner should understand.
Quality matters when it comes to longevity. Premium models with solid construction and high-grade components often outlast budget alternatives by several years. The materials used, from the shell to the pump system, play a major role in determining how long your investment will serve you.
Smart maintenance habits can add years to your hot tub’s life, while neglect can cut it short. Knowing which components wear out first and recognizing the warning signs helps owners make informed decisions about repairs versus replacement. The difference between a hot tub that lasts 10 years and one that reaches 25 often comes down to how well it’s cared for.
Hot Tub Lifespan at a Glance
Most hot tubs last between 5 to 20+ years, depending on several key factors. The wide range exists because no two installations face identical conditions.
Build quality plays the biggest role in longevity. Premium models with reinforced shells and quality components typically outlast budget options by years.
Usage frequency directly impacts lifespan. A tub used daily will show wear faster than one used occasionally.
Climate conditions affect durability significantly. Harsh winters and extreme temperature swings stress components more than moderate climates.
Maintenance habits can double or halve a hot tub’s life. Regular cleaning, proper chemical balance, and timely repairs prevent premature failure.
Lifespan Factor
Impact on Longevity
Build Quality
High-end: 15-20+ years, Budget: 5-10 years
Usage Level
Light: +3-5 years, Heavy: -2-4 years
Climate
Moderate: Standard, Harsh: -2-3 years
Maintenance
Excellent: +5-7 years, Poor: -3-5 years
The same hot tub model can last 7 years in one home and 17 in another. This variance depends on how these factors combine.
Quality installation also matters. Professional setup prevents early problems that reduce lifespan.
Hot tubs represent a significant investment. Understanding these variables helps owners maximize their tub’s working life through proper care and realistic expectations.
What Makes a Hot Tub Last Longer
Quality materials form the foundation of a durable hot tub. ABS base pans resist cracking and warping better than cheaper alternatives. Acrylic shells maintain their colour and strength for decades when properly manufactured.
Premium plumbing systems prevent costly leaks and repairs. Stainless steel components outlast plastic fittings by years. Quality pumps and heaters reduce maintenance headaches.
Smart engineering choices separate good hot tubs from great ones. Proper insulation keeps energy costs low while protecting internal components from temperature swings. Weatherproofing shields electrical systems from moisture damage.
Reinforced frames distribute weight evenly and prevent structural problems. Steel frames typically outlast wood construction in harsh Canadian winters.
Manufacturer design matters more than most buyers realize. Companies that invest in research create products that handle daily use better. Skilled craftsmanship during assembly prevents future problems.
Cabinet materials affect longevity too. Cedar and composite materials resist rot and insects better than basic wood options.
Water chemistry management extends equipment life significantly. Balanced pH levels prevent corrosion of metal components. Regular sanitization protects both users and internal systems.
Professional installation prevents many premature failures. Proper electrical connections and level placement reduce stress on components. Quality dealers provide ongoing support that keeps hot tubs running smoothly.
Regular maintenance schedules catch small problems before they become expensive repairs. Filter cleaning and water changes protect pumps and heaters from damage.
Critical Components That Age First
Hot tub parts wear out at different rates. Some components fail much sooner than others.
Heaters typically last 5 to 8 years with regular use. They work constantly to maintain water temperature. Hard water and chemical imbalances can shorten their lifespan significantly.
Pumps usually need replacement after 6 to 10 years. These motors run for hours daily to circulate water and power jets. Debris and poor maintenance cause early failure.
Control panels often malfunction within 5 to 10 years. Moisture and temperature changes damage electronic components. Circuit boards are especially vulnerable to corrosion.
Component
Typical Lifespan
Main Failure Causes
Heaters
5-8 years
Hard water, chemical damage
Pumps
6-10 years
Debris, overwork
Control panels
5-10 years
Moisture, corrosion
The shell and cabinet last much longer. These structural parts often survive 15 to 20 years or more with proper care.
One failing system affects the whole tub. A broken heater makes the hot tub unusable in winter. A dead pump stops filtration completely. A faulty control panel prevents any operation.
Smart owners replace aging components before they fail completely. This prevents damage to other parts and keeps the hot tub running smoothly.
Signs Your Hot Tub Is Nearing the End
Hot tubs show clear warning signs when they approach their final years. These indicators help owners decide between costly repairs and replacement.
Frequent mechanical breakdowns become a major red flag. When pumps, heaters, or control systems fail repeatedly, the hot tub is likely reaching its limits.
Maintenance costs start climbing rapidly. Parts become more expensive and harder to find. Labour costs increase as technicians spend more time diagnosing complex problems.
Physical damage to the shell signals serious trouble. Look for these warning signs:
Cracks in the acrylic surface
Structural sagging or warping
Persistent leaks despite repairs
Foam insulation deterioration
Plumbing issues multiply as seals and joints age. Water loss increases even after professional repairs. The circulation system struggles to maintain proper flow.
Replacement parts become scarce for older models. Manufacturers discontinue components after 10-15 years. Generic parts may not fit properly or last as long.
Energy efficiency drops significantly. Older hot tubs use more electricity to heat the same amount of water. Insulation breaks down over time, causing heat loss.
Water chemistry problems persist despite proper maintenance. Old surfaces develop buildup that affects water balance. Filtration systems lose effectiveness.
Multiple systems failing simultaneously indicates the end is near. When electrical, plumbing, and heating issues overlap, replacement becomes more economical than repair.
These signs typically appear after 15-20 years of regular use. Professional assessment helps determine if repairs are worthwhile or if replacement makes better financial sense.
Real-World Stories: What Longevity Looks Like
Hot tub owners share remarkable stories about their units’ lifespan. Many report their models running strong after 15 to 20 years of regular use.
One family in British Columbia purchased their acrylic spa in 2005. They maintained weekly water changes and annual professional service. The same hot tub still operates daily without major repairs.
Well-maintained units typically show these patterns:
Neglected hot tubs tell different stories. Owners who skipped regular maintenance faced expensive repairs within 5-7 years. Poor water chemistry caused premature equipment failure.
Some users replaced their spas early due to cosmetic issues. Others with identical problems chose repairs and extended their unit’s life by another decade.
A Toronto resident shared how professional annual maintenance saved thousands. His 18-year-old model needed only minor component replacements.
Repair vs. replacement decisions often depend on:
Age of major components
Cost of needed repairs
Owner’s attachment to current features
Forum discussions reveal that consistent care matters more than brand name. Units receiving proper attention regularly outlast expensive models with poor maintenance.
Early replacement typically occurs when owners upgrade features rather than due to equipment failure. Many working hot tubs get replaced for modern conveniences like smartphone controls or improved energy efficiency.
Maintenance Habits That Extend Life
Proper water chemistry control stands as the most important factor in extending hot tub lifespan. Balanced pH levels between 7.2 and 7.8 prevent corrosion and equipment damage.
Testing water twice weekly prevents costly repairs. Alkalinity should stay between 80-120 ppm, while sanitizer levels need daily monitoring.
Filter Maintenance Schedule:
Rinse filters weekly with garden hose
Deep clean monthly with filter cleaner
Replace every 12-18 months
Clean filters allow pumps and heaters to work efficiently. Dirty filters force equipment to work harder, reducing their lifespan significantly.
Draining the hot tub every 3-4 months removes built-up contaminants. This prevents biofilm formation and keeps water fresh.
Regular seal inspections catch problems early. Check door seals, pump connections, and pipe fittings monthly for cracks or leaks.
Winter Protection Steps:
Never let water freeze in plumbing
Keep hot tub running during cold snaps
Insulate exposed pipes
Maintain minimum 10°C temperature
Freeze damage destroys pumps, heaters, and plumbing instantly. Prevention costs far less than replacement.
Cover maintenance protects the entire system. Replace worn covers promptly to maintain heat efficiency and prevent debris entry.
Professional servicing every 6-12 months identifies potential issues before they become expensive problems. Technicians spot worn components and calibrate systems properly.
These simple habits can double or triple hot tub lifespan. Consistent care prevents most major repairs and keeps warranties valid.
Budget Tubs vs. Premium Models: Lifespan Comparison
Budget hot tubs typically last 5-7 years with regular maintenance. Premium models often reach 15-20 years or more when properly cared for.
Price Point Expectations
Entry-level tubs ($3,000-$8,000) use thinner acrylic shells and basic components. Mid-range options ($8,000-$15,000) offer better insulation and stronger pumps. Premium models ($15,000+) feature commercial-grade materials and advanced systems.
Shell Quality Impact
Cheaper tubs use thin acrylic that cracks easily under temperature changes. Premium shells use multiple layers with reinforced backing. This difference becomes obvious after 3-4 years of use.
Energy Efficiency Over Time
Budget models lose heat faster due to poor insulation. Monthly energy costs increase as seals deteriorate. Premium tubs maintain efficiency longer with superior foam insulation and tight-fitting covers.
Feature
Budget Tubs
Premium Models
Shell thickness
2-3mm
5-6mm
Insulation
Basic foam
Full-foam or thermal wrap
Pump warranty
1-2 years
3-5 years
Expected lifespan
5-7 years
15-20+ years
Initial Savings vs. Long-Term Durability
A $5,000 budget tub may seem attractive initially. However, frequent repairs and replacement costs add up quickly. Premium tubs cost more upfront but provide better value over time.
Budget tubs often need new pumps, heaters, and control systems within five years. Premium models typically require only routine maintenance for the first decade.
When Repairs Stop Making Sense
Hot tub owners face a critical decision when repair costs begin climbing. Most experts agree that spending more than 50% of your hot tub’s current value on repairs signals replacement time.
Multiple breakdowns within a single year indicate deeper problems. When your hot tub needs three or more significant repairs in 12 months, the underlying systems are likely failing.
Energy efficiency drops significantly in aging hot tubs. Older units consume 30-40% more electricity than modern models. Monthly utility bills climbing above $150 suggest your hot tub is working harder to maintain temperature.
Repair Cost
Action
Under $500
Usually worth fixing
$500-$1,500
Consider hot tub age and condition
Over $1,500
Likely time for replacement
Parts availability becomes problematic after 10-15 years. Manufacturers discontinue components for older models, making repairs expensive and time-consuming.
Structural issues like shell cracks or frame damage rarely justify repair costs. These problems typically require complete refurbishment costing $3,000-$5,000.
Safety concerns should trigger immediate replacement consideration. Faulty electrical systems, persistent chemical balance issues, or compromised filtration systems pose health risks.
Consider your hot tub’s age alongside repair frequency. Units over 10 years old requiring major component replacement often benefit from full replacement instead.
Modern hot tubs offer improved insulation, advanced filtration, and smart controls. These features provide better value than repeatedly repairing outdated systems.
How to Future-Proof Your Next Hot Tub Purchase
Smart buyers focus on three key areas when selecting a hot tub that will last decades. These decisions made today prevent costly repairs and replacements tomorrow.
Essential Construction Features
Quality hot tubs include full-foam insulation throughout the entire cabinet. This feature reduces energy costs and prevents freeze damage during harsh Canadian winters.
Steel frames provide superior structural support compared to wooden alternatives. They resist warping, rot, and pest damage that can compromise your investment.
Brand Support Matters
Choose manufacturers with established Canadian service networks. Local parts availability and trained technicians make repairs faster and more affordable.
Research brand reputation through customer reviews and industry ratings. Companies with 20+ years in business typically offer better long-term support.
Warranty Considerations
Red Flag
What to Avoid
Short structural warranty
Less than 5 years coverage
Limited parts availability
No Canadian distribution
Unclear service terms
Vague warranty language
Comprehensive warranties cover shell, plumbing, and electrical components separately. Quality brands offer 5-10 year structural warranties with clear service terms.
Energy Efficiency Planning
Look for Energy Star certified models or equivalent efficiency ratings. These units reduce operating costs significantly over 15-20 years of ownership.
Programmable controls and variable-speed pumps lower electricity consumption. These features become more valuable as energy costs increase.
Installation Considerations
Plan for professional installation on a proper foundation. Concrete pads or reinforced decking prevent structural issues that void warranties.
Final Takeaway: Quality and Care Make the Difference
Hot tub longevity depends on two key factors: initial quality and ongoing maintenance. These elements work together to determine whether your investment lasts 5 years or 25 years.
Premium materials matter from day one. High-quality shells resist cracking and fading. Quality pumps and heaters run longer between repairs.
Regular care prevents most problems before they start. Weekly water testing takes five minutes but prevents thousands in damage. Monthly filter cleaning keeps systems running smoothly.
Quality Investment
Maintenance Habit
Result
Acrylic shell
Weekly water testing
20+ year lifespan
Stainless steel heater
Monthly filter cleaning
Fewer repairs
Insulated cabinet
Annual professional service
Lower operating costs
Location choices affect durability too. Covered hot tubs last longer than exposed ones. Proper electrical connections prevent costly damage.
Smart buyers choose reputable dealers who offer service support. Local expertise means faster repairs and better advice.
The math is simple: spending more upfront often costs less over time. A $12,000 quality hot tub lasting 20 years costs $600 annually. A $6,000 budget model lasting 8 years costs $750 per year.
Good maintenance habits develop quickly. Most owners establish routines within the first month. After that, care becomes automatic.
Quality construction plus consistent care equals maximum enjoyment and value from any hot tub investment.
Frequently Asked Questions
Hot tub owners often ask about lifespan expectations, maintenance schedules, and replacement timelines. Most quality hot tubs last 15-20 years with proper care, while components like covers and pumps have shorter lifespans.
What is the typical lifespan of a hot tub?
A well-maintained hot tub typically lasts 15 to 20 years. Higher-end models with quality materials often reach the 20-year mark.
Budget models usually last 10 to 15 years with regular maintenance. The shell material and construction quality play major roles in longevity.
Regular water treatment and seasonal care can extend a hot tub’s life by several years. Poor maintenance can reduce the lifespan to 8-12 years.
How long can you expect a hot tub cover to remain in good condition?
Most hot tub covers last 3 to 5 years with regular use. Heavy snow loads and UV exposure can shorten this timeframe.
Vinyl covers typically show wear signs after 4 years. The foam core inside often breaks down before the outer material fails.
Covers in shaded areas last longer than those in direct sunlight. Proper cleaning and conditioning can extend cover life by 1-2 years.
What is the average durability of hot tub pumps?
Hot tub pumps generally last 8 to 12 years with normal use. Single-speed pumps often outlast variable-speed models.
Circulation pumps typically last longer than jet pumps because they run at lower speeds. Hard water and chemical imbalances can reduce pump life significantly.
Regular filter cleaning helps pumps last their full expected lifespan. Pump replacement becomes necessary when motors fail or seals leak consistently.
How much time does it generally take for a hot tub to heat up?
Most hot tubs heat at a rate of 1-2 degrees Celsius per hour. A typical 1,500-litre hot tub takes 6-8 hours to reach 40°C from cold.
Larger hot tubs require 12-24 hours for initial heating. Well-insulated models with efficient heaters heat faster than basic units.
Ambient temperature affects heating time significantly. Hot tubs heat slower in winter and faster during warm weather.
What are the indicators that a hot tub heater needs replacement?
Water that won’t reach set temperatures indicates heater problems. Frequent breaker trips during heating cycles suggest heater failure.
Unusual noises from the heater housing signal internal damage. Visible corrosion on heater elements means replacement is needed.
Error codes on the control panel often point to heater malfunctions. Professional testing can confirm whether repair or replacement is necessary.
Which factors contribute to the longevity of a hot tub?
Water chemistry maintenance is the most critical factor for hot tub longevity. Balanced pH and sanitiser levels prevent equipment damage.
Regular filter cleaning keeps pumps and heaters working efficiently. Monthly deep cleaning prevents buildup that shortens component life.
Quality covers reduce heating costs and protect the shell from UV damage. Professional annual inspections catch problems before they become expensive repairs.
Hot tubs offer benefits that extend far beyond simple relaxation. While most people think of them as luxury items for weekend unwinding, research shows they provide real health advantages for everything from chronic pain to sleep quality. Regular hot tub use can reduce muscle tension, improve circulation, and even boost your immune system.
More Canadians are discovering these wellness benefits during our long winters. The warm water and jets work together to ease joint stiffness and help the body recover from daily stress. From supporting better sleep patterns to creating natural pain relief, hot tubs become valuable tools for maintaining health year-round.
The social benefits matter too. Hot tubs create spaces for meaningful conversations and family time without screens or distractions. Whether you’re dealing with arthritis, looking to improve your sleep, or simply want to build stronger relationships at home, understanding these broader benefits can help you make the most of your investment.
Why More Canadians Are Investing In Hot Tubs
Canadians are purchasing hot tubs at record rates, driven by wellness trends and the recognition of their health benefits. The pandemic shifted priorities toward home-based relaxation and self-care solutions.
Rising Popularity Across The Country
Hot tub sales have surged 300% since 2020 across Canada. Ontario leads the market, followed by British Columbia and Alberta.
Canadian winters make hot tubs particularly appealing. The contrast between cold air and warm water creates a unique therapeutic experience that many homeowners crave.
Key growth factors include:
Remote work creating more time at home
Travel restrictions increasing domestic spending
Rising awareness of mental health benefits
Government incentives for home improvements
The average Canadian household now spends $8,000 to $15,000 on hot tub installations. This investment pays dividends through year-round use and property value increases.
Suburban communities see the highest adoption rates. Neighbourhoods in the Greater Toronto Area report one in four homes now features a hot tub or spa.
Lifestyle Trends In Wellness And Self-Care
Wellness culture has transformed from luxury to necessity for many Canadians. Hot tubs fit perfectly into this shift toward preventive health care.
Social media influencers showcase hot tub wellness routines. Instagram posts featuring morning soaks and evening relaxation sessions inspire followers to invest in their own units.
Popular wellness applications include:
Daily meditation sessions
Post-workout recovery soaks
Family bonding time
Stress relief after work
The concept of “hygge” has gained traction among Canadian consumers. Hot tubs provide the perfect setting for this Danish approach to cozy contentment.
Millennials drive much of this trend. They prioritize experiences over material possessions, viewing hot tubs as investments in their quality of life rather than simple purchases.
Hot Tubs As Everyday Health Tools
Medical professionals increasingly recommend hot tubs for specific health conditions. Warm water therapy helps manage arthritis, chronic pain, and sleep disorders.
Documented health benefits include:
Improved circulation
Reduced muscle tension
Better sleep quality
Lower blood pressure
Enhanced mood
Physiotherapists often suggest hot tub sessions for injury recovery. The buoyancy reduces joint stress while heat promotes healing.
Canadian healthcare costs continue rising. Many families view hot tubs as proactive health investments that may reduce future medical expenses.
Regular hot tub use can replace costly spa treatments. A typical massage costs $100, while home hot tub sessions cost pennies per use over time.
Sports medicine clinics report patients with home hot tubs recover faster from injuries. The convenience of immediate access to hydrotherapy accelerates healing processes.
Relief Where It Hurts: Muscles, Joints, And Chronic Pain
Hot water therapy targets specific pain points through heat, buoyancy, and targeted massage. These elements work together to reduce inflammation and ease discomfort in problem areas.
Tension Release From Massage Jets And Buoyancy
Hot tub jets deliver targeted pressure to tight muscle groups. The pulsating water streams help break up knots and trigger points that cause daily discomfort.
Buoyancy reduces body weight by up to 90%. This weightlessness takes pressure off joints and allows muscles to relax completely. People with mobility issues find movement becomes easier in water.
The combination creates a powerful effect:
Jets massage specific areas
Warm water increases blood flow
Buoyancy supports the body’s weight
Muscles can release tension naturally
Regular sessions help prevent muscle soreness from building up. Athletes use this method to recover faster between training sessions.
Pain Relief For Arthritis, Lower Back Pain, And Fibromyalgia
Arthritis patients experience significant relief in hot water. The heat reduces joint stiffness while buoyancy allows gentle movement without weight-bearing stress.
Lower back pain responds well to targeted jet therapy. The warm water relaxes supporting muscles while jets work on specific pressure points. Many people find their range of motion improves after consistent use.
Fibromyalgia symptoms often decrease with regular hydrotherapy. The gentle heat helps reduce widespread pain signals. Patients report better sleep and reduced morning stiffness.
Temperature recommendations by condition:
Arthritis: 36-38°C
Lower back pain: 37-39°C
Fibromyalgia: 35-37°C
Sessions lasting 15-20 minutes provide optimal benefits without overheating.
Expert-Backed Hydrotherapy Benefits
Research shows hydrotherapy reduces chronic pain by 25-30% in regular users. The Arthritis Foundation recommends warm water therapy as part of comprehensive treatment plans.
Physical therapists use similar techniques in clinical settings. Home hot tubs provide convenient access to these same therapeutic benefits.
Key physiological changes include:
Increased circulation
Reduced muscle tension
Lower stress hormone levels
Improved joint mobility
Medical professionals note that consistent use produces better results than occasional sessions. Daily 20-minute soaks show measurable improvements in pain scores within two weeks.
The therapy works best when combined with gentle stretching exercises in the water. This approach maximizes pain relief while building strength safely.
A Natural Way To Unwind And Destress
Hot tubs create a calming space where the body naturally releases tension and the mind finds peace. The warm water triggers physical changes that lower stress hormones while promoting feel-good chemicals in the brain.
Physiological Effects: Reduced Cortisol And Endorphin Release
The warm water in a hot tub directly affects the body’s stress response system. When someone soaks in temperatures between 37°C and 40°C, their cortisol levels drop within 15 to 20 minutes.
Cortisol is the main stress hormone that makes people feel anxious and tired. High cortisol levels can cause headaches, muscle tension, and trouble sleeping.
Hot tub sessions trigger the release of endorphins. These natural chemicals act like the body’s own pain relievers. Endorphins create feelings of happiness and relaxation.
The heat also increases blood flow to muscles. This improved circulation helps remove waste products that build up from daily stress. Better blood flow delivers more oxygen to tired muscles.
Key physiological benefits include:
Lower cortisol levels within 20 minutes
Increased endorphin production
Improved blood circulation
Reduced muscle tension
Better oxygen delivery to tissues
Warm Water Immersion For Anxiety And Mental Fatigue
Warm water immersion helps calm an overactive mind. The gentle pressure of water against the body activates the parasympathetic nervous system. This system controls the body’s rest and digest response.
Mental fatigue often comes from constant decision-making and information processing. The quiet environment of a hot tub provides a break from these mental demands.
The warmth helps regulate breathing patterns. Slower, deeper breathing sends signals to the brain that it’s safe to relax. This breathing change reduces anxiety symptoms like rapid heartbeat and racing thoughts.
Hot tub sessions can improve mental clarity by giving the brain time to process information. Many people find that solutions to problems come more easily after a relaxing soak.
The buoyancy of water reduces physical strain on joints and muscles. This weightless feeling helps people focus on relaxation instead of physical discomfort.
End-Of-Day Wind-Down Ritual
Creating a regular hot tub routine signals to the body that it’s time to transition from work mode to rest mode. This ritual helps establish healthy boundaries between daily stress and personal time.
The timing of hot tub use affects its stress-relieving benefits. Soaking 1-2 hours before bedtime allows body temperature to cool down gradually. This cooling process promotes better sleep quality.
A 15-20 minute session provides optimal stress relief without overheating. Longer sessions may actually increase stress on the cardiovascular system.
Adding simple elements enhances the wind-down experience:
Dim lighting or candles
Gentle music or nature sounds
Aromatherapy with lavender or eucalyptus
Disconnecting from phones and screens
The ritual becomes more effective when practised consistently. Regular users often report feeling calmer throughout the day, knowing they have dedicated relaxation time scheduled.
The Sleep Connection: How Soaking Before Bed Can Reset Your Nights
Hot tub soaking triggers specific physiological changes that directly impact sleep quality. The temperature shift from warm water to cool air mimics natural sleep signals, while the timing of your soak determines its effectiveness.
Body Temperature Regulation And Improved Sleep Onset
The human body naturally drops its core temperature by 1-2 degrees Celsius to initiate sleep. Hot tub soaking accelerates this process through thermoregulation. When someone exits warm water, their body temperature drops rapidly as blood vessels dilate and heat dissipates.
This temperature decline signals the brain to release melatonin. Research shows people experience improved sleep quality after hydrotherapy sessions lasting 15-20 minutes in water heated to 40-42°C.
Studies using the Pittsburgh Sleep Quality Index demonstrate significant improvements in sleep onset time. Participants fell asleep 36% faster after regular evening soaking sessions. The warm water also increases blood flow to extremities, which helps cool the body’s core temperature more efficiently.
People with insomnia particularly benefit from this temperature regulation. The consistent routine helps establish circadian rhythm patterns that promote natural sleep cycles.
Optimal Timing: 60–90 Minutes Before Bed
The timing of hot tub sessions directly affects sleep benefits. Soaking 60-90 minutes before bedtime allows sufficient time for body temperature regulation. This window provides optimal cooling time without disrupting natural sleep patterns.
Soaking too close to bedtime can elevate core temperature and delay sleep onset. The body needs time to cool down and trigger natural drowsiness responses. People who soak within 30 minutes of bedtime often experience difficulty falling asleep.
Recommended Timeline:
90 minutes before bed: Ideal for maximum temperature regulation
60 minutes before bed: Minimum effective timeframe
30 minutes before bed: Too close, may disrupt sleep
Water temperature should remain between 37-40°C during evening sessions. Higher temperatures can overstimulate the nervous system and counteract sleep benefits.
Routine Example For Better Rest
A consistent pre-sleep routine maximizes hot tub benefits for better sleep. Begin soaking 75 minutes before intended bedtime in 38°C water. Limit sessions to 15-20 minutes to prevent overheating.
After exiting the hot tub, shower with lukewarm water to remove chemicals and gradually cool body temperature. Put on comfortable sleepwear and engage in quiet activities like reading or gentle stretching.
Sample Evening Routine:
9:00 PM: Enter hot tub
9:20 PM: Exit and shower
9:30 PM: Light reading or meditation
10:15 PM: Bedtime
Dim lighting during and after soaking supports melatonin production. Avoid screens and stimulating activities that can interfere with the relaxation response. This routine helps establish consistent sleep-wake cycles that improve overall sleep quality over time.
Cardio Without The Workout: Boost Circulation And Heart Health
Hot tub use naturally increases heart rate and widens blood vessels, creating cardiovascular benefits without physical exercise. Research shows these passive improvements can enhance vascular function and support heart health for people with mobility limitations or blood pressure concerns.
Mild Increases In Heart Rate And Blood Vessel Dilation
Warm water immersion raises the heart rate by 10-15 beats per minute. This gentle increase happens because the body works to regulate temperature. The heart pumps more blood to distribute heat throughout the body.
Heat causes blood vessels to dilate, which improves circulation. Wider vessels allow blood to flow more easily. This process reduces the workload on the heart while maintaining proper blood flow.
The cardiovascular system responds to hot tub heat similarly to light exercise. Blood moves more efficiently through dilated vessels. This improved circulation delivers oxygen and nutrients to tissues more effectively.
Research demonstrates measurable cardiovascular benefits from regular hot tub use. A 2016 study found that passive heat therapy improved vascular function in people with limited mobility.
Japanese research showed daily hot baths reduced cardiovascular disease risk by 28%. Participants who used hot water immersion 5-7 times weekly had better cardiovascular health outcomes. The study followed over 60,000 adults for 20 years.
Studies on passive heat therapy show improved endothelial function. The endothelium lines blood vessels and helps regulate circulation. Better endothelial function means healthier blood vessels and improved cardiovascular function.
Researchers found that regular heat exposure increased nitric oxide production. This molecule helps blood vessels relax and improves circulation. The cardiovascular benefits lasted beyond the hot tub session.
Benefits For Limited Mobility Or High Blood Pressure
Hot tubs provide cardiovascular exercise for people who cannot perform traditional workouts. Those with arthritis, joint pain, or mobility issues can still boost circulation safely.
The hydrostatic pressure of water helps blood return to the heart. This pressure acts like compression therapy for the legs. It reduces swelling and improves circulation without physical strain.
People with high blood pressure may benefit from regular hot tub use. The heat helps blood vessels relax, which can lower blood pressure. However, individuals should consult their doctor before starting any heat therapy routine.
Circulation improvements include:
Better blood flow to hands and feet
Reduced swelling in lower limbs
Enhanced metabolism through increased circulation
Improved vascular health over time
The warm water environment allows gentle movement that further supports cardiovascular health. Even simple stretching in a hot tub can enhance the circulation benefits.
From Aches To Immunity: Reducing Inflammation From The Inside Out
Heat therapy through hot water immersion triggers powerful anti-inflammatory responses that strengthen immune function. The combination of warm water and hydrostatic pressure creates measurable changes in blood flow and cellular repair processes.
Heat And Hydrostatic Pressure Reduce Inflammation
Hot tub sessions activate heat shock proteins that protect cells from damage and reduce inflammatory markers throughout the body. Water temperatures between 38-40°C stimulate these protective mechanisms within 15-20 minutes of immersion.
Hydrostatic pressure from the water compresses tissues and improves lymphatic drainage. This gentle compression helps remove waste products that contribute to inflammation and joint stiffness.
Key inflammatory benefits include:
Reduced C-reactive protein levels
Lower interleukin-6 production
Decreased muscle soreness after exercise
Improved recovery time from injuries
Regular heat therapy sessions can improve glucose tolerance by enhancing insulin sensitivity in muscle tissues. This metabolic improvement supports weight management efforts and reduces inflammation associated with type 2 diabetes.
Immune Response And Improved Circulation
Hot water immersion increases core body temperature, which mimics a mild fever response. This controlled thermal stress strengthens immune cell production and enhances the body’s natural defence mechanisms.
Blood circulation improves dramatically during hot tub use. Vessels dilate, allowing immune cells to travel more efficiently throughout the body. Enhanced circulation also supports the detoxification process by improving kidney and liver function.
White blood cell count increases temporarily after heat therapy sessions. These immune cells become more active and effective at identifying threats. The improved circulation helps deliver these protective cells to areas that need repair.
Circulation improvements include:
Increased blood flow to extremities
Better oxygen delivery to tissues
Enhanced nutrient transport
Faster removal of metabolic waste
Benefits For Autoimmune Conditions
People with autoimmune conditions often experience reduced symptoms through regular hot tub use. The heat helps modulate overactive immune responses while reducing joint inflammation and stiffness.
Rheumatoid arthritis patients report significant pain reduction after consistent heat therapy sessions. The warm water environment allows for gentle movement and stretching that wouldn’t be possible on land.
Fibromyalgia symptoms improve through the combination of heat, buoyancy, and pressure. The multi-sensory experience helps interrupt pain signals while promoting muscle relaxation.
Autoimmune benefits observed:
Decreased morning stiffness
Reduced medication dependence
Better sleep quality
Improved daily function
Type 2 diabetes management becomes easier with regular heat therapy. The improved insulin sensitivity and glucose tolerance help stabilize blood sugar levels naturally.
Breath Easy: Support For Respiratory Function
Hot tub steam and warm air create conditions that may help with breathing difficulties and sinus congestion. The moist heat can provide temporary relief for certain respiratory symptoms.
Steam Benefits For Sinuses, Lungs, And Breathing
Hot tub steam works similarly to a humidifier for the respiratory system. The warm, moist air helps thin mucus in the nasal passages and sinuses.
This thinning effect makes it easier to clear congestion naturally. Many people find their sinuses feel less blocked after spending time in a hot tub.
The steam also helps moisturize dry nasal passages. Cold winter air often dries out these sensitive areas, causing discomfort.
Benefits for breathing include:
Reduced nasal congestion
Easier mucus drainage
Moisturized airways
Temporary relief from stuffiness
The warm, humid environment may help people with seasonal allergies or dry air issues. However, those with serious respiratory conditions should consult their doctor before using hot tubs regularly.
Warm Air And Relaxation For Mild Respiratory Issues
The combination of warm air and relaxation can benefit people with minor breathing difficulties. Stress often makes respiratory symptoms worse, so hot tub relaxation may provide dual benefits.
Warm air feels gentler on sensitive airways than cold air. This can be especially helpful during Canadian winters when outdoor air is harsh and dry.
The relaxation response triggered by hot tub use may help reduce stress-related breathing issues. When people feel more relaxed, their breathing often becomes deeper and more regular.
Mild respiratory issues that may benefit:
Seasonal stuffiness
Dry throat from indoor heating
Stress-related shallow breathing
Minor seasonal allergies
The heat also increases blood flow throughout the body, including to respiratory tissues. This improved circulation may support natural healing processes.
Tip: Safe Water Chemistry For Safe Steam
Proper water chemistry is essential for safe steam inhalation. Poor water quality can create harmful vapours that irritate the respiratory system instead of helping it.
Key chemical levels to maintain:
pH: 7.2-7.8
Chlorine: 1-3 ppm
Total alkalinity: 80-120 ppm
Test water chemistry twice weekly using reliable test strips or a digital tester. Unbalanced water can harbour bacteria that becomes airborne with the steam.
Clean filters regularly to prevent contaminants from entering the water. Dirty filters allow particles and bacteria to circulate, creating poor air quality above the water surface.
Replace water every 3-4 months or as recommended by the manufacturer. Fresh water with proper chemical balance creates the safest steam for respiratory benefits.
More Than Me-Time: Social And Relationship Perks
Hot tubs transform outdoor spaces into gathering spots where real conversations happen naturally. The warm water creates a relaxed atmosphere that brings people together without distractions.
Hot Tubs As Modern-Day Campfires
Hot tubs serve the same social function that campfires provided for generations. People naturally gather around warm, inviting spaces to share stories and connect.
The circular seating arrangement encourages face-to-face conversation. Everyone sits at the same level, creating equality among participants. This setup breaks down social barriers that might exist in formal settings.
Key social benefits include:
Natural conversation starters about the warmth and bubbles
Shared sensory experience that creates common ground
Relaxed atmosphere that reduces social anxiety
Intimate setting that encourages deeper discussions
The warm water releases endorphins that improve mood. Happy people communicate more openly and form stronger bonds. Regular hot tub gatherings often become cherished traditions among friend groups.
Unlike campfires, hot tubs work year-round in Canadian weather. Winter soaks create particularly memorable experiences as steam rises into cold air.
Family Time, Romantic Escapes, And Friends’ Nights In
Families discover hot tubs provide screen-free time together. Children often share more about their day while relaxing in warm water. Parents find these moments create lasting memories.
Popular family activities include:
Evening talks about school and friends
Weekend morning soaks with hot chocolate
Teaching children about responsibility through hot tub maintenance
Celebrating special occasions together
Couples use hot tubs to reconnect after busy days. The private setting allows for intimate conversations without household distractions. Many couples establish regular hot tub dates as relationship rituals.
Friend groups turn hot tub nights into social events. The space naturally limits group size, creating more meaningful interactions than large parties. These gatherings often become weekly traditions.
The warm environment encourages people to stay longer than typical social visits. Extended time together strengthens relationships naturally.
Screen-Free Bonding Opportunities
Hot tubs create natural phone-free zones. The combination of water and electronics doesn’t mix, forcing people to engage with each other directly. This digital detox benefits all relationships.
Without screens competing for attention, conversations flow more naturally. People make eye contact and practice active listening skills. These face-to-face interactions build stronger emotional connections.
Benefits of unplugged socializing:
Improved communication skills
Better conflict resolution abilities
Stronger emotional bonds
Enhanced empathy development
Children learn valuable social skills during hot tub time. They practice reading facial expressions and body language. These skills transfer to school and future relationships.
Adults rediscover the art of conversation without digital interruptions. Many report feeling more connected to family and friends after regular hot tub sessions.
The relaxed environment makes difficult conversations easier. Families often use hot tub time to discuss important topics that might feel too formal in other settings.
A Smarter Wellness Routine Starts At Home
Building a consistent wellness routine becomes easier when you schedule regular hot tub sessions throughout your week. Post-workout soaks help muscles recover faster, while evening sessions melt away daily stress.
Integrating Hot Tub Sessions Into Weekly Schedules
Most people find success with three to four hot tub sessions per week. Monday and Wednesday evenings work well for mid-week stress relief. Weekend mornings offer a peaceful start to slower days.
Schedule 20-minute sessions for the best results. Longer soaks can dehydrate your body or make you feel drowsy.
Weekly Schedule Example:
Monday: 7:00 PM stress relief soak
Wednesday: 8:00 PM muscle recovery session
Friday: 6:30 PM week-end wind-down
Sunday: 10:00 AM morning relaxation
Set phone reminders for your scheduled times. Treat these sessions like important appointments. Your body will start to expect and crave these regular wellness breaks.
Keep a towel and water bottle nearby before each session. This preparation makes it easier to stick to your routine.
Tips For Post-Workout Soaks And Stress Relief
Wait 30 minutes after intense exercise before entering your hot tub. This cooling period prevents your body temperature from rising too quickly. The warm water then helps tight muscles relax and recover.
Post-Workout Benefits:
Reduces muscle soreness by 25-30%
Improves blood flow to tired muscles
Speeds up recovery time between workouts
For stress relief, focus on deep breathing during your soak. Inhale for four counts, hold for four, then exhale for six counts. This technique activates your body’s relaxation response.
Evening sessions work best for stress management. The warm water naturally lowers your heart rate and blood pressure. Your body temperature drops after you exit, which signals your brain to prepare for sleep.
Layering Aromatherapy, Lighting, And Playlists
Aromatherapy transforms ordinary hot tub sessions into spa-like experiences. Add a few drops of essential oils to cotton balls and place them near your hot tub. Lavender calms your mind, while eucalyptus clears your sinuses.
Popular Aromatherapy Combinations:
Lavender + chamomile for evening relaxation
Peppermint + eucalyptus for morning energy
Citrus oils for mood-boosting afternoon soaks
Dim lighting creates the perfect atmosphere for relaxation. String lights around your hot tub area or use battery-powered lanterns. Avoid bright overhead lights that strain your eyes.
Soft background music completes the sensory experience. Nature sounds like rain or ocean waves work well for stress relief. Instrumental music helps your mind unwind without distracting lyrics.
Create different playlists for morning and evening sessions. Upbeat acoustic songs energise morning soaks. Slower, ambient tracks help evening wind-down routines.
Health Gains Without Health Risks: Safe Soaking Tips
Smart hot tub use requires attention to water temperature, timing, and proper hydration practices. Certain health conditions need medical consultation before beginning regular soaking routines.
Time And Temperature Guidelines
Water temperature should stay between 37°C and 40°C for most adults. Higher temperatures can cause overheating and skin irritation.
Sessions should last 15-20 minutes maximum. Longer soaking times increase risks of dehydration and heat exhaustion.
People new to hot tub use should start with shorter sessions of 10-15 minutes. Bodies need time to adjust to heat exposure.
Temperature Safety Guidelines:
37°C-38°C: Beginner-friendly range
38°C-39°C: Standard comfort zone
39°C-40°C: Maximum safe temperature
Exit the water immediately if dizziness or nausea occurs. These symptoms signal overheating.
Hydration, Avoiding Alcohol, And Maintenance
Drink water before, during, and after hot tub sessions. Heat exposure increases fluid loss through sweating.
Alcohol consumption during soaking creates dangerous dehydration risks. It also impairs judgment about safe soaking times.
Clean, balanced water prevents skin irritation and infections. Test chemical levels twice weekly using proper test strips.
Essential Maintenance Tasks:
Filter cleaning every 2-3 weeks
pH levels between 7.2-7.8
Chlorine levels at 1-3 ppm
Total alkalinity 80-120 ppm
Replace water every 3-4 months depending on usage frequency. Dirty water harbours bacteria that cause skin problems.
Who Should Consult A Doctor First
Pregnant women need medical approval before hot tub use. High temperatures can affect fetal development.
People with heart conditions should discuss safe temperature limits with their doctor. Heat affects blood pressure and circulation.
Those taking medications that affect body temperature regulation require medical guidance. Some pharmacological treatments increase heat sensitivity.
Conditions requiring medical consultation:
Diabetes
High or low blood pressure
Circulatory disorders
Skin conditions like eczema
Children under 5 years need constant supervision and shorter exposure times. Their bodies regulate temperature differently than adults.
Small Investment, Big Lifestyle Shift
A hot tub purchase transforms daily routines into wellness rituals while delivering measurable health benefits. The year-round enjoyment and therapeutic value create lasting lifestyle improvements that extend far beyond the initial investment.
Recap Of Physical, Emotional, And Restorative Benefits
Hot tubs deliver proven physical relief through targeted hydrotherapy. The warm water increases blood circulation by up to 40%. This improved flow reduces muscle tension and joint stiffness.
Buoyancy reduces body weight by 90%. This relief allows damaged tissues to heal faster. People with arthritis experience significant pain reduction during regular soaking sessions.
The emotional benefits are equally substantial. Warm water triggers endorphin release naturally. These feel-good chemicals reduce stress hormones like cortisol.
Sleep quality improves dramatically for regular users. The temperature drop after soaking signals the body to prepare for rest. Most people fall asleep 15-20 minutes faster.
Mental clarity increases when stress levels drop. The quiet environment promotes meditation and reflection. Daily worries fade during peaceful soaking sessions.
Elevating Everyday Life Year-Round
Winter transforms from a season to endure into months of outdoor enjoyment. Canadians soak comfortably in -20°C temperatures. The contrast between cold air and warm water creates an invigorating experience.
Summer entertaining reaches new heights with backyard hot tub gatherings. Friends and family naturally gravitate toward the relaxing environment. Evening soaks become cherished social rituals.
Morning routines gain therapeutic value when they include brief hot tub sessions. The heat loosens stiff muscles before work begins. Energy levels stay higher throughout busy days.
Weekend recovery becomes effortless. Athletes use hot tubs to reduce muscle soreness after intense training. The improved circulation speeds healing and prevents injury.
Home value increases with professional hot tub installation. Quality spas add $3,000-$8,000 to property values. The investment pays dividends during resale.
Call To Action: Visit Showroom Or Book Consultation
Canadian Home Leisure’s Whitby showroom features 15+ premium hot tub models. Customers test different seating configurations and jet placements. Expert staff explain maintenance requirements and energy costs.
Free consultations include site assessment and delivery planning. Certified technicians evaluate electrical requirements and access routes. They provide accurate installation timelines and cost estimates.
Financing options make premium spas accessible immediately. Monthly payments start at $89 for qualified buyers. Extended warranties protect investments for up to 10 years.
The design team creates custom outdoor spaces around new hot tubs. They coordinate lighting, decking, and privacy features. Complete backyard transformations happen in single visits.
Current promotions include free delivery and setup within 50 kilometres. Spring installation specials save customers up to $2,000. Limited-time offers end when inventory levels drop.
Frequently Asked Questions
Hot tub users often ask similar questions about health benefits, safety concerns, and how soaking compares to other wellness activities. These common questions help people make informed decisions about incorporating hot tub use into their daily routines.
What are the potential health advantages of using a hot tub regularly?
Regular hot tub use can improve circulation by dilating blood vessels and increasing blood flow throughout the body. The warm water helps reduce muscle tension and joint stiffness, which may provide relief for people with arthritis or chronic pain conditions.
Hot tubs can also promote better sleep quality. The drop in body temperature after leaving the warm water signals the body to prepare for rest.
Many users experience reduced stress levels during soaking sessions. The combination of warm water, buoyancy, and quiet time can lower cortisol levels and promote relaxation.
How does soaking in a hot tub benefit post-exercise recovery?
Heat therapy from hot tubs increases blood flow to muscles, which helps deliver oxygen and nutrients needed for repair. This improved circulation can speed up the removal of metabolic waste products like lactic acid.
The buoyancy of water reduces pressure on joints and muscles. This weightless environment allows tight muscles to relax more easily than on dry land.
Hot tub sessions within 24 hours after exercise may reduce muscle soreness. The heat helps prevent muscles from becoming overly stiff after intense physical activity.
Can regular use of a hot tub lead to skin improvements?
Warm water opens pores and increases perspiration, which can help remove dead skin cells and impurities. This natural exfoliation process may leave skin feeling smoother.
The increased blood circulation from heat exposure brings more nutrients to skin cells. Better circulation can contribute to a healthier complexion over time.
However, hot water can also strip natural oils from skin. Users should limit session times and moisturize afterward to prevent dryness or irritation.
Is it safe to use a hot tub frequently, and what are the potential risks?
Most healthy adults can safely use hot tubs several times per week when following proper guidelines. Sessions should typically last 15-20 minutes to avoid overheating.
Pregnant women, people with heart conditions, and those taking certain medications should consult healthcare providers before regular use. Hot tubs can affect blood pressure and body temperature regulation.
Poor water maintenance creates risks for bacterial infections. Users must maintain proper chemical balance and filtration to prevent health issues.
Dehydration is a common concern with frequent use. The combination of heat and sweating can lead to fluid loss if users don’t drink enough water.
How might hot tubs contribute to weight loss efforts?
Hot tub use burns calories through the body’s effort to regulate temperature in warm water. A 30-minute session may burn 100-150 calories, similar to a brisk walk.
The heat can temporarily increase heart rate and metabolic activity. This mild cardiovascular effect provides some fitness benefits without intense exercise.
Hot tubs may support weight loss indirectly by improving sleep quality and reducing stress. Better sleep and lower stress levels help regulate hormones that affect appetite and metabolism.
However, hot tub use alone won’t produce significant weight loss. It works best as part of a comprehensive plan including proper diet and regular exercise.
What are the differences between the benefits of using a jacuzzi and a sauna?
Jacuzzis use warm water immersion while saunas rely on dry heat exposure. Water provides buoyancy that reduces joint pressure, which saunas cannot offer.
Saunas typically reach higher temperatures than hot tubs, often between 70-100°C compared to 37-40°C for jacuzzis. This intense heat may produce more dramatic sweating and detoxification effects.
The social aspect differs between the two options. Jacuzzis allow for easier conversation and longer sessions, while saunas often involve shorter, more solitary experiences.
Both provide cardiovascular benefits and stress relief. The choice often depends on personal preference for wet versus dry heat therapy.