Wednesday, January 7, 2026

Hot Tub Leak Repair Tips for Fast, Permanent Fixes

A leaking hot tub doesn’t have to mean expensive service calls or weeks of downtime; you can often locate and fix the problem yourself with a clear method and the right tools. Start by watching how and where water escapes, isolate the likely systems (plumbing, shell, fittings), and test each area systematically to find the leak quickly.

hot tub leak repair hot tub leaking from bottom how to fix a hot tub leak how to find leak in hot tub hot tub losing water

This guide walks you through spotting symptoms, common causes, prepping the tub, step‑by‑step plumbing and shell repairs, testing the fix, and simple prevention so your spa stays watertight. Follow the practical steps here and you’ll restore your hot tub’s performance without guesswork or unnecessary costs.

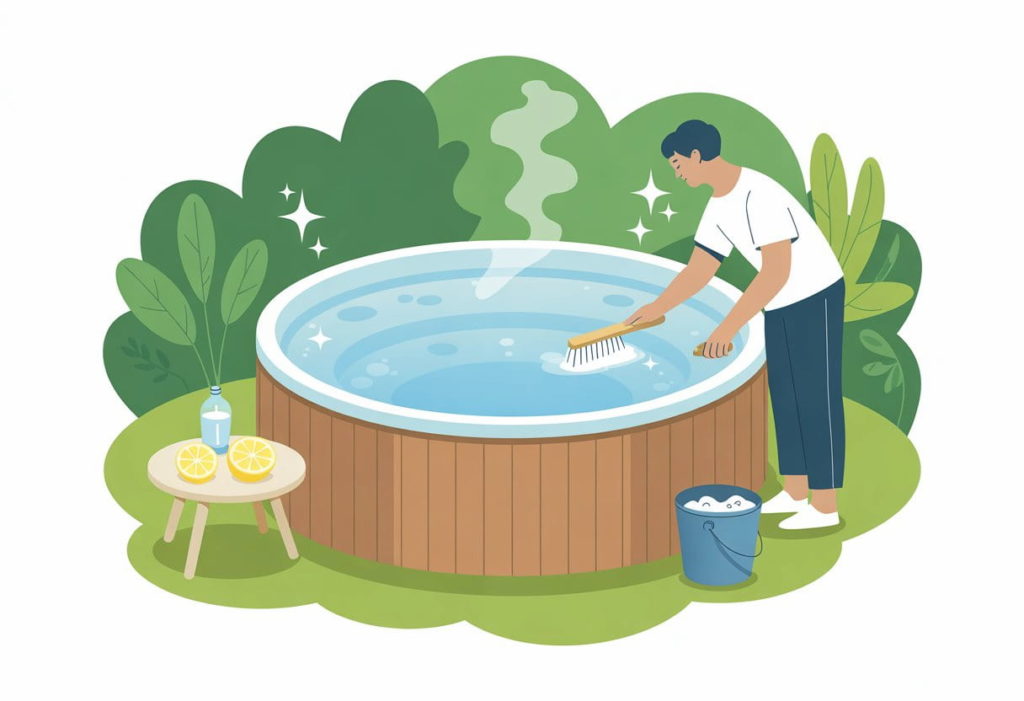
Identifying Hot Tub Leaks

hot tub leak repair hot tub leaking from bottom how to fix a hot tub leak how to find leak in hot tub hot tub losing water

You can spot most hot tub leaks by watching water loss patterns, checking visible plumbing, and listening for unusual sounds. Prioritize where water appears, how fast it drops, and whether the pump runs dry or loses prime.

Common Signs of a leak

Look for consistent water level drops beyond normal evaporation — more than 1–2 inches per week indicates a leak. Puddles or damp soil around one side of the tub point to a localized leak in nearby fittings or equipment.

Air in the circulation system, gurgling from jets, or loss
of heater/pump prime suggests an internal plumbing leak or a cracked manifold.
White calcium streaks or mineral deposits on fittings often mark slow leaks.
Also watch for higher electrical bills; the system may run longer to maintain
temperature when it loses water.


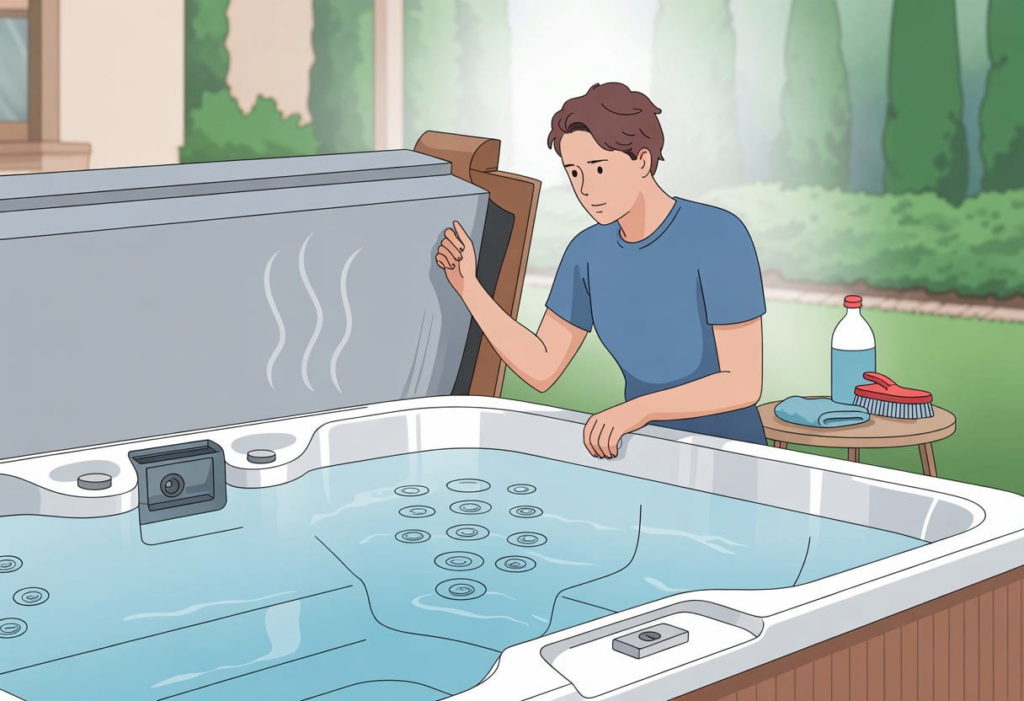
Visually inspect the cabinet and skirt for swelling, rot, or
damp insulation. These signs often mean the leak has been present long enough
to damage the shell or frame.

tools for leak detection

Use a garden hose and bucket for simple tests: isolate sections of plumbing and run water to see where it appears outside the system. A dye tablet or food coloring helps trace leaks in the shell or around jets without altering water chemistry.

Carry a flashlight and a small mirror to inspect under panels and inside pump bays. A wet/dry vacuum helps remove standing water during repairs and can test seals by creating suction. Consider a pressure gauge for air lines and a simple pressure tester for plumbing loops; these show drops that indicate leaks.


Electronic leak detectors and listening sticks amplify sound from running water behind panels. Thermal imaging cameras reveal cooler wet spots in insulation or framing. You don’t need every tool; pick the ones that match the suspected leak location.

inspecting internal components

Remove access panels and cut minimal insulation to expose the pump, valves, unions, and manifolds. Check all unions and threaded fittings for hand-tightness and hairline cracks; tighten or replace soft O-rings and worn gaskets first.

Examine the pump housing and seals for oil, grease, or clear weeping; a weeping shaft seal often first shows as dampness around the pump base. Inspect heater canister and pressure switches for corrosion or mineral buildup that can cause micro-leaks. Trace PVC runs for hairline cracks, especially at elbows and factory welds.

Run the system with panels removed and watch for drips while someone operates each jet and switches pump speeds. Document exact leak locations and photograph them before disassembly to ensure correct part replacement.

cause of hot tub leak

hot tub leak repair hot tub leaking from bottom how to fix a hot tub leak how to find leak in hot tub hot tub losing water

Leaks usually come from a few specific places: plumbing connections that loosen or crack, seals and gaskets that wear out, and structural damage to the shell. Identifying the exact source quickly saves water, prevents equipment damage, and lowers repair cost.

plumbing joint issues

Plumbing joints include PVC fittings, unions, and flexible hose clamps that connect pumps, heaters, and jets. Over time thermal cycling and vibration loosen threaded unions and stress solvent-welded PVC joints. You’ll often find slow drips at the base of a union, water pooling under the equipment pad, or wet drywall near the cabinet.


Inspect unions by hand-tightening (power off) and checking for cracked or split union nuts. For glued joints, look for hairline cracks or damp residue along pipe runs; pressure from pump cycles can force water through tiny fissures. Replace damaged PVC sections, re-glue solvent joints with proper primer/solvent cement, and swap brittle hoses and clamps for reinforced, UV-resistant replacements.

worn seals and gaskets

Seals and gaskets sit at pump shafts, jet fittings, and between components; they keep pressurized water contained. Heat, chemicals, and age dry out rubber parts, causing shrinkage and hardening that leads to seepage or spray under pressure. You’ll notice leaking from the pump volute, around jet bezels, or at plumbing union faces when these parts fail.


Start by isolating the pump and visually inspecting shaft seals, pump union gaskets, and O-rings on jets and filters. Replace any gasket that looks flattened, cracked, or oily — don’t try to reuse old O-rings. Use manufacturer-spec replacement seals and apply a thin silicone lubricant where appropriate to seat O-rings without cutting them. Test at operating temperature to verify the fix.

cracks in the shell

Shell cracks occur in acrylic or fiberglass surfaces from freeze damage, structural settling, or impact. Small stress hairlines near the jet fittings or along seams can widen under water pressure and become significant leaks. You may see puddles directly below a cracked area, discolored spots where water wicks through laminates, or bubbles/soft spots in the cabinet below the shell.


Repair options depend on size and location. Hairline surface cracks can accept acrylic-compatible epoxy or specialized patch kits if they don’t go through the laminate. Through-cracks or delamination under jets require professional gelcoat/fiberglass repair or shell replacement. When you find a crack, drain the tub, dry the area thoroughly, and follow the repair kit instructions or contact a certified technician for structural repairs.

preparing for leak repair

hot tub leak repair hot tub leaking from bottom how to fix a hot tub leak how to find leak in hot tub hot tub losing water

You will confirm safety, drain the tub methodically, and gather the exact parts and tools needed before cutting into plumbing or shell. Taking these steps prevents damage and speeds repair.

safety precautions

Turn off power at the spa’s dedicated breaker and lock it out. Verify power is off by attempting to turn the control panel on and testing with a non-contact voltage tester at the pack and heater connections.

Wear eye protection, chemical-resistant gloves, and knee protection when working around the shell and foam. If you must remove insulation, wear a dust mask and long sleeves to avoid skin irritation and inhalation of dust or fibreglass particles.

Keep a stable work area: clear space around the tub, set up bright, portable work lights, and use a tarp to collect debris and protect decking. Have a fire extinguisher and a first-aid kit nearby in case of accidents.


If the repair involves soldering, PVC solvent, or power tools, follow the manufacturer’s safety directions and ensure good ventilation. Consider calling a licensed electrician or plumber for any electrical or complex plumbing work beyond your skills.

draining hot tub

Check the owner’s manual for the recommended water disposal method and local regulations about draining to storm drains or lawns. Turn off all equipment and let the water cool before beginning to drain.

Locate the tub’s drain spigot or attach a submersible pump to a garden hose for faster removal. Place the hose where water can drain safely without causing erosion, basement seepage, or neighbor issues.

Once most water is out, remove the shell access panels and use a wet/dry vacuum to remove the last inches of water from jet housings and plumbing low points. Keep a bucket and rags handy to mop small puddles from foam and cabinet interiors.


After draining, prop up covers and panels to air out the cavity and allow you to inspect foam, plumbing, and the shell without trapped moisture obscuring leaks.

gathering repair materials

Identify the leak type first: visible cracked plumbing, loose fittings, or a shell crack require different materials. Inspect jets, unions, heaters, and visible PVC lines to determine whether you need PVC primer/solvent, replacement unions, gaskets, or epoxy.

Basic tool kit: adjustable wrench, pipe cutter or PVC saw, plumber’s tape, silicone or marine-grade sealant, rag, bucket, wet/dry vac, flashlight, and screwdriver set. For plumbing repairs, add PVC primer/solvent and replacement pipe and fittings sized to match existing plumbing (usually 1″, 1.5″, or 2″).


For shell repairs, have appropriate acrylic repair kits, waterproof epoxy, and fine-grit sandpaper. Keep replacement O-rings, union nuts, and a spare pressure-tested hose clamp on hand. If you expect foam removal, prepare insulation-compatible adhesive and foam-safe sealants.

repairing plumbing leaks

You’ll learn how to stop leaks in pipes, swap worn fittings, and fix manifold cracks with practical steps and the right tools. Follow targeted checks, use proper sealing products, and test repairs under pressure before refilling the tub.

fixing leaking pipes

Start by isolating power and draining the tub below the leak level. Locate the leak by running the pump briefly and watching plumbing runs; use a flashlight and paper towels to find slow weeps.

For PVC or CPVC pipes, cut out the damaged section with a pipe cutter or hacksaw. Clean ends, dry, and deburr. Use primer and solvent cement rated for the pipe type; apply both to pipe and fitting, then push and hold for the manufacturer’s set time.

For flexible hoses, replace rather than patch when possible. If you must patch temporarily, use a rubber splice, hose clamps, and silicone tape designed for pressurized water—treat this as a short-term fix. After repair, pressurize the system and check for leaks at normal operating temperature and pressure.


Tools and materials to have: pipe cutter, primer/cement, replacement pipe/fittings, hose clamps, silicone tape, shop towels, and a small bucket. Wear gloves and eye protection.

replacing fittings

Turn off power, drain the water below the fitting, and depressurize the lines. Identify the fitting type—threaded, glued, push-to-connect, or barb—and match replacement parts exactly by material and size.

For glued fittings, cut the pipe on both sides of the fitting. Remove old glue residue with a solvent if permitted, then install a new fitting with appropriate primer and cement. For threaded fittings, wrap PTFE tape on male threads and tighten to manufacturer torque; avoid over-tightening plastic threads to prevent cracking.


Use push-fit fittings for quick repairs where code and pressure ratings allow. Ensure surfaces are clean and cut squarely for reliable seals. After replacement, run the pump and inspect under operating heat to confirm the new fitting holds.

repairing manifold leaks

Manifold leaks commonly arise at threaded ports, O-rings, or cracked plastic bodies. First, remove spa side panels and dry the manifold area. Inspect for hairline cracks, loose unions, or degraded O-rings.

If the leak is at a union or threaded port, tighten slightly and replace the O-ring or use new washers. For O-ring replacement, lubricate with a compatible silicone grease and seat the ring evenly. If the manifold body is cracked plastic, plan to replace the entire manifold assembly; temporary epoxy repairs usually fail under heat and pressure.


When replacing a manifold, match port count, orientation, and material (usually ABS or PVC). Support plumbing during replacement to avoid stress on new joints. Pressure-test the replaced manifold before returning the spa to normal operation.

fixing shell and surface damage

Address small cracks and surface gouges promptly to prevent leaks and further deterioration. Use the right cleaner, matching repair material, and follow cure times so the repair bonds properly and restores water integrity.

sealing small cracks

Start by turning off power and draining the tub below the damaged area. Clean the crack and surrounding 6–12 inches with a non-abrasive cleaner and a cloth; remove wax, oils, and mineral deposits so repair compounds adhere.

For hairline and shallow cracks, use a marine-grade two-part epoxy or acrylic repair resin designed for spa shells. Mix per manufacturer directions, apply with a plastic spreader into the crack, and smooth flush with the surface. Apply thin layers rather than one thick fill to avoid air pockets; allow recommended cure time between layers.


Sand lightly with 320–400 grit paper after full cure to feather edges and create a smooth finish. If the surface color matters, use a compatible gelcoat touch-up or a color-matched acrylic polish to blend the repair. Test for leaks by refilling to just below the repair and observing for water loss over 24 hours.

applying fiberglass repair kits

Use a fiberglass kit for deeper splits, holes, or when structural strength is needed. Gather safety gear: gloves, eye protection, and a respirator. Work in a well-ventilated area and follow kit instructions exactly.

Cut backing and resin-saturated fiberglass cloth to fit with 1–2 inches overlap. After cleaning and scuffing the area with 80–120 grit, apply a thin resin coat, lay the cloth, then saturate it with more resin while smoothing to eliminate bubbles. Build 2–4 layers for structural repairs, waiting the specified cure time between layers.


Once cured, trim excess with a rotary tool, sand progressively from 80 to 320 grit for shape and finish, then apply a gelcoat or compatible topcoat for water resistance and color match. Pressure-test the repair by partially refilling and monitoring the area for 24–48 hours before full use.

addressing leak-prone components

Focus on the physical sources: the heater assembly and the pump/seal areas. Identifying exact leak points and replacing failed parts prevents recurring water loss and electrical hazards.

Heater Leak Solutions

Locate the leak by draining the tub below the heater level and inspecting the heater housing, unions, and threaded fittings with a flashlight. If you see corrosion, mineral crust, or a wet spot at a union, tighten the union nut a quarter turn and retest; do not overtighten plastic unions.

If the heater element or housing shows cracks, replace the entire heater assembly. Heaters often fail at the welds or where the element meets the manifold; purchase an OEM or exact-spec replacement and follow the wiring diagram when reinstalling. Use new silicone or Teflon tape on threaded pipe connections rated for hot-water use.


For minor pinhole leaks in metal housings, you can apply a high-temperature epoxy designed for plumbing as a temporary fix, but schedule a full heater replacement within weeks. Always disconnect power at the breaker before working near the heater and verify no remaining charge with a multimeter.

pump and seal repairs

First, inspect the pump wet end, mechanical seal area, and unions for visible drips while the pump is running. Common signs include water pooling beneath the pump, oil-stained water (if applicable), or leaks originating where the shaft enters the volute.

Replace the mechanical seal whenever you open the pump wet end. Use the exact seal dimensions and replace worn impellers or O-rings at the same time. Clean mating surfaces and lubricate new O-rings with a water-compatible silicone before reassembly to ensure a proper seal.


If the leak comes from union fittings, shut off water, loosen the union, check the flat gasket for cracks, and replace it if compressed or damaged. For cracks in the pump housing or volute, replace the pump; do not rely on glues unless it’s a short-term stopgap. After repairs, run the system and recheck for leaks under pressure before refilling the spa.

testing after repair

Confirm the repair holds under normal operating conditions and watch for signs that the fix didn’t fully seal the leak. Refilling, a controlled pressure run, and scheduled checks will tell you whether the issue is resolved.

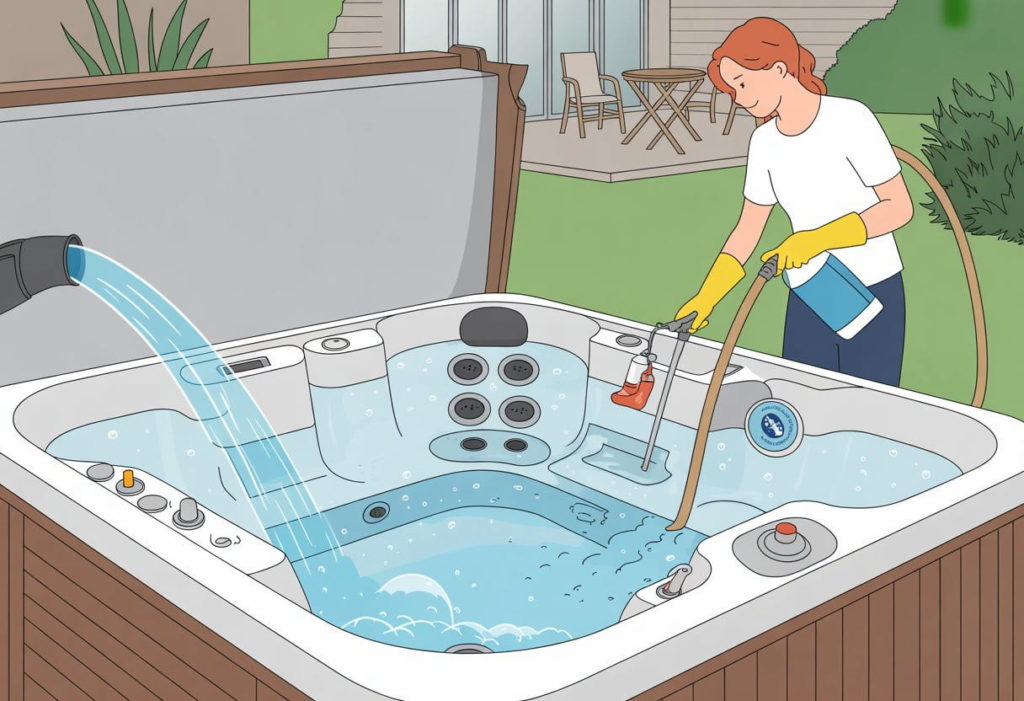
refilling and inspection

Refill the tub slowly to the normal water level so you can watch for immediate drips around the repaired area. Use a flashlight and a rag to inspect joints, fittings, and the repair site as water rises; touch fittings to feel for moisture that visual checks can miss.

Run the pump and jets for 10–15 minutes while watching the repair points. Check the equipment pad for new puddles and feel pipes and unions for wetness or vibration that could indicate a hidden leak.


Do a dye test if you still suspect a slow leak: place a blue dye tablet or a few drops of food coloring near the repair while the water is still; watch whether colored water is drawn into cracks or seams. Record water level after 24 hours to confirm there’s no ongoing loss.

long-term monitoring

Monitor water level and equipment area daily for the first week, then weekly for a month. Keep a simple log with date, water-level change (inches or centimeters), and any visible signs of moisture so you can spot gradual failures.

Inspect underneath access panels and around the skimmer, seals, and pump unions every two weeks for the first three months. If you installed epoxy, sealant, or a replacement fitting, check those specific repairs for cracking or separation under thermal cycling.


If you observe recurring loss greater than ¼ inch per day, visible wet spots, or new corrosion, shut down the system and re-inspect immediately. Contact a qualified hot tub technician if the leak returns or if the repair site is inaccessible without specialized tools.

preventing future hot tub leaks

Regular checks and correct water chemistry stop most leaks before they start. Focus on scheduled inspections, tight fittings, and balanced water to protect seals, valves, and plumbing.

routine maintenance tips

Inspect visible plumbing, unions, and fittings every 30 days. Tighten loose unions by hand, then 1/4 turn with a wrench; replace cracked or brittle unions immediately.
Check the cabinet and base for damp spots weekly to catch slow leaks early. Lift panels periodically to inspect underneath for pooling or corrosion.


Clean and inspect jets and circulation fittings every 3 months. Remove and reseat jets to ensure proper O-ring compression; replace O-rings if they show flat spots or cracks.
Run the pump and listen for air leaks or irregular suction; air noise often indicates a leaking suction fitting or loose hose clamp.
Schedule a professional pressure or dye test annually if you have recurring loss or hard-to-find leaks.

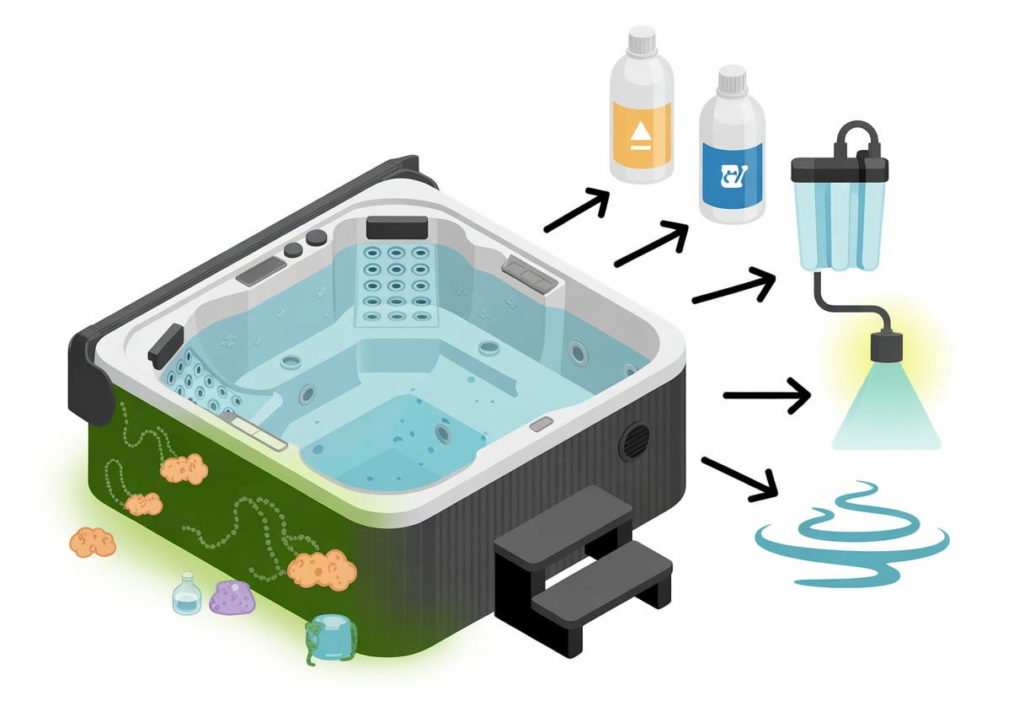
proper water chemistry management

Test pH, total alkalinity, and calcium hardness at least twice weekly during heavy use and weekly otherwise. Keep pH 7.4–7.6, alkalinity 80–120 ppm, and calcium hardness 150–250 ppm to protect seals and plastics.
High pH or hardness scales cause deposits that stress fittings; low alkalinity accelerates corrosion of metal components.


Maintain sanitizer levels per manufacturer specs and shock weekly to prevent biofilm. Biofilm can hide leaks and degrade O-rings and gaskets.
Use a sequestering agent in hard-water areas and replace filters every 6–12 months or when flow drops 25% to preserve circulation and reduce pressure on plumbing.

when to call a professional

If the leak persists after basic checks — filter cleaning, visible hose inspection, and tightening fittings — call a pro. You may have an internal plumbing crack, a damaged pump seal, or a failing heater element that requires tools and access you likely don’t have.

Call a technician if you find water pooling under the cabinet or in hard-to-reach places. Hidden leaks can damage electronics and the shell, and professionals can pressure-test plumbing and locate difficult sources quickly.

Any electrical symptoms mean stop and call an expert immediately. Tripped breakers, burning smells, or an unresponsive control panel indicate risks that need certified handling to protect you and the equipment.

Use a professional when repairs require specialty parts or complex disassembly. Replacing manifolds, sub-surface fittings, or factory-sealed components often needs replacement parts and skills beyond DIY scope.


Consider professional help if you’re unsure about warranty or insurance implications. Technicians can document damage, perform repairs to code, and advise whether a repair or component replacement better preserves your warranty.

quick checklist

  • Immediate pro: electrical issues, pooled water under cabinet, persistent leak after DIY checks.
  • Professional inspection: hidden or intermittent leaks, noisy or failing pumps, heater failures.
  • When in doubt: call a certified hot tub technician to avoid costly mistakes.                         
The post Hot Tub Leak Repair Tips for Fast, Permanent Fixes first appeared on Canadian Home Leisure.

source https://canadianhomeleisure.ca/hot-tub-leak-fix-tips/

Friday, November 21, 2025

Automatic Hot Tub Chemical Monitor and Dispenser Systems

Maintaining proper water chemistry in a hot tub can feel like a never-ending chore. Testing pH levels, adding chlorine, and balancing sanitizers takes time most people would rather spend relaxing in warm water.

An automatic chemical monitor and dispenser attached to the edge of an outdoor hot tub with clear water and plants in the background.

An automatic hot tub chemical monitor and dispenser eliminates the guesswork by continuously testing water chemistry and adding the right chemicals at the right time. These smart systems work around the clock to keep water clean and balanced. Hot tub owners can finally enjoy their spa without constant maintenance worries.

Modern chemical monitoring systems use advanced sensors to track pH, sanitizer levels, and other key factors. The technology automatically dispenses precise amounts of chemicals when needed. This article explores how these systems work, what to look for when choosing one, and tips for keeping the equipment running smoothly.

How Automatic Hot Tub Chemical Monitor and Dispenser Systems Work

These systems use digital sensors to continuously test water chemistry and automatically add the right amount of chemicals. They monitor chlorine levels, pH balance, and sanitizer concentration while dispensing treatments as needed.

Core Functions and Technology

Digital sensors measure water chemistry every few minutes throughout the day. The main control unit processes this data and compares it to pre-set target ranges.

Most systems include pH sensors and ORP (oxidation-reduction potential) sensors. The ORP sensor detects sanitizer effectiveness rather than just measuring chemical amounts. This gives a more accurate picture of water quality.

When levels fall outside the target range, the system activates chemical pumps. These pumps draw from separate chemical containers and inject precise amounts into the water circulation system.

Smart connectivity allows remote monitoring through smartphone apps. Users can check water status, adjust settings, and receive alerts about low chemical supplies or system maintenance needs.

The control unit typically mounts near the hot tub equipment area. Chemical containers connect through tubing that runs to injection points in the plumbing system.

Monitoring Sanitizer and Chlorine Levels

The ORP sensor continuously tracks sanitizer effectiveness in the water. This measurement tells the system whether there’s enough active sanitizer to kill bacteria and viruses.

Target ORP levels typically range from 650 to 750 millivolts for hot tubs. When readings drop below this range, the system automatically dispenses chlorine or bromine sanitizer.

pH sensors work alongside ORP monitoring because pH affects sanitizer performance. If pH rises above 7.6, chlorine becomes less effective even at proper concentrations.

The system adjusts both chemicals in the correct sequence. pH correction happens first since proper pH levels allow sanitizers to work efficiently. This prevents chemical waste and maintains consistent water quality.

Most units can handle liquid chlorine, granular chemicals through dissolving chambers, or mineral sanitizer cartridges depending on the model.

Water Care Automation Benefits

Automated systems eliminate daily water testing with test strips or liquid test kits. They maintain consistent chemical levels without constant manual adjustments.

Chemical efficiency improves significantly because the system adds small amounts frequently rather than large doses weekly. This approach prevents chemical spikes that can irritate skin or damage equipment.

Water stays balanced continuously rather than swinging between safe and unsafe levels. Hot tub owners spend less time on maintenance and more time enjoying their spa.

The systems reduce over-chlorination incidents that create strong chemical odours or skin irritation. Precise dosing means chemicals last longer and cost less over time.

Remote monitoring capabilities let owners check water status before arriving home. They can adjust settings or troubleshoot issues without being physically present at the hot tub location.

Choosing and Maintaining an Automatic Hot Tub Chemical Dispenser

A person adjusting an automatic chemical dispenser attached to the side of a bubbling outdoor hot tub surrounded by wood decking and plants.

The right dispenser matches your hot tub size, usage patterns, and preferred sanitizer type. Proper installation requires attention to plumbing connections and placement, while regular maintenance keeps the system running smoothly for years.

Selecting the Right Device for Your Spa

Hot tub owners need to match their dispenser capacity to their spa’s water volume. A 300-gallon hot tub requires different chemical delivery than an 800-gallon model. Most dispensers handle between 200-1,000 gallons effectively.

Sanitizer compatibility plays a crucial role in selection. Some units work exclusively with chlorine tablets, while others accommodate bromine or mineral systems. Multi-sanitizer models offer flexibility but cost more upfront.

Flow-through dispensers connect directly to plumbing lines. They provide consistent chemical distribution but require professional installation. Floating dispensers offer easier setup but may create uneven sanitizer levels in larger hot tubs.

Feature Flow-Through Floating Inline
Installation Professional DIY Moderate
Coverage Excellent Good Very Good
Cost $$$ $ $$

Digital models with WiFi connectivity allow remote monitoring of chlorine levels and water care status. Basic mechanical units cost less but require manual checking and adjustment.

Installation Considerations

Professional installation ensures proper water flow and chemical distribution throughout the hot tub system. The dispenser must connect between the heater and return jets for optimal performance.

Plumbing modifications may be necessary depending on the hot tub’s existing setup. Some systems require additional bypass valves or flow switches to regulate chemical delivery rates.

Electrical connections matter for automated dispensers. GFCI-protected circuits prevent safety hazards near water. Battery-powered units eliminate electrical work but need regular battery replacement.

Placement affects chemical mixing and system efficiency. Install flow-through units downstream from the heater but upstream from UV or ozone systems. Chemical sanitizers can interfere with these alternative water care methods.

Water pressure requirements vary by model. Most dispensers need 15-30 PSI to function properly. Low-pressure systems may require booster pumps or different dispenser types.

Ongoing Maintenance and Best Practices

Weekly refills keep sanitizer levels stable in most residential hot tubs. Heavy usage or high temperatures increase chemical consumption and require more frequent attention.

Clean the dispenser housing monthly to prevent buildup and clogs. Remove any residue from tablets or granules that didn’t dissolve completely. Calcium deposits can reduce flow rates and affect performance.

Monitor sanitizer levels with test strips or digital meters twice weekly. Automatic dispensers supplement regular testing but don’t replace it entirely. Adjust dispenser settings based on actual chlorine levels rather than manufacturer recommendations alone.

Replace worn seals and gaskets annually to prevent leaks. Most units include replacement part kits for common maintenance items. Store extra chemicals in cool, dry locations away from direct sunlight.

Winterisation procedures vary by climate and dispenser type. Drain all water from the unit before freezing temperatures arrive. Remove any remaining chemical tablets to prevent corrosion during storage periods.

Frequently Asked Questions

A modern hot tub outdoors with an automatic chemical monitor and dispenser device attached, surrounded by greenery.

Automatic hot tub chemical monitors and dispensers raise many questions about their operation, maintenance requirements, and cost-effectiveness. These systems offer advanced features like smartphone connectivity, precise chemical regulation, and built-in safety measures.

How does an automated hot tub chemical dispenser regulate pH and chlorine levels?

The system uses electronic sensors to measure water chemistry every few minutes. These sensors send data to a control unit that compares current levels to preset targets.

When pH drops below the desired range, the dispenser automatically releases pH increaser into the water. If chlorine levels fall too low, it dispenses the right amount of sanitizer to restore proper balance.

Most units can adjust chemicals within 15-30 minutes of detecting changes. The control unit stores dosing history and learns the hot tub’s specific chemical consumption patterns over time.

What maintenance is required for an automatic hot tub chemical monitoring system?

Users need to refill chemical reservoirs every 2-4 weeks depending on hot tub usage. The system alerts owners when chemical supplies run low through indicator lights or smartphone notifications.

Sensor probes require cleaning every 2-3 months with a soft brush and calibration solution. This process takes about 10 minutes and ensures accurate readings.

The dispensing tubes should be checked monthly for clogs or buildup. Annual professional servicing helps maintain optimal performance and extends equipment life.

Are there smart hot tub monitors that allow for remote management via a smartphone app?

Many current models include WiFi connectivity and companion mobile apps. These apps display real-time water chemistry readings, chemical usage history, and maintenance reminders.

Users can adjust target pH and chlorine levels remotely from anywhere with internet access. The apps send push notifications when chemical levels drift outside safe ranges or when supplies need refilling.

Some advanced systems integrate with home automation platforms like Alexa or Google Home. This allows voice commands to check water status or modify settings.

What safety features should I look for in an automatic chemical dispenser for my hot tub?

Lockout mechanisms prevent chemical overdosing by limiting maximum daily dispensing amounts. These systems shut down automatically if sensors detect readings outside safe parameters.

Chemical reservoir locks keep children and pets away from concentrated chemicals. Leak detection sensors alert users immediately if dispensing lines develop problems.

Emergency stop buttons allow instant system shutdown during maintenance or emergencies. Many units include backup battery power to maintain monitoring during electrical outages.

How often do the chemical levels need to be calibrated with an automatic monitoring device?

Most systems require calibration every 3-4 months for accurate performance. The process involves testing sensor readings against manual test strips or liquid test kits.

New installations need initial calibration within the first week of operation. Heavy bather loads or extreme weather may require more frequent calibration adjustments.

Professional technicians can perform annual calibrations as part of regular maintenance visits. This ensures sensors maintain factory-level accuracy throughout their operational life.

What are the cost benefits of installing an automatic chemical monitor and dispenser in a hot tub?

Automated systems reduce chemical waste by dispensing precise amounts only when needed. Manual dosing often results in overuse, making chemicals last 20-30% longer with automated control.

The systems prevent costly water chemistry problems that require complete water changes. Maintaining proper balance extends equipment life and reduces repair expenses.

Time savings average 2-3 hours weekly compared to manual testing and chemical addition. Many owners find the convenience worth the initial investment within the first year of operation.

The post Automatic Hot Tub Chemical Monitor and Dispenser Systems first appeared on Canadian Home Leisure.

source https://canadianhomeleisure.ca/automatic-chemical-feeder/

Sunday, September 21, 2025

Can You Put Your Head Underwater in a Hot Tub?

Generally, submerging your head in hot water is a bad idea—especially somewhere communal. Every hot tub owner it seems has the question: can I put my head under water? Putting your head underwater may sound harmless, but health organizations and industry professionals strongly recommend against it.

One reason is water between 102 and 104 degrees Fahrenheit breeds bacteria, a reason why hot tubs require sanitation. Thankfully, bathing your legs or torso in the water does not fully expose you to these potential bacteria.

However, your nose, eyes, ears and mouth give easy ingress to your body, meaning you are more likely to catch an illness or infection with your head underwater. There are other safety concerns as well.

reasons why you shouldn't go underwater in a hot tub?

Why You Shouldn’t Put Your Head Under Water:

There are valid reasons why you shouldn’t put your head underwater in a hot tub.

Drowning or losing consciousness

Since hot water heat up your body, you could get dizzy or feel faint, which is an easy way to drop under.

Brain Damage

Even in perfectly clean water, high temperatures pose a hazard to children’s brains. While children should not enter a hot tub above 95-or-so degrees anyway, those who do are at a greater risk of hindering brain development when getting their heads wet. A child’s body is more sensitive to heat and cannot regulate its temperature as effectively. The head, specifically, is vulnerable to overheating because it is a major source of heat loss.

Hair Hazards

For both adults and children, the jets in a hot tub introduce yet another danger. When you dunk your head underwater, you risk catching your hair in the jets and filters. Regardless of how shallow the spa, if your hair gets caught you might not be able to surface for air. Thus, we recommend wearing a bathing cap if you have long hair

For advice on buying a hot tub please read The Ultimate Hot Tub Buyers Guide.

Infections

Warm water is a breeding ground for bacteria/fungi that could lead to ear infections, nose infections, or respiratory illnesses

Hair entrapments

Powerful jets or strong drains could entangle long hair, resulting in entrapment.

Final Thoughts…

One particularly alarming factor is that children are most at risk here: Children heat up far quicker than adults, and are also not always capable of keeping themselves safe enough to know to pull away if they are trapped or feel faint.

Thus, in accordance with the CDC, pediatricians, and hot tub safety organizations, they recommend always keeping your head above water.

The post Can You Put Your Head Underwater in a Hot Tub? first appeared on Canadian Home Leisure.

source https://canadianhomeleisure.ca/can-you-put-your-head-underwater-hot-tub/

Wednesday, August 20, 2025

How to Remove Musty Smell from Hot Tub With Simple Cleaning Methods

A musty smell in hot tubs ruins relaxation time and signals water quality problems that need immediate attention. Most owners face this issue at some point, but the good news is that it’s completely fixable.

The key to removing musty odours is identifying the source, balancing water chemistry, and implementing proper cleaning techniques. Whether the smell comes from dirty filters, poor water circulation, or bacterial buildup, specific steps can eliminate the problem and prevent its return.

This guide walks through finding the odour source, fixing water chemistry issues, and cleaning every component thoroughly. Hot tub owners will also learn prevention strategies and troubleshooting tips to keep their spa smelling fresh year-round.

hot tub smells bad

Pinpoint Where the Odour Is Coming From

hot tub smells musty

Finding the source of musty smells requires careful inspection of your hot tub. Start by lifting the cover and taking a gentle sniff near the water surface.

Chemical vs. musty odours tell different stories. Sharp chlorine scents suggest sanitizer issues. Rotten egg smells point to bacteria problems. Musty or mildew odours indicate organic buildup.

Check these key areas for visible signs of trouble:

Location What to Look For
Cover underside Slimy film, discolouration
Waterline Ring of scum, oily residue
Jets Dark spots, mineral deposits
Filter area Clogged debris, green tinge

The cover’s underside often harbours mould and mildew. Look for dark patches or slippery surfaces that feel different from clean vinyl.

Waterline inspection reveals a lot about water quality. A visible ring around the tub shows where oils and dead skin cells collect.

Jets can trap organic matter deep inside. Remove jet covers if possible and peer into the openings with a flashlight.

Persistent musty odours typically signal biofilm development. This invisible layer of bacteria and algae coats surfaces throughout your hot tub’s plumbing system.

Temperature matters when detecting odours. Warm, humid conditions make smells stronger and easier to identify.

Take notes about which areas smell strongest. This helps target your cleaning efforts and prevents wasting time on unaffected sections.

Reinforce Water Chemistry and Sanitation Basics

Testing water chemistry weekly prevents musty odours from taking hold. pH levels between 7.2 and 7.6 create the ideal environment for sanitizers to work effectively.

Use test strips or a digital tester to check both pH and sanitizer levels. Chlorine should measure 1-3 ppm, while bromine needs 2-4 ppm for proper sanitation.

Low sanitizer levels allow bacteria to multiply quickly. These bacteria create the musty smell that plagues many hot tub owners.

High pH levels above 7.6 reduce sanitizer effectiveness by up to 80%. This dramatic drop leaves water vulnerable to bacterial growth and unpleasant odours.

Parameter Ideal Range
pH 7.2 – 7.6
Chlorine 1 – 3 ppm
Bromine 2 – 4 ppm

Add pH decreaser if levels exceed 7.6. Increase sanitizer immediately when readings fall below recommended ranges.

After adjusting chemicals, run jets for 15-20 minutes to circulate treated water. This ensures even distribution throughout the entire system.

Retest water after two hours to confirm adjustments worked properly. Make additional changes if readings still fall outside target ranges.

Daily sanitizer checks during heavy use periods catch problems before odours develop. Summer months and frequent entertaining require extra attention to water balance.

Break Down Odour Sources with Treatment

hot tub water smells musty

Musty smells in hot tubs come from bacteria, oils, and organic waste that build up over time. These contaminants need direct treatment to eliminate the source of bad odours.

Shock treatments work fast to break down chloramines and organic matter. Non-chlorine shock (MPS) oxidizes contaminants without adding more chlorine to the water. Chlorine shock kills bacteria and burns off oils from lotions and body products.

Apply shock treatment when the hot tub isn’t in use. Follow the package directions for your water volume. Most treatments need 15-30 minutes to work properly.

Enzyme cleaners target stubborn oils and lotions that stick to surfaces. These natural cleaners break down organic waste that regular sanitizers miss. They work slowly but clean deeply into the water system.

Spa purge products remove biofilm from pipes and jets. This slimy buildup hides bacteria and creates ongoing odour problems. Purge treatments flush out contamination from hard-to-reach areas.

Treatment Type Best For Application Time
Non-chlorine shock General oxidation 15-30 minutes
Chlorine shock Heavy contamination 30-60 minutes
Enzyme cleaner Oil and lotion buildup 2-8 hours
Spa purge Biofilm removal 1-2 hours

Run the jets for at least 30 minutes after any treatment. This circulates the product through all the plumbing. Test water chemistry again before the next use to ensure proper sanitizer levels.

Dive Deeper: Cleaning Filters, Surfaces, and Pipes

Hot tub filters trap dirt and oils that cause musty odours. Rinse filters weekly under cool water to remove loose debris.

Deep-clean filters monthly or when changing water. Soak them in filter cleaning solution overnight. Replace filters every 12-18 months for best results.

Surface Cleaning Steps:

  • Drain the hot tub completely
  • Mix equal parts isopropyl alcohol and demineralized water
  • Wipe all surfaces with a clean cloth
  • Clean jets and crevices thoroughly
  • Remove biofilm buildup around waterline

The plumbing system holds the most bacteria and biofilm. These hidden areas create strong musty smells that regular cleaning cannot reach.

Run a specialized pipe cleaner through the system during each drain and refill cycle. Spa purge products work best for this job.

Component Frequency Method
Filters Weekly rinse, monthly deep-clean Rinse + overnight soak
Surfaces Each water change 50/50 alcohol solution
Plumbing Each drain/refill Spa purge product

Fill the hot tub above the jets before adding pipe cleaner. Run pumps for the recommended time on the product label. This process breaks down biofilm in hard-to-reach areas.

Drain completely after the purge cycle. Refill with fresh water and proper chemical balance.

Reset Completely: Drain, Clean, and Refill

why does my hot tub smell

Sometimes a musty smell needs a complete fresh start. A full reset eliminates stubborn odours that surface treatments cannot fix.

Safety comes first. Turn off all power to the hot tub before draining. This protects the heating elements and pumps from damage.

Open the drain valve and let the water flow out completely. Most hot tubs take 1-2 hours to empty fully.

Clean every surface thoroughly. Use a hot tub cleaner or mild bleach solution to scrub:

  • Shell walls and floor
  • Headrests and pillows
  • Filter compartments
  • Jets and fittings
  • Cover underside

Pay special attention to the waterline where oils and bacteria collect. Rinse everything multiple times with fresh water.

Replace or deep clean the filters. Old filters trap contaminants that cause musty odours. Soak reusable filters in filter cleaner overnight.

Refill the hot tub with fresh water. Fill slowly to avoid air bubbles in the plumbing lines.

Balance the water chemistry immediately. Test and adjust these levels:

Chemical Target Range
pH 7.2 – 7.6
Total Alkalinity 80 – 120 ppm
Sanitizer Per product instructions

Add sanitizer and run the circulation system for at least 30 minutes. Apply shock treatment if the musty smell was severe.

This complete reset gives your hot tub a fresh start with clean water and balanced chemistry.

Establish a Simple Routine to Prevent Future Odours

how to remove musty smell from hot tub

A consistent maintenance schedule keeps musty smells from returning to your hot tub. Regular care prevents bacteria buildup and chemical imbalances that cause unpleasant odours.

Weekly Tasks

  • Test water chemistry levels using test strips
  • Add shock treatment if chlorine levels drop below 3 ppm
  • Rinse the filter with clean water to remove debris

Monthly Maintenance
Hot tub owners should perform deeper cleaning once per month. Remove filters and soak them in filter cleaner solution overnight.

Wipe down all surfaces above the waterline with a mild cleaner. Apply enzyme treatments or purge products to break down organic waste.

Quarterly Deep Clean
Every 3-4 months, drain the hot tub completely. Scrub the shell with non-abrasive cleaner and rinse thoroughly before refilling.

This process removes built-up chemicals and organic matter that regular treatments cannot eliminate.

Annual Filter Replacement
Replace hot tub filters every 12-18 months regardless of their appearance. Old filters lose effectiveness and harbour bacteria even after cleaning.

Mark replacement dates on your calendar to stay on track.

Water Chemistry Targets

Chemical Ideal Range
pH 7.2 – 7.6
Alkalinity 80 – 120 ppm
Chlorine 1 – 3 ppm

Following this routine eliminates most odour problems before they start. Consistent care saves money on expensive treatments and extends your hot tub’s lifespan.

Optional Add-Ons for Further Protection

Several additional systems can boost your hot tub’s odour-fighting power. These products work alongside your regular cleaning routine.

Ozone and UV Systems provide extra sanitation without heavy chemical use. They kill bacteria and other microorganisms that cause musty smells. These systems reduce your reliance on chlorine or bromine.

UV systems use light to destroy harmful organisms. Ozone generators create ozone gas that breaks down contaminants. Both options help keep water fresh between regular treatments.

Mineral-based products like O-Care support your main sanitizer. These systems release minerals that prevent buildup on surfaces. They also help maintain balanced water chemistry.

Add-On Type Primary Benefit How It Helps
Ozone System Extra sanitation Kills odour-causing bacteria
UV System Chemical reduction Destroys microorganisms with light
Mineral Products Prevents buildup Supports sanitizer effectiveness

Mineral cartridges typically last 3-4 months. They work best when combined with proper chemical balance. Many hot tub owners find these products reduce maintenance time.

Some persistent odour problems need professional help. A qualified technician can identify issues that home treatments cannot fix. They may recommend specific products for your hot tub model.

These add-ons work best as prevention tools. Install them when your hot tub smells fresh. They help maintain clean conditions rather than fix existing problems.

Quick-Look Troubleshooting Table

This table helps pinpoint common causes of musty hot tub odours. Use it to identify problems quickly before they worsen.

Problem Likely Cause Quick Fix
Rotten egg smell High sulphur or bacteria buildup Shock treat with chlorine, test pH levels
Sweet musty odour Algae growth in filtration system Clean filters, scrub surfaces, add algaecide
Sour smell Low sanitiser levels Test water chemistry, add appropriate chemicals
Mouldy basement smell Poor ventilation around hot tub Improve air circulation, check for water leaks
Fishy odour Organic matter decomposition Remove debris, vacuum hot tub bottom
Chemical smell mixed with mustiness Unbalanced chloramines Test total chlorine vs free chlorine levels

When to Call Professionals

Some situations require expert help. Contact a hot tub technician if odours persist after multiple treatments.

Warning Signs

Green or black water indicates serious contamination. Drain the hot tub immediately and disinfect all surfaces.

Prevention Notes

Most musty smells develop from poor maintenance habits. Regular water testing prevents these problems from starting.

Frequently Asked Questions

Hot tub owners commonly face musty odours that require specific solutions based on the underlying cause. These questions address the most frequent smell-related issues and their proven remedies.

What are effective methods for eliminating a musty odour in spa water?

Shock treatment with chlorine or bromine provides the fastest solution for musty smells. Users should add 2-3 times the normal sanitizer amount and run the pump for 30 minutes.

Complete water drainage and refill eliminates persistent odours when chemical treatments fail. Fresh water removes accumulated contaminants that cause musty smells.

Filter cleaning or replacement removes trapped bacteria and debris. Dirty filters circulate contaminated water that creates ongoing odour problems.

Why does my spa water have a clear appearance but emit a foul smell?

Clear water can harbour invisible bacteria and dissolved organic compounds that produce unpleasant odours. These contaminants remain below visual detection levels while creating strong smells.

Low sanitizer levels allow bacteria growth without visible cloudiness. The bacteria produce waste products that smell musty or sour.

High pH levels above 7.6 reduce sanitizer effectiveness. This allows odour-causing microorganisms to multiply while water stays clear.

What can I add to my hot tub to improve the water’s scent?

Proper sanitizer levels between 3-5 ppm chlorine or 4-6 ppm bromine eliminate odour sources naturally. Balanced chemicals prevent smell formation rather than masking existing problems.

Enzyme products break down oils and organic matter that cause smells. These treatments work over 24-48 hours to eliminate odour sources.

Clarifying agents remove dissolved particles that contribute to musty smells. Monthly clarifier treatments keep water fresh-smelling between water changes.

What causes a hot tub to smell similar to a wet dog, and how can it be resolved?

Biofilm buildup on surfaces creates wet dog odours in hot tubs. These bacterial colonies form on jets, pipes, and shell surfaces where water circulation is limited.

Biofilm remover products dissolve these bacterial colonies effectively. Users should circulate the treatment for 2 hours before shocking with sanitizer.

Weekly jet cleaning prevents biofilm formation. Running jets on high speed for 15 minutes after each use removes organic matter before it accumulates.

Why does my hot tub have a fishy smell, and what steps should I take to address it?

Fishy odours indicate excessive organic contamination from body oils, lotions, or environmental debris. These compounds interact with sanitizers to create ammonia-like smells.

Immediate shock treatment neutralizes the organic compounds causing fishy odours. Triple the normal sanitizer dose and run circulation for one hour.

Pre-shower requirements for bathers prevent organic contamination. Removing lotions, perfumes, and body oils before soaking reduces odour formation significantly.

What should I do if my hot tub water becomes cloudy and develops an unpleasant odour?

Cloudy, smelly water requires immediate drainage and thorough cleaning. This combination indicates severe bacterial contamination that poses health risks.

System flush treatments clean internal plumbing before refilling. These products remove biofilm and bacteria from pipes where standard cleaning cannot reach.

Professional water testing identifies specific contamination sources. Local dealers can analyze water samples to prevent recurring problems with customized treatment plans.

The post How to Remove Musty Smell from Hot Tub With Simple Cleaning Methods first appeared on Canadian Home Leisure.

source https://canadianhomeleisure.ca/hot-tub-smells-musty/

Hot Tub Leak Repair Tips for Fast, Permanent Fixes

A leaking hot tub doesn’t have to mean expensive service calls or weeks of downtime; you can often locate and fix the problem yoursel...