Tuesday, March 18, 2025

How To Clean Outdoor Patio Furniture: A Guide on Best Practices

Keeping your patio furniture clean doesn’t have to be a chore. With regular maintenance and the right cleaning methods, you can enjoy your outdoor space without worrying about dirt, stains, or weather damage. The most effective way to maintain patio furniture is to clean it regularly with appropriate cleaners for each material type and protect it with covers when not in use. To get the freshest look from your collection, you’re going to need to know how to clean patio furniture properly. Follow these simple steps to breathe new life into its look and get your collection in tip-top shape.

how to clean patio furniture properly in Canada

Weather can be tough on outdoor furniture, especially in Canada where we experience everything from summer heat to winter snow. Different materials—whether it’s wood, metal, wicker, or plastic—each need specific care to stay looking their best.

Prevention is just as important as cleaning. Using furniture covers, storing cushions indoors during harsh weather, and positioning furniture under shelter can significantly reduce cleaning time. These simple habits will extend the life of your patio set and keep your outdoor space inviting for years to come.

The Basics on Patio Furniture Materials

Different outdoor furniture materials require specific cleaning approaches. Knowing what your patio pieces are made from will help you keep them looking their best for years to come.

Identifying Furniture Surfaces

Patio furniture comes in several common materials, each with unique cleaning needs:

Wood: Cedar, teak, and acacia are popular choices. Teak develops a silver patina over time unless oiled regularly. Clean with mild soap and water, avoiding pressure washers that can damage the grain.

Metal: Aluminum doesn’t rust but can oxidize, while wrought iron requires rust prevention. Wipe aluminum with soapy water, and treat iron with rust-resistant paint when needed.

Wicker and Rattan: These natural or synthetic materials need gentle cleaning. Synthetic versions resist moisture better. Use a soft brush to remove dirt from the weave, then wipe with a damp cloth.

Plastic/Resin: The most low-maintenance option. Clean with dish soap and water, or try a vinegar solution for stubborn stains.

Characteristics of Outdoor Cushions

Outdoor cushions face unique challenges from sun exposure, moisture, and debris. Most quality cushions feature:

Fabric Types:

  • Olefin/polypropylene: Highly water-resistant
  • Acrylic: UV-resistant but less water-repellent
  • Polyester: Affordable but may fade faster

Inner Materials: Look for quick-dry foam that prevents mildew growth. Some cushions have mesh bottoms for better drainage and air circulation.

Protection Features: Many cushions come with water-repellent coatings that need occasional renewal. Zippered covers allow for easier cleaning and replacement when needed.

To extend cushion life, bring them indoors during harsh weather and use furniture covers when not in use. A gentle scrub with mild soap usually handles most stains before they set.

Regular Cleaning Routines

Setting up a consistent cleaning schedule prevents dirt buildup and extends your patio furniture’s lifespan. The right routine can save you time and keep your outdoor space looking its best year-round.

Dusting and Wiping Down

Start by removing loose debris from your patio furniture at least once a week. A soft brush or microfiber cloth works perfectly for this task.

For metal furniture, mix mild dish soap with warm water and wipe surfaces with a soft cloth. Rinse with clean water and dry thoroughly to prevent water spots.

Wood furniture needs special care. Use a damp cloth for dusting, but don’t soak the wood. Commercial wood cleaners formulated for outdoor use are ideal for deeper cleaning.

Plastic furniture is simple to maintain. Wipe with a solution of warm water and dish soap, then rinse well. For stubborn dirt, a soft bristle brush can help without scratching the surface.

Always follow up by drying furniture completely to prevent mildew growth.

Spot Cleaning Techniques

Tackle spills immediately to prevent staining. Blot liquids with absorbent cloth rather than rubbing, which can spread the stain.

For fabric cushions, most outdoor fabrics respond well to a solution of:

  • 1 tablespoon mild dish soap
  • 1 litre warm water
  • 2 tablespoons borax (for mildew spots)

Test cleaning solutions on a hidden area first. Apply with a soft brush using gentle circular motions, then rinse thoroughly.

For stubborn stains on different materials:

  1. Metal: Baking soda paste for rust spots
  2. Wood: Mild vinegar solution for water rings
  3. Plastic: Magic eraser for tough marks

Allow all furniture to dry completely in the sun after spot cleaning to prevent moisture damage.

Deep Cleaning Procedures

Sometimes regular wipe-downs aren’t enough to keep your patio furniture truly clean. When dirt builds up, it’s time for a proper deep cleaning session.

Preparing the Cleaning Solution

The right cleaning solution makes all the difference when tackling grimy outdoor furniture. For most patio pieces, a simple mixture of warm water and mild dish soap works wonders. Add about 1/4 cup of dish soap to a bucket of warm water and stir gently to create suds.

For tougher stains, you might need something stronger. Try adding 1/4 cup of baking soda to your soapy mixture for extra cleaning power.

Always check the manufacturer’s recommendations before using any cleaning solution. Some materials like teak or wicker may require special cleaners.

Test your solution on a small, hidden area first to ensure it won’t damage the finish or colour of your furniture.

Using a Sponge and Bucket

Armed with your cleaning solution and a good bucket, it’s time to get scrubbing. Choose a non-abrasive sponge for most surfaces to avoid scratches. The soft side works for general cleaning, while the rougher side tackles stubborn grime.

Dip your sponge into the bucket and wring it out slightly. You want it wet enough to clean but not dripping everywhere.

Work in small sections, scrubbing with gentle circular motions. Pay special attention to armrests, table edges, and other high-touch areas where oils from hands accumulate.

For textured surfaces like wicker, use an old toothbrush to get into the crevices. Rinse your sponge frequently in the bucket to avoid spreading dirt around.

After scrubbing, rinse thoroughly with clean water from a garden hose. Let furniture dry completely before using again.

Stain Removal Strategies

Keeping patio furniture spotless requires specific techniques for different types of stains. The right approach can make all the difference between furniture that looks tired and worn versus fresh and inviting.

Tackling Common Stains

Bird droppings are a common nuisance on patio furniture. Remove them quickly by scraping off the solid matter, then clean with a solution of 1 part vinegar to 3 parts water. This prevents permanent staining.

For food and beverage spills, act fast! Blot liquids immediately rather than rubbing, which can spread the stain. Mix mild dish soap with warm water for most food stains.

Tree sap requires a different approach. Apply ice to harden the sap, then gently scrape it off. Follow with rubbing alcohol on a cloth to remove any residue.

Pollen stains should never be wiped with a dry cloth—this just spreads the yellow powder! Instead, use your garden hose to rinse it away, then clean with soapy water.

Specialized Solutions for Tough Stains

Rust marks need oxalic acid-based cleaners, available at most hardware stores. Apply with a soft cloth, let sit for 10 minutes, then rinse thoroughly. Wear gloves to protect your hands.

For stubborn mildew, mix:

  • 1 part bleach
  • 3 parts water
  • 1 tablespoon dish soap

Apply to affected areas, wait 15 minutes, then scrub with a soft brush and rinse well. This works wonders on vinyl and plastic furniture.

Sunscreen stains contain oils that cling to fabric. Create a paste using baking soda and water, apply to the stain, and let it sit for 30 minutes before washing. Your cushions will thank you!

Grease from barbecues can be tackled with cornstarch. Sprinkle it on the stain, let it absorb the oil for an hour, then brush away and clean with dish soap.

Preventative Measures

outdoor patio furniture set

Taking steps to protect your patio furniture before problems arise will save you time and effort in the long run. Prevention is truly your best cleaning strategy.

Protective Covers

Quality furniture covers are your patio’s best friends. They shield your outdoor pieces from harsh weather, bird droppings, and tree sap that can cause permanent damage. Look for waterproof covers with UV protection to prevent colour fading and material breakdown.

When selecting covers, ensure they fit properly. Loose covers can trap moisture underneath, potentially creating mould issues. Tight-fitting covers with ventilation features allow air circulation while keeping debris out.

Store covers properly when not in use. Fold them neatly rather than crumpling them up to extend their lifespan. During winter months, consider moving furniture to sheltered areas for additional protection if possible.

Remember to secure covers with straps or weights during windy conditions. Nothing’s more frustrating than chasing a runaway cover across the neighbourhood!

Proactive Care Tips

Regular maintenance prevents dirt from becoming stubborn stains. Wipe surfaces weekly with a damp cloth to remove pollen and dirt before they settle in. For wooden furniture, apply a protective sealant twice yearly to prevent moisture damage.

Place furniture strategically to minimize exposure to elements:

  • Position under awnings during rainy seasons
  • Avoid direct afternoon sun for plastic items
  • Keep away from sprinklers to prevent water spots

Quick cleaning kit to keep handy:

  • Soft brushes for textured surfaces
  • Microfibre cloths for smooth materials
  • An all-purpose cleaner suitable for your furniture type
  • Small vacuum for cushion crevices

Apply furniture wax to metal pieces to create a protective barrier against rust. For fabric cushions, spray with fabric protector before first use and reapply after thorough cleanings.

Consider rubber or plastic feet for furniture legs to prevent staining on decks and to reduce wear from friction.

Seasonal Maintenance and Storage

how to clean outdoor furniture

Taking care of your patio furniture throughout the year helps it last longer and stay beautiful. The changing seasons require different approaches to furniture care and protection.

End-of-Season Cleaning

When autumn leaves start falling, it’s time to prepare your outdoor furniture for its seasonal rest. Before storage, give everything a thorough cleaning. Remove cushions and wash fabric covers according to their care labels. For frames, use appropriate cleaners based on material type:

  • Wood: Mild soap, water and soft brush
  • Metal: Vinegar-water solution (1:1 ratio)
  • Wicker: Vacuum first, then wipe with damp cloth
  • Plastic: Baking soda paste for stubborn stains

Don’t forget those hidden areas where dirt loves to holiday! Check underneath tables and between chair slats.

Let everything dry completely before storage. Moisture trapped in furniture can lead to mould growth and material damage during winter months.

Proper Furniture Storage

Where you store your patio pieces matters almost as much as how you clean them. A dry, covered location is ideal – garage, shed, or basement work brilliantly.

If space is tight (and whose isn’t these days?), consider stackable options or disassembling larger pieces. Cover everything with breathable furniture covers rather than plastic, which can trap moisture.

For cushions, use water-resistant storage bags or containers. Elevate furniture off the ground using pallets or blocks to prevent moisture absorption.

If outdoor storage is your only option, invest in heavy-duty, weather-resistant covers. Secure them properly to withstand Canadian winter winds. Check periodically throughout the season for snow accumulation or water pooling on covers.

Eco-Friendly Cleaning Options

Eco friendly ways to cleaning patio furniture

Keeping your patio furniture pristine doesn’t have to harm the environment. Many natural alternatives work just as effectively as chemical cleaners while being gentler on our planet.

Natural Cleaning Agents

White vinegar tops the list of eco-friendly cleaners for patio furniture. This kitchen staple cuts through grime and disinfects surfaces without harsh chemicals. Mix equal parts vinegar and water in a spray bottle for a quick cleaning solution.

Baking soda works wonders on stubborn stains. Its mild abrasive quality helps lift dirt without scratching surfaces. For tough spots on plastic or metal furniture, make a paste with water and scrub gently with a soft brush.

Lemon juice is nature’s bleach alternative. The citric acid brightens surfaces and removes rust spots from metal furniture. Simply cut a lemon in half and rub directly on the stained area, or mix the juice with water in a spray bottle.

DIY Cleaning Mixtures

Create an all-purpose patio cleaner by combining 250 ml of white vinegar, 2 tablespoons of baking soda, and 1 litre of warm water. This mixture tackles dirt, mildew, and light stains on most furniture materials.

For wooden furniture, try this gentle mixture:

  • 2 tablespoons olive oil
  • 1 tablespoon white vinegar
  • 1 litre warm water

The oil conditions the wood while the vinegar cleans without stripping natural oils.

For cushions and fabric, mix:

  • 60 ml mild dish soap
  • 60 ml borax
  • 4 litres warm water

Apply with a soft brush, allow to sit for 15 minutes, then rinse thoroughly. Your cushions will look fresh without exposure to harsh chemicals that fade fabrics.

Frequently Asked Questions

Outdoor set with cleansers and a hose

Keeping patio furniture clean doesn’t have to be complicated. Here are answers to common questions about maintaining your outdoor furniture to keep it looking great all season long.

What are effective methods for cleaning patio furniture mesh?

Mesh patio furniture requires gentle cleaning to avoid damage. Mix mild dish soap with warm water and use a soft-bristled brush to scrub the mesh surface. For stubborn stains, try a mixture of baking soda and water.

Rinse thoroughly with a garden hose and allow to air dry completely before using. Avoid harsh chemicals that can break down the mesh material over time.

Should you scotchgard patio furniture?

Applying Scotchgard or similar fabric protectors to patio furniture can be beneficial. These products create a barrier that repels water, dirt, and stains, making future cleanings easier.

For best results, apply protectant to clean, dry furniture on a mild day. Reapply every 6-12 months or after thorough cleanings to maintain protection. Always test on a small, hidden area first to ensure it doesn’t discolour your furniture.

What steps should I follow to clean and maintain outdoor furniture cushions?

Start by removing loose debris with a soft brush. For regular cleaning, use mild soap and water with a soft brush, gently scrubbing the fabric. Stubborn stains may require a specialized outdoor fabric cleaner.

Rinse thoroughly and stand cushions on edge to dry completely before replacing. Never put cushion covers in the dryer, as high heat can damage the fabric and waterproof coatings.

Store cushions in a dry place during extended bad weather or off-seasons to extend their life. Those cushions deserve a winter vacation too!

Can vinegar be used to clean outdoor furniture, and if so, how?

Vinegar is an excellent natural cleaner for outdoor furniture. Mix equal parts white vinegar and water in a spray bottle for an effective, eco-friendly solution.

Spray the mixture onto the furniture surface, let it sit for 5-10 minutes, then wipe clean with a damp cloth. For wooden furniture, reduce the vinegar to one part vinegar to three parts water to avoid damage to finishes.

Vinegar works particularly well on mildew and mould because of its natural antimicrobial properties.

How do I keep my patio furniture from getting dirty?

Prevention is easier than cleaning! Use furniture covers when your patio set isn’t in use. Quality covers that fit properly provide the best protection against dirt, pollen, and weather damage.

Place furniture away from trees that drop sap or berries. Regular light cleaning prevents buildup of dirt and grime that becomes harder to remove over time.

Consider using indoor-outdoor rugs under eating areas to catch food spills before they reach your deck or patio surface.

Is it recommended to use a protective spray like Scotchgard on patio furniture?

Protective sprays can significantly extend the life of your patio furniture fabrics. They create a barrier against moisture, stains, and UV damage that would otherwise deteriorate the material.

Always clean the furniture thoroughly before application. Apply in thin, even coats and allow proper drying time between applications. Most manufacturers recommend reapplication every season for optimal protection.

What is the proper way to clean black metal outdoor furniture?

Black metal furniture requires special care to maintain its finish. Wash with mild soapy water and a soft cloth, avoiding abrasive scrubbers that can scratch the surface.

Rinse thoroughly and dry immediately to prevent water spots. For rust spots, gently sand with fine-grit sandpaper, clean the area, and touch up with outdoor-rated metal paint that matches your furniture.

Apply a thin coat of automotive wax after cleaning to help protect the finish and make future cleanings easier.

How do you keep algae off outdoor furniture?

Algae thrives in damp, shaded areas, so keep furniture dry and in sunny spots when possible. Clean furniture regularly with a mixture of equal parts water and white vinegar to kill existing algae.

For persistent algae problems, mix one part bleach with four parts water, apply to affected areas, wait 10 minutes, then rinse thoroughly. Always test cleaning solutions on a small area first.

Ensure proper drainage around your patio area to reduce standing water and humidity that encourage algae growth.

Quick Summary on a Simple Cleaning Routine

Give your patio set a dry-rub down

With a dry brush or cloth, remove any loose dirt, leaves and dust that have most likely attached themselves to your beloved patio set. No sense in fighting against the grime when it’s wet when you can get most of it off with a good dry-wiping once-over.

Remove loose, lingering dirt with a hose

If it’s plastic, metal, wood or fabric that has been made for the outdoors, you’ve got the green light to give them a good old hose down. Loosen any lingering grime that is threatening the freshness of your outdoor digs. A refreshing rinse will make cleaning your set that much easier.

Breathe life back into your patio collection

The approach you take to cleaning your outdoor furniture will depend on the material you’re cleaning. Here are the particulars for the various types of material in your typical garden furniture collection.

Wicker patio furniture clean and new
Click here to see our selection of Wicker Patio Furniture

How to clean plastic patio furniture

For materials like plastic, you can simply grab an all-purpose cleaner and wipe it down to get it looking freshest. This holds for cast aluminum and resin furniture as well. Do not use abrasive material (brushes or abrasive cleansers) as this can leave scuff marks on your patio set.

How to clean wrought iron, stainless steel, metal furniture

For metal such as wrought iron and steel, you can use a bit of dish soap in a bucket of water to get the job done. If there’s any rust you should use steel wool to remove it and refinish the piece to protect it from any further oxidation.

You can completely refurbish the newness of your furniture with little expense by spray painting with the colour of your choice. You can also wax apply a coat of wax to summon a new shine (same goes for plastic).

How to clean teak and natural wood finishes

If you have teak or other wicker furniture that is composed of natural wood fibre, it’s best to opt for a more gentle approach to cleaning. Use a soft sponge with mild oil soap or any commercial product designed specifically for cleaning wood.

Learn how to clean patio furniture-even if it's low-maintenance like cast aluminum
Deco Cast Aluminum Conversation Set

How to clean outdoor fabric (cushions, umbrella’s and rugs)

Mix a solution consisting of 1L water and one teaspoon of dishwashing detergent. You can add a tablespoon of Borax if you really want to get wild. Borax is a salt of boric acid and will prevent mould and bacteria from growing in your cushions, seats and rug.

Fun Fact: Borax was banned in the UK for claims of adverse effects on the reproductive system (this was only tested on mice and rats and occurred when ingested at high doses). Maybe skip the Borax just to be on the safe side…

Soak your sponge or cloth, or heavily spray your solution on all sides of the fabric you’re cleaning.

Rinse the solution out with a hose at high pressure. 

Let the cushions dry in direct sunlight.

Spray your cushions/rug with fabric protector before they are completely dry.

We’re here to help

Canadian Home Leisure offers a wide variety of outdoor patio furniture that comes in many different materials and fabrics. If you’re ever unsure about how to clean patio furniture, we’re here to help. Don’t hesitate to send us a message or call us to answer any questions you might have.

The post How To Clean Outdoor Patio Furniture: A Guide on Best Practices first appeared on Canadian Home Leisure.

source https://canadianhomeleisure.ca/how-to-clean-patio-furniture/

Tuesday, February 4, 2025

Hot Tub After a Workout? The Science Behind Post-Exercise Soaking

The allure of slipping into a hot tub after an intense workout is undeniable. While many athletes swear by their post-exercise soak, timing your hot tub session correctly can make the difference between helping and hindering your recovery. Let’s dive into the science behind hot tub use and exercise to optimize your results.

The Immediate Post-Workout Window: Why Waiting Matters

Your body’s core temperature rises significantly during exercise. Immersing yourself in hot water while already heated can strain your cardiovascular system, leading to dizziness and potential health risks. The smart approach is to wait until your body temperature and heart rate return to baseline – typically 30-60 minutes after exercise.

Pre-Workout Soaking: A Strategic Approach

While hot tub before workout sessions might seem counterintuitive, brief pre-exercise soaks can actually enhance performance. A 5-10 minute immersion increases blood flow and primes your muscles for activity. This is particularly beneficial in cold weather, where warm muscles can help prevent injury and improve overall performance.

Benefits of pre-workout soaking include:

  • Increased blood flow and flexibility
  • Reduced risk of cold-weather injuries
  • Enhanced warm-up effectiveness
  • Improved range of motion

Optimal Timing Chart:

CopyTime Period   | Duration | Temperature | Notes
-------------|----------|-------------|------------------------
Pre-Workout   | 5-10 min | 100-102°F   | Light soak, focus on warmup
Post-Workout  | None     | N/A         | Wait 30-60 minutes
Recovery Soak | 15-20 min| 102-104°F   | Focus on major muscle groups

Game Day Considerations

The question “Is hot tub good before a game?” requires careful consideration. A brief morning soak can help prepare your body, but timing is crucial. Athletes should complete any hot tub session at least three hours before competition to ensure optimal performance.

The Recovery Timeline: When to Take the Plunge

For hot tub muscle recovery, following a structured approach maximizes benefits while minimizing risks. After your workout, focus first on cooling down and rehydrating. Once your body temperature normalizes, a therapeutic soak can help reduce muscle tension and promote recovery.

The professional athlete’s contrast therapy approach has shown impressive results:

  1. Begin with a cold plunge (55°F for 1-2 minutes)
  2. Transition to hot tub (102°F for 3-4 minutes)
  3. Repeat cycle 3-4 times
  4. Finish with cold exposure
hot tub after a workout

Hydration: The Critical Factor

Whether choosing hot tub before or after workout, hydration demands special attention. Your body loses fluids through both exercise and soaking, creating a compounded effect. Keep water readily available during your soak and consider sports drinks to replenish electrolytes, especially after intense training sessions.

Key hydration points:

  • Drink 16-20 oz water before soaking
  • Keep water within reach during your session
  • Monitor urine color as a hydration indicator
  • Replace fluids consistently post-soak

Sports-Specific Considerations

The impact of hot tub therapy varies by sport and training intensity. Endurance athletes might benefit from longer recovery soaks, while power athletes should focus on shorter, targeted sessions. Understanding your sport’s specific demands helps optimize your hot tub routine for maximum benefit.

Common Questions Answered

Does a hot tub help muscle recovery? The evidence strongly supports hot tub use for muscle recovery when properly timed. The combination of heat and hydrostatic pressure helps reduce muscle tension and promote blood flow to damaged tissues.

The benefits of hot tub after workout extend beyond just muscle recovery. Regular, well-timed sessions can improve sleep quality, reduce stress, and enhance overall recovery. The key lies in respecting the waiting period and listening to your body’s signals.

700 series hybrid beachcomber
View all Beachcomber sizes

Pro Tips for Optimal Results:

  • Start with shorter sessions to gauge your body’s response
  • Position jets strategically against major muscle groups
  • Maintain consistent water temperature
  • Exit immediately if feeling lightheaded or uncomfortable

Remember: The key to successful hot tub therapy isn’t just about timing – it’s about understanding your body’s needs and responding appropriately. Whether you’re an athlete looking to optimize performance or simply seeking better recovery, strategic hot tub use can be a valuable addition to your fitness routine.take should increase, so losing fluids through your pours is counterproductive. Rather than kicking back in the hot tub, spend time drinking water and cooling down.

The Cool-Plunge-Hot-Tub Dance

CorePerformance.com suggests jumping into 55-degree (Fahrenheit) water following a workout. At this temperature, muscle inflammation decreases. After only a few minutes, you can slip into the hot tub to stimulate blood flow and aid in muscle recovery. Repeating this process makes for a great post-workout wind-down routine.

If you do not own a pool, then you can emulate this process by taking a cold shower prior to entering the hot tub. Showering then using a sauna can have a similar effect. It’s actually common practice in many health centres and gyms.

The post Hot Tub After a Workout? The Science Behind Post-Exercise Soaking first appeared on Canadian Home Leisure.

source https://canadianhomeleisure.ca/should-you-hot-tub-after-workout/

Spills in the Spa: A Canadian’s Guide to Hot Tub Damage Control

Owning a hot tub gives you an excuse to host get-togethers with friends and family. Unless you adopt a no-food-or-drink policy, you can expect the occasional spill. After all, heat exacerbates the effects of alcohol, meaning your guests will get clumsier.

Spills, Splashes, and Survival: Your Hot Tub’s Liquid Encounters

That heart-stopping moment when a drink tips over into your hot tub isn’t actually the disaster it seems. While watching that beer, wine, or cocktail mix with your carefully balanced water might make you cringe, your tub’s filtration system is more resilient than you’d expect.

Most common beverages pose minimal risk to your hot tub’s chemistry:

  • Beer quickly loses its carbonation and contains minimal yeast
  • Wine is primarily water with some natural compounds
  • Clear spirits evaporate rapidly and leave little trace

The real troublemakers are those tropical concoctions and sugary cocktails. These drinks create an entirely different scenario, often leaving behind a rainbow sheen of fruit oils and syrup that floats on the surface. While it looks concerning, this floating film is more of an aesthetic issue than a mechanical one. However, you’ll want to address it promptly to prevent any potential filter clogging.

Recovery Action Plan

When dealing with a standard spill, recovery is straightforward. Start by removing any solid debris like fruit slices or garnishes, then run your jets for about 15 minutes to help disperse the liquid. The next day, add a modest shock treatment – about half your usual dose should suffice. Test your water after a few hours to ensure everything’s balanced.

For those more challenging fruity cocktail spills, you’ll need to:

  • Clear the tub temporarily
  • Skim the surface while the oils are still floating
  • Apply an enzyme treatment if available
  • Consider a partial drain and refill in severe cases

Prevention is always easier than cleanup.

Smart placement of drinks and proper equipment can save you from most spill scenarios. Consider investing in stable cup holders that attach to the tub’s edge, and stick to sturdy plastic drinkware. Keep beverages a reasonable distance from the water, and maybe reconsider serving anything that looks like it belongs in a tiki bar.

Your hot tub can handle the occasional spill without requiring a complete drain and refill. The key is prompt attention and understanding that different beverages require different responses. Just keep those test strips handy, maintain your sense of humor, and remember that someday this will make for a funny story at your next gathering.

Romantic hot tub setting with potential for spills in the spa
View our 2-Person Hot tub or The Whole Beachcomber Lineup

Do You Need to Empty the Tub after a Little Spill?

Thankfully, dropping beer or wine into the hot tub does not necessitate a total draining.

Considering the small volume of liquid in a drink, a quick shock the next day should rebalance the chemical levels.

That said, fruity drinks may call for a temporary evacuation, as it will float and froth on the surface. Besides looking gross, it won’t do much harm.

When Glass and Hot Tubs Collide: A Serious Safety Concern

The most dangerous party foul in hot tub history isn’t spilling your drink – it’s dropping the container it came in. Broken glass in a hot tub creates a particularly treacherous situation that demands immediate attention and thorough action.

Understanding the risks is crucial. Water’s refractive properties make glass shards nearly invisible once submerged, creating a hazardous environment for unsuspecting bathers. Hot tub jets complicate the situation further, as they can:

  • Propel glass fragments throughout the tub at high speeds
  • Force shards into hard-to-reach corners and crevices
  • Push pieces into the filtration system
  • Create a circulation pattern that keeps glass suspended

The potential for injury is significant and varied:

  • Deep cuts requiring medical attention
  • Small, hard-to-detect punctures
  • Embedded glass fragments in feet, legs, or other body parts
  • Possible damage to expensive pump components

The Only Real Solution

Unfortunately, when glass breaks in your hot tub, there’s only one safe approach – a complete drain and thorough cleaning. Here’s why partial measures don’t work:

The combination of moving water, multiple jets, and various recessed areas makes it impossible to guarantee you’ve removed all glass fragments without emptying the tub completely. Even a tiny shard left behind can cause serious injury or damage to your filtration system.

Prevention Protocol Establishing strict rules about glassware around your hot tub isn’t being uptight – it’s being smart. Keep a supply of:

  • Plastic cups
  • Acrylic wine glasses
  • Insulated drink holders
  • Non-breakable serving containers

Smart hot tub owners know that a “no glass” policy isn’t just a suggestion – it’s an investment in safety and peace of mind. After all, nobody wants to end their evening with an emergency drain or, worse, a trip to the emergency room.

Remember: If glass does break in your tub, immediately shut off all jets and safely evacuate all bathers. It’s better to end the party early than risk injury or expensive damage to your tub’s components.

two women drinking in the hot tub

A Word About Drinking in the Hot Tub…

Look, we know what we’re about up here in Canada. When it’s -30°C outside and your hot tub is steaming like a maple syrup kettle, there’s nothing quite like a cold brew or ice wine to complete the experience. It’s practically a national pastime, right up there with apologizing and debating the best Tim Hortons order.

However, even we hardy Canucks need to acknowledge some realities. That beautiful contrast between the freezing air and hot water is already doing a number on your system, and adding alcohol into the mix is like trying to play hockey without a helmet – technically possible, but not the smartest game plan.

Here’s how we typically handle it:

  • Keep your drinks in insulated holders (nobody likes warm beer or frozen fingers)
  • Make sure you’ve got a designated hot tub spotter who’s sticking to Sprite
  • Time your soaks – we recommend 15-20 minutes, then a quick cool-down break
  • Have some water between drinks, eh? You’re already sweating like a snowman in July

Play fair and PLAY SAFE!!

The post Spills in the Spa: A Canadian’s Guide to Hot Tub Damage Control first appeared on Canadian Home Leisure.

source https://canadianhomeleisure.ca/spills-in-the-spa/

Friday, January 10, 2025

How to Clean a Shuffleboard in 3 Minutes: Master Shuffleboard Players Hate This

Keeping your shuffleboard table clean is key to enjoying countless hours of smooth sliding and friendly competition. A well-maintained table ensures pucks glide effortlessly and scores remain accurate. Ready to learn how to clean a shuffleboard table? The quick answer is this: start by dusting the surface with a microfibre cloth, then apply a specialized shuffleboard cleaner and buff it gently with a soft towel.

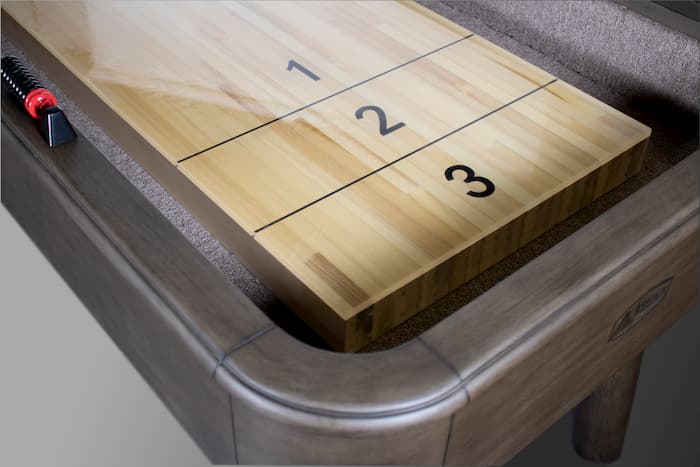
Close up of the collins shuffleboard "How to clean a shuffleboard"

The process is simple but important. Regular cleaning prevents the dirt, dust, and old wax buildup that can affect gameplay. It also helps protect the wood surface from damage over time.

A clean shuffleboard table not only looks great but also performs better. With proper care, your table will provide years of fun for family and friends. Whether you’re a casual player or a serious competitor, a clean table is the foundation for an enjoyable shuffleboard experience.

Preparation for Cleaning

Get ready for a thrilling journey into the world of shuffleboard maintenance. Like a knight preparing for battle, you’ll arm yourself with the right tools and knowledge to face any grime that dares to tarnish your beloved table.

Gathering the Right Supplies

First, gather your cleaning arsenal. You’ll need:

• Silicone spray • Shuffleboard wax • Multi-purpose cleaner • Shuffleboard brush • Soft cloths • Vacuum cleaner (optional)

These items are your trusty companions on this cleaning quest. The silicone spray acts as a shield, protecting the table’s surface. Shuffleboard wax is like magic dust, making the pucks glide smoothly. The multi-purpose cleaner is your potion for banishing dirt. Lastly, the shuffleboard brush is your mighty sword, sweeping away debris.

Assessing Your Table’s Condition

Now, it’s time to size up your opponent. Look closely at the table’s surface. Are there visible marks or scratches? Is there a build-up of old wax? Check the gutters and edges for dust and debris. This step is like scouting the battlefield before the big fight.

Feel the surface with your hand. Is it smooth or rough? Are there any sticky spots? These clues will guide your cleaning strategy. Remember, each table is unique and may need special care. By understanding your table’s condition, you’ll be better prepared to tackle the cleaning process head-on.

Routine Cleaning and Maintenance

Keeping a shuffleboard table clean is key to its performance and longevity. Regular upkeep prevents issues and ensures smooth gameplay.

General Cleaning Procedure

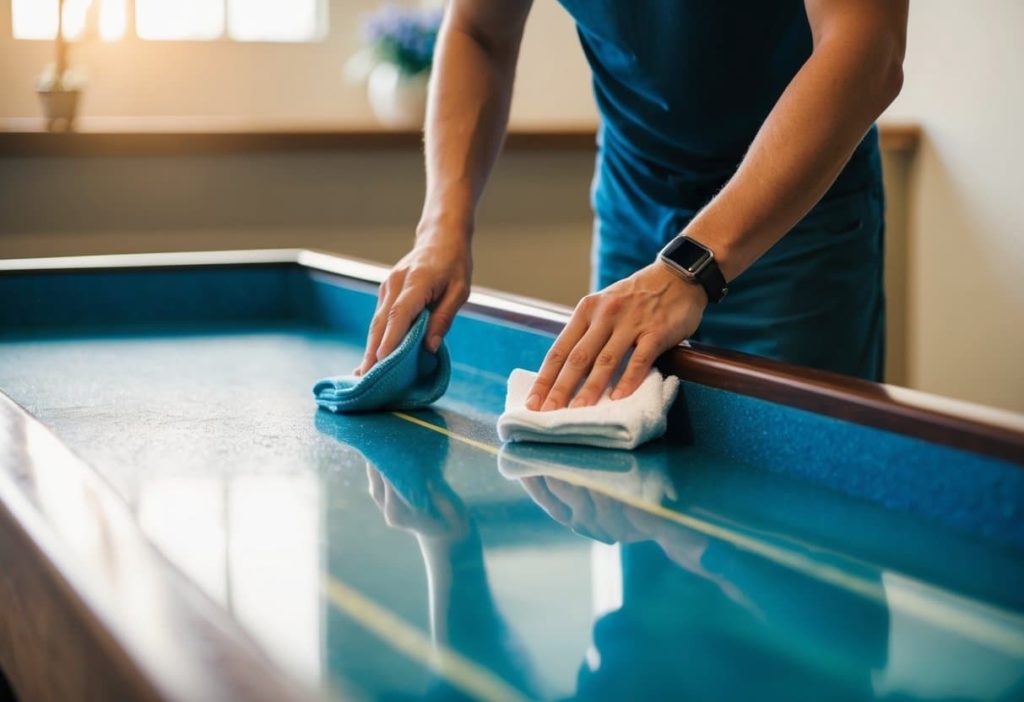
Start by gathering your cleaning supplies. You’ll need a soft microfiber cloth, a spray bottle with water, and mild dish soap. Mix a tiny squirt of soap with water in the bottle.

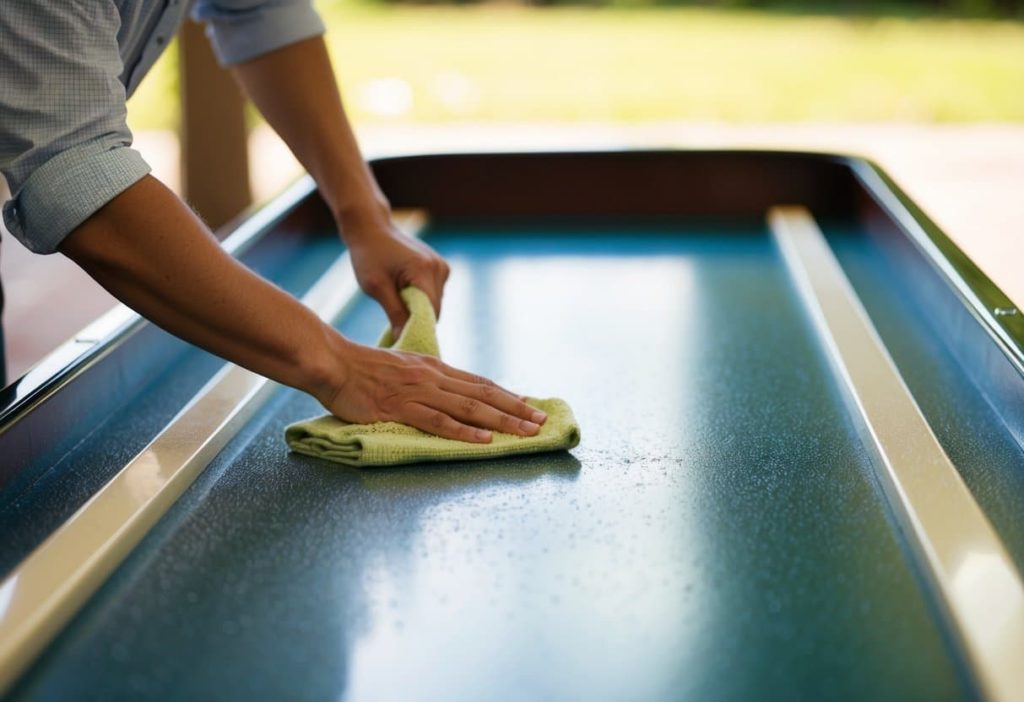
Spray the solution lightly on the table surface. Don’t soak it – a little goes a long way. Wipe the table gently with the cloth, moving from one end to the other.

For stubborn marks, use a bit more elbow grease. But be careful not to scrub too hard. You don’t want to damage the finish.

Once you’ve cleaned the whole surface, grab a dry cloth. Wipe the table again to remove any leftover moisture. A dry table is a happy table!

Removing Dust and Debris

Dust bunnies beware – it’s time for their eviction! Grab a soft-bristled brush or a clean, dry microfiber cloth. Sweep or wipe the table surface gently.

Pay extra attention to the gutters. They’re like dust magnets. A small brush can help get into these tight spots.

For pesky bits that won’t budge, try a can of compressed air. It’s like giving your table a mini hurricane – minus the property damage.

Don’t forget the sides and legs of the table. Dust likes to settle there too. A quick wipe-down keeps everything spick and span.

Regular dusting is like a spa day for your shuffleboard. It keeps the playing surface smooth and prevents buildup. Your pucks will thank you for the VIP treatment!

Performance Optimization

Proper maintenance and adjustments are key to a shuffleboard table’s optimal performance. These steps can significantly improve gameplay and extend the table’s lifespan.

Waxing and Silicone Application

Waxing and silicone application are crucial for a smooth playing surface. A thin layer of silicone spray creates a slick surface, allowing pucks to glide effortlessly. Speed powder, also known as shuffleboard wax, further enhances this effect.

Players should apply silicone spray evenly across the table. They can use a clean cloth to spread it uniformly. After the spray dries, they should sprinkle speed powder lightly over the surface.

Too much wax can slow pucks down, while too little may cause them to stick. Finding the right balance is essential for ideal gameplay.

Adjusting for Climate

Climate plays a big role in shuffleboard table performance. Humidity and temperature changes can affect the playing surface.

A climate adjuster helps maintain the table’s flatness. It compensates for warping caused by moisture or heat. Players should check and adjust it regularly, especially during seasonal changes.

In humid areas, dehumidifiers can help protect the table. For dry climates, a humidifier may be necessary to prevent the wood from cracking.

Keeping the room temperature stable also helps. Sudden temperature shifts can cause the table to expand or contract, affecting gameplay.

Improving Puck Glide

Smooth puck glide is vital for enjoyable shuffleboard games. Regular cleaning and maintenance can greatly improve this aspect.

Players should clean pucks after each use. Any dirt or debris can hinder their movement. A soft cloth and mild cleaner work well for this task.

Checking pucks for damage is also important. Scratches or chips can affect their glide. Replace damaged pucks to ensure fair play.

The table’s levelling is another factor. Use a level tool to check for any unevenness. Adjust the legs as needed to create a perfectly flat surface.

Protecting Your Shuffleboard Table

how to clean a shuffleboard is part of shuffleboard maintenance

Proper care and protection are key to keeping a shuffleboard table in top shape. Regular upkeep helps maintain its smooth surface and extends its lifespan.

Utilizing Furniture Wax and Polish

Furniture wax and polish play a big role in protecting shuffleboard tables. A thin layer of wax helps guard the surface from scratches and wear. It’s best to use a high-quality paste wax made for wood.

Apply the wax in small circles using a soft cloth. Let it dry for about 15 minutes, then buff it with a clean cloth. This creates a smooth, shiny finish.

Some players prefer liquid polish over wax. Polish is easier to apply but may not last as long. It’s a good choice for quick touch-ups between games.

Long-Term Maintenance and Protection

Long-term care keeps shuffleboard tables in prime condition. A polymer finish can add an extra layer of protection to the wood surface. This clear coat helps prevent damage from spills and heavy use.

Reapply the polymer finish every few years, or when the surface starts to look worn. Clean the table well before adding a new coat. Follow the maker’s instructions for the best results.

Cover the table when it’s not in use. This guards against dust, sun damage, and accidental spills. A fitted cover works best, but a clean sheet can do in a pinch.

Check the table’s legs and frame often. Tighten any loose screws or bolts. This keeps the table stable and level, which is key for fair play.

Special Considerations for Outdoor Shuffleboard

Outdoor shuffleboard tables face unique challenges. Weather can damage the playing surface and equipment. Regular cleaning is extra important for these tables.

Sun exposure can fade and crack the table’s finish. Use a cover when the table isn’t in use. This protects it from sun and rain.

Moisture is a big concern for outdoor tables. Wipe up any water right away to prevent warping. Check the table often for signs of mould or mildew.

Leaves and dirt can scratch the surface. Sweep the table before each game. Use a soft-bristled broom to avoid damaging the finish.

Choose cleaning products made for outdoor use. They’re tougher on grime and can stand up to the elements. Always test cleaners on a small area first.

Apply a fresh coat of silicone spray after cleaning. This helps the pucks glide smoothly. It also adds a layer of protection against moisture.

Store playing equipment indoors when not in use. This keeps pucks and cues in good shape. It also prevents them from becoming projectiles in strong winds.

Consider bringing the table inside during harsh winters. If that’s not possible, use a heavy-duty cover designed for outdoor shuffleboard tables.

Troubleshooting Common Issues

Keeping a shuffleboard table in top shape can be tricky. A few common problems often crop up, but they’re easy to fix with the right know-how.

Dealing with Sticky Surfaces

A sticky shuffleboard surface makes for a frustrating game. Dust and dirt are often the culprits. A quick clean with a microfibre cloth can work wonders. For tougher grime, try a specialized shuffleboard cleaner.

If the stickiness persists, the silicone spray may have worn off. Apply a fresh coat of silicone spray. Be sure to let it dry fully before playing.

Temperature changes can also cause stickiness. Keep the table in a room with steady temperature and humidity.

Addressing Climate Adjuster Problems

Climate adjusters help keep the table flat. If they’re not working right, the game suffers.

Check if all adjusters are at the same height. Uneven adjusters can warp the playing surface. Use a level to make sure the table is flat.

Loose adjusters are another common issue. Tighten them with a wrench, but be gentle to avoid damage.

If adjusters won’t budge, they might be stuck. A drop of lubricant can often free them up.

Resolving Puck-Related Problems

Puck glide is key to a good game. If pucks aren’t sliding smoothly, the problem might be the pucks themselves.

Check pucks for chips or cracks. Even small damage can affect their slide. Replace any damaged pucks.

Dirty pucks can also cause issues. Clean them with a soft cloth and mild soap. Dry them well before use.

If pucks are sliding too fast or slow, the problem might be the playing surface. Make sure it’s clean and properly waxed.

Remember, regular care prevents most puck problems. Store pucks in a clean, dry place when not in use.

Frequently Asked Questions

Proper care and maintenance are key for keeping a shuffleboard table in top shape. Common issues can often be solved with the right cleaning methods and products.

What are the steps for maintaining a shuffleboard table?

Regular upkeep is crucial. Dust the table daily with a soft cloth. Clean the surface weekly with a mild cleaner. Apply shuffleboard wax monthly. Check the climatic adjusters every few months to keep the table level.

Can vinegar be used to clean a shuffleboard surface?

Vinegar is not recommended for cleaning shuffleboard tables. It’s too acidic and can damage the playing surface. Stick to cleaners made for shuffleboards or a mix of warm water and mild dish soap.

What are common solutions if shuffleboard pucks aren’t sliding properly?

Poor puck sliding is often due to dirt or lack of wax. Clean the table thoroughly. Apply a fresh coat of shuffleboard wax. Make sure the table is level. Check the pucks for damage or wear.

Is it safe to apply silicone spray to a shuffleboard table?

Silicone spray is not safe for shuffleboard tables. It can damage the playing surface and affect gameplay. Use only products made for shuffleboards, like shuffleboard wax or powder.

How should one go about restoring an old shuffleboard table?

Start by cleaning the table thoroughly. Sand the surface lightly to remove scratches. Apply several thin coats of shuffleboard finish. Let each coat dry fully. End with a coat of shuffleboard wax.

What’s the proper way to disassemble a shuffleboard table for moving or repair?

Remove the scoreboard and legs first. Take off the side rails. Lift the playing surface carefully – it’s heavy, so get help. Wrap all parts in blankets or bubble wrap. Label each piece for easy reassembly later.

Clean Your Shuffleboard Table with a Water-Based Oil and Vinegar Solution

To prep your table for polishing and waxing, you first need to remove any dust and debris from the surface. The product you use to clean the board depends on its material.

  • Wood finishes require water and vinegar mixtures to draw out dirt from the pours. Adding a drop of oil lubricates the wood and prevents cracking and splintering. Wooden furniture polish can enhance the look of wooden tables, too.
  • Polymer finishes are easiest to clean; you can use most glass and multi-purpose cleaners. Alternatively, a damp rag can do the trick.
  • Lacquer finishes work well with ordinary furniture wax and polish. The cleaning instructions on the bottle apply.

Clean your table when you first setup it up! After the initial clean, you can get away with buffing and polishing a few times each month. A nice table cover can reduce the amount of work spent on this step, too.

Spray Silicone and Distribute Wax Powder Evenly along the Table

Periodically, you may wish to wax the table after cleaning it. Doing so maintains a smooth, even feel and protects the table from scratches and grooves. Apply this wax with a soft towel and let it sit for several minutes before spraying.

To a dry table, apply silicon spray purchased from your local billiards store. Mist the table evenly, letting it dry for a minimum of five minutes before dusting with wax. Once ready, sprinkle the wax powder over the shuffleboard for slick, accurate gameplay. Make sure to use wide sweeping motions to prevent clumping.

The post How to Clean a Shuffleboard in 3 Minutes: Master Shuffleboard Players Hate This first appeared on Canadian Home Leisure.

source https://canadianhomeleisure.ca/how-to-clean-shuffleboard-table/

Tuesday, December 10, 2024

Best Pool Table Felt Colours: Top Picks for Billiards Tables

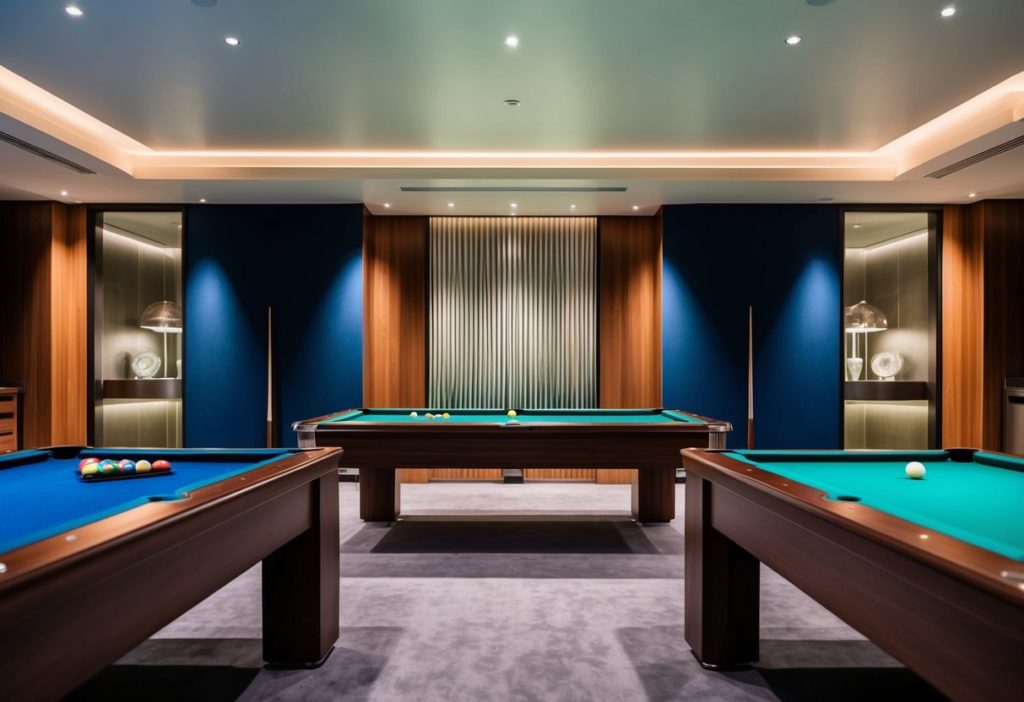
Pool table felt colours can greatly impact the look and feel of your game room. The right colour choice adds style and sets the mood for exciting matches.

The best pool table felt colours are often green, blue, red, or grey, but personal preference plays a key role. Some players like classic green for its traditional look. Others prefer bold reds or blues to make a statement. Grey is a trendy option that fits well in modern spaces.

Which Color Billiards Felt Should You Choose?

5 different colours of billiard felt to choose from in the Elle II pool table
For more options for billiard tables click here

Billiards Forum recently ran a poll, asking its users which colour felt they preferred. An overwhelming majority settled on green and blue. Combined, these colours accounted for 99% of responses.

And rightfully so.

For ages, tables have sported royal green felts. Only in the last few years has Blue gained traction in halls and tournaments.

Both green and blue are believed to strain the eyes less than louder colours like red. True or not, the colour you choose should come down to preference—things like material and installation matter more to gameplay and durability.

Remember that the felt laid is never permanent. Most tables need resurfacing after a while. Nevertheless, you can preserve your felt by brushing and cloaking it regularly.

Factors When Choosing Billiards Felt

Reflectivity

The colour of a billiard table changes its sheen. Dark colours tend to downplay shadows, but they also reduce visibility and affect our ability to visualize angles. Light colours promise the best balance—soft, even lighting. Arguably, gray beats out all other colours regarding such criteria.

Thickness

The thickness of the felt affects how the ball rolls. The thicker the felt, the less the slate impacts speed and directness. For expensive concrete slate tables, thin felts are best. Similarly, the coarseness of the fabric determines the maximum rolling distance. Thick, sticky felt absorbs too much momentum.

Coordination

Although some colours are more popular than others, not every colour will jive with your décor. Before picking a felt, consider the primary colours of your home. Neutrals not only promise the greatest visibility, but they complement most paints and furniture.

When picking a felt colour, think about the room’s decor and lighting. The felt should blend with the space while still standing out as a focal point. In the end, the best colour is one that makes you happy and eager to play.

Understanding Pool Table Felt

Pool table felt is a key part of the game. It affects how balls move and how players perform. The right felt can make a big difference in gameplay.

Material and Quality

Pool table felt is often made from wool. Worsted wool is a top choice. It’s smooth and lets balls roll fast. Merino wool is another good option. It’s soft and durable.

High-quality felt lasts longer. It keeps its colour and shape well. Better felt means fewer wrinkles and less pilling. This helps balls move more smoothly.

Some felt blends include nylon. This can make the felt stronger. But it may change how the balls move. Pure wool is still the go-to for serious players.

Importance of Colour Selection

Felt colour affects more than looks. It can change how players see the balls. Some colours make it easier to spot balls. Others might be harder on the eyes.

Green is a classic choice. It’s easy on the eyes for long games. Blue is popular too. It can make the balls stand out more.

Darker colours like navy or burgundy look nice. But they might make it harder to see the balls. Bright colours can be fun but may be distracting.

The right colour can make players feel more at ease. This can lead to better play.

Popular Felt Colours in Billiards

Green and blue are the most common felt colours. They’re used in many tournaments. The Championship Tour Edition often uses a bright blue felt.

Here’s a list of popular felt colours:

  • Tournament Blue
  • Electric Blue
  • Forest Green
  • Championship Green
  • Burgundy
  • Camel
  • Grey

Some players prefer specific colours. Red felt is eye-catching but less common. Black felt looks sharp but can make play harder.

Light colours show chalk marks more. Dark colours can hide dirt better. The choice often comes down to personal taste and how the table will be used.

Aesthetics and Room Decor

pool table green

Pool table felt colour plays a big role in setting the mood and style of a game room. The right choice can tie the whole space together and make a strong visual impact.

Complementing Room Ambiance

Green felt is a classic choice that suits many spaces. It brings a traditional billiards hall feel to any room. For a modern look, grey or blue felt works well with sleek decor.

Dark colours like navy or burgundy create a rich, upscale vibe. They pair nicely with wood tones and leather furniture.

Light colours such as tan or cream brighten up dim rooms. They give a fresh, airy feel to the space.

Consider the room’s lighting when picking felt colour. Some shades may look different under various light types.

Expressing Personal Style with Felt

Bold felt colours let you show off your unique taste. Bright red or purple make eye-catching statements.

Sports fans might choose felt that matches their team colours. This creates a fun theme for the game room.

Nature lovers could opt for colours that mimic the outdoors. Sky blue or forest green bring a calming touch.

Think about how the felt colour fits with your other decor items. Art, rugs, and furniture should all work together.

Classic Versus Contemporary Themes

Green and red felt give a timeless look. They suit rooms with antique furniture or traditional styling.

For modern spaces, try sleek black or white felt. These create a clean, minimalist aesthetic.

Grey felt offers a nice middle ground. It works in both classic and contemporary settings.

Mixing old and new can be fun too. A bold felt colour can add flair to an otherwise traditional room.

Remember that felt colour affects gameplay too. Some players find certain colours easier to see the balls against.

Performance and Playability

pool table felt colours

The colour of the pool table felt affects both gameplay and visibility. Certain shades can impact a player’s ability to see balls clearly and judge shots accurately.

Impact of Colour on Gameplay

Dark green and blue felts are popular choices for their classic look and smooth playing surface. These colours provide good contrast with white cue balls and coloured object balls. Red felt can make it harder to see red balls, while black felt may cause eye strain during long games.

Light colours like tan or grey can make it tougher to judge ball speed and spin. However, they often show fewer chalk marks, keeping the table looking cleaner. Some players find lighter felts help them focus better on ball position and angles.

Visibility and Contrast Considerations

The best felt colour balances visibility and eye comfort. Electric blue offers high contrast and is easy on the eyes. Forest green provides a neutral backdrop that doesn’t compete with ball colours. Burgundy can add warmth while still allowing good ball visibility.

Good lighting is key for any felt colour. Bright, even light reduces shadows and glare. This helps players see clearly across the entire table surface. Some venues use slightly textured felt to cut down on glare from overhead lights.

For home tables, it’s smart to consider the room’s decor and lighting when picking felt colour. The goal is a pleasant playing experience that doesn’t strain eyes or distract from the game.

Colour Selection Based on Lighting

pool table colors

The right felt colour for your pool table depends greatly on the lighting in your room. Proper colour choices can boost visibility and enhance your playing experience.

Influence of Lighting Conditions

Lighting plays a big role in how the pool table felt looks. Bright rooms need different colours than dim spaces. Natural sunlight changes how felt appears during the day.

In sunny rooms, light colours like tan or light blue work well. They don’t fade as much in strong light. Darker rooms benefit from brighter felt shades. Vibrant greens or blues can make the table pop.

Some felt colours change under different lights. A felt that looks great in daylight might seem dull under artificial lighting. It’s smart to test felt samples in your room at different times of day.

Optimal Felt Colours for Various Lighting

Here’s a quick guide to felt colours for different lighting:

  • Bright rooms: Light blue, tan, grey
  • Dim rooms: Bright green, royal blue, red
  • Rooms with lots of windows: Forest green, navy blue
  • Rooms with warm lighting: Burgundy, dark green

For the best contrast, pick a felt colour that stands out from your balls. This makes it easier to see shots. Green is popular because it contrasts well with most ball colours.

In rooms with changing light, medium shades often work best. They look good in both bright and dim settings. Avoid very dark colours in poorly lit rooms, as they can make play harder.

Maintenance and Durability Considerations

felt for pool table

Pool table felt colour affects both upkeep and lifespan. Some hues need more care, while others stay fresh longer. Proper maintenance keeps any felt looking great.

Ease of Cleaning Different Colours

Light felt shows dirt and chalk marks easily. It needs frequent brushing and vacuuming. Dark colours like navy or green hide stains better. They don’t need cleaning as often.

Red and other bright shades may fade if cleaned too harshly. Gentle brushing works best for these. Neutral tones like grey or tan are forgiving. They tolerate regular cleaning without losing their look.

All felt needs care to avoid wear. Use a soft brush and low suction when vacuuming. Spot clean spills right away with a damp cloth. Don’t use harsh chemicals on any colour.

Longevity of Vibrant Versus Neutral Tones

Neutral colours like green and blue last longer. They don’t show fading as much over time. Bright reds and yellows may lose their pop faster. Sun exposure speeds up this process for all hues.

Dark felt can look worn sooner. It shows lint and dust more than light shades. But it hides ball marks better, which helps it look new longer.

Felt quality matters more than colour for durability. Good felt lasts years with proper care. Cheap felt wears out fast, no matter the hue. Pick a trusted brand for the best results.

Popular and Traditional Colour Choices

Pool table felt comes in many shades. Some colours have stood the test of time, while others are making a splash in modern game rooms. Let’s look at the top choices for pool table felt.

Trending Pool Table Felt Colours

Red felt is gaining fans in home game rooms. It adds a bold pop of colour and stands out from the crowd. Electric blue is another eye-catching choice that’s on the rise. It gives tables a modern, cool vibe.

Bright colours are becoming more common for home use. They can match room decor or show off the owner’s style. Some trendy options include:

  • Burgundy
  • Royal purple
  • Burnt orange
  • Sunny yellow

These fun shades can make a pool table the centre of attention at parties.

Time-Honoured Classics in Pool Table Felt

Green has been the top pick for pool tables for ages. It comes in different shades to suit all tastes. Classic green is a rich, deep tone that many players love. Tournament green is a bit brighter and is often used in competitions.

Dark green is another timeless option. It has a classy look that fits well in many settings. For a slightly different take on tradition, some prefer tournament blue. This colour is easy on the eyes during long games.

Snooker tables often sport a forest green felt. This shade has been used for over a century in professional play.

Customization Options

Pool table felt offers many ways to personalize your table. Players can add unique flair and style through custom designs and themes.

Personalized and Theme-Based Designs

Custom pool table felt allows players to create one-of-a-kind tables. Sports team logos are a popular choice, letting fans show their spirit. Some opt for favourite colours or patterns to match their game room decor.

Family crests or personal symbols can be added for a touch of class. Nature scenes like mountains or beaches bring the outdoors in. For a fun twist, cartoon characters or movie themes liven up the playing surface.

High-quality digital printing makes complex designs possible. The felt can feature realistic images or abstract art. Some companies even offer glow-in-the-dark options for a cool night-time effect.

Custom felt isn’t just about looks. Players can choose different materials for improved gameplay. Worsted wool offers fast, smooth roll. Nylon blends provide durability for heavy use.

Frequently Asked Questions

Pool table felt colours can impact gameplay and aesthetics. The right choice depends on personal preference and playing needs.

What is the most popular colour for pool table felt?

Green is the most popular colour for pool table felt. It’s a classic choice seen in many pool halls and home game rooms. Green felt gives tables a traditional look that many players enjoy.

Which colour of pool table felt is considered the best for visibility?

Blue felt is often seen as the best for ball visibility. It creates a good contrast with coloured balls, making them easy to see. This can help players line up shots more accurately.

How does one choose the right pool table felt colour?

Picking a felt colour depends on a few factors. Think about the room’s lighting and decor. Consider how often you’ll use the table. Your playing skill level matters too. Test different colours if possible before deciding.

What are the advantages of Tournament Blue felt for pool tables?

Tournament Blue offers good ball visibility. It reduces glare from overhead lights. This colour is often used in professional tournaments. It can make your home table feel more official.

What type of felt do professional pool players prefer?

Many pros like Simonis 860 cloth in Tournament Blue or green. This felt is known for its smooth, fast play. It’s durable and maintains its colour well over time. Some pros may have personal preferences for other colours too.

Are there any recommendations for pool table felt colours that reduce eyestrain?

Softer colours like light blue or grey can help reduce eyestrain. These hues are easier on the eyes during long playing sessions. They also work well in rooms with different lighting conditions.

The post Best Pool Table Felt Colours: Top Picks for Billiards Tables first appeared on Canadian Home Leisure.

source https://canadianhomeleisure.ca/pool-table-felt-colours/

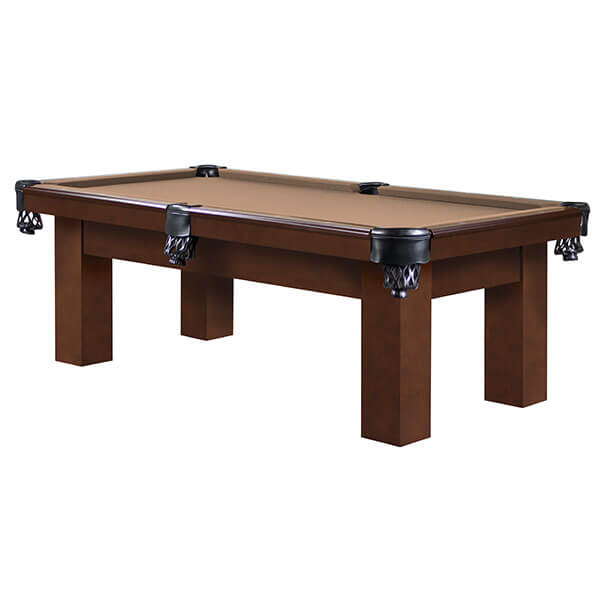
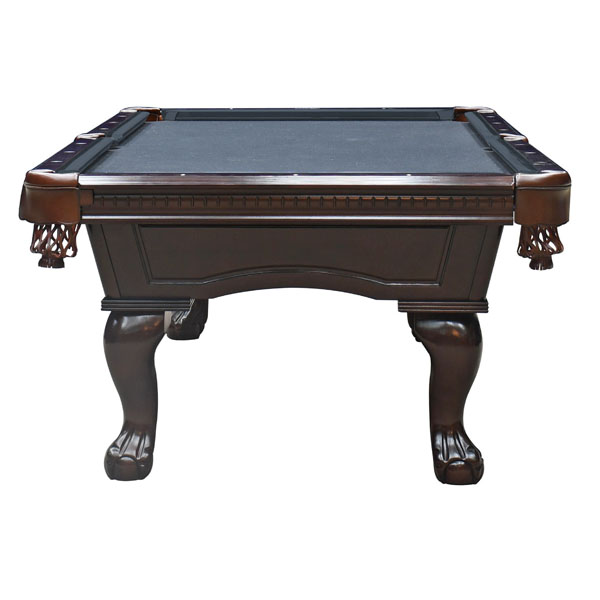
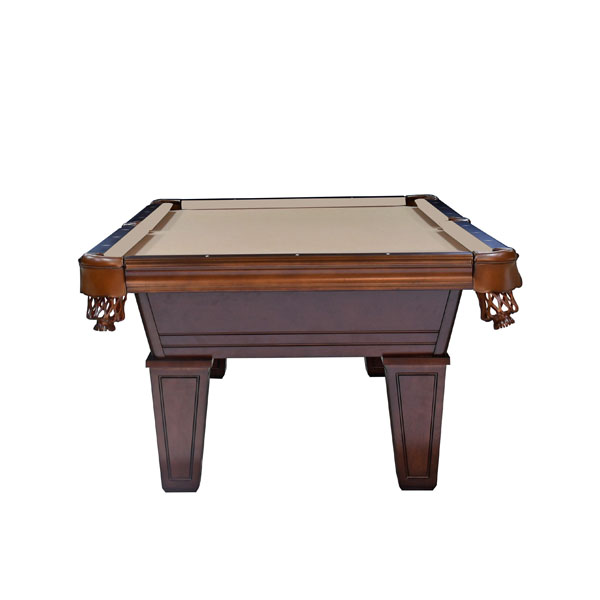
The Slate Top Pool Table: Premium Choice for Serious Players

Slate top pool tables offer a unique blend of style and performance. These tables feature a smooth playing surface made from genuine slate, prized for its flatness and consistency. Slate pool tables provide unmatched stability and precision for serious players and casual enthusiasts alike.

A slate pool table with colourful balls and a cue stick

The durability of slate tops sets them apart from other materials. They resist warping and maintain their shape over time, ensuring a level playing field for years to come. This longevity makes slate top tables a smart investment for home game rooms or commercial settings.

Beyond their practical benefits, slate top pool tables add a touch of elegance to any space. The natural stone appearance complements various decor styles, from classic to modern. With proper care, these tables can become cherished centrepieces for generations of family fun and friendly competition.

Benefits of Slate Top Pool Tables

Slate-top pool tables offer top-notch performance and quality for billiards enthusiasts. These tables provide a superior playing experience and stand the test of time.

Precision and Consistent Play

Slate pool tables deliver unmatched accuracy for professional-level play. The fine-grained rock creates an incredibly flat surface. This ensures balls roll true without unexpected deviations. Players can count on consistent ball movement across the entire table.

The level playing field allows for precise shot-making and strategy. Pros and amateurs alike benefit from the predictable nature of slate surfaces. This consistency lets players focus on improving their skills rather than adapting to table quirks.

Slate’s natural properties resist warping and maintain flatness over time. This stability preserves the table’s playability for years to come.

Longevity and Durability

Slate pool tables are built to last. The tough rock material can withstand decades of use without losing its shape or smoothness. With proper care, a slate table can remain in top condition for generations.

Regular cleaning and meticulous care help maintain the slate’s pristine surface. Unlike other materials, slate doesn’t absorb moisture or expand with temperature changes. This resistance to environmental factors keeps the playing surface true.

The durability of slate means less frequent repairs or replacements. While the initial cost may be higher, the long-term value is clear.

Enhanced Stability

Slate pool tables offer rock-solid stability during play. The hefty weight of the slate, combined with solid wood frames, creates a sturdy base. This stability is key for maintaining the table’s level and preventing unwanted movement.

The substantial mass of slate helps absorb vibrations and impacts. This results in quieter play and less ball bounce after shots. The improved flatness also means fewer dead spots or subtle slopes that can affect gameplay.

Stable tables allow players to lean or rest on the rails without disturbing the playing surface. This added convenience enhances the overall billiards experience.

Different Types of Slate Pool Tables

Slate pool tables come in various styles and sizes to fit different spaces and needs. These tables offer top-notch playing surfaces for billiards enthusiasts.

Standard vs. Outdoor Pool Tables

Standard slate pool tables are made for indoor use. They have a wood frame and a cloth-covered slate top. The slate is 1 inch thick for the best play. Outdoor tables use special materials to resist the weather. They have aluminum frames and waterproof surfaces. Some use Slatron, a fake slate that can handle rain and sun.

Black pool tables are popular for both indoor and outdoor use. They give a sleek look to any space.

Portable and Conversion Pool Tables

Portable pool tables can be moved easily. They often have folding legs and wheels. These tables are great for small homes or parties.

Conversion pool tables serve two roles. They can switch from a pool table to a dining table. A dining top covers the slate surface. This type is perfect for rooms that need to do double duty.

Size Variations: 7 Foot and 8 Foot Options

Pool tables come in different sizes. The most common are 7-foot and 8-foot tables.

7-foot tables:

  • Good for smaller rooms
  • Often used in pubs
  • Faster gameplay

8-foot tables:

  • More space for shots
  • Standard size for many homes
  • Better for learning proper technique

Special Features

Some pool tables have extra features to improve gameplay or ease of use.

Auto ball return systems send balls to a collection area after they’re pocketed. This saves time between games.

Custom cloth colours let players match their table to their decor.

Built-in storage for cues and balls keeps everything tidy.

LED lighting can be added to table pockets for a modern touch.

Selecting the Right Slate Pool Table

Choosing a slate pool table involves considering room size, materials, and potential multipurpose uses. These factors impact gameplay and overall enjoyment.

Considering Room Size and Game Play

Room size affects the pool table size you can fit. 7-foot tables work well in smaller spaces, while 8-foot tables are ideal for larger rooms. Measure your space carefully before buying.

Leave enough room around the table for players to move and use cues comfortably. A good rule is to add 5 feet to each side of the table for proper clearance.

Table size also impacts gameplay. Larger tables offer more challenges and are better for skilled players. Smaller tables can be easier for beginners and casual players.

Materials and Design Options

Slate is the top choice for pool table playing surfaces. It provides a smooth, level area that stays flat over time. Look for tables with at least a 1-inch thick slate for the best performance.

Table frames come in various materials like wood or metal. Wood offers a classic look, while metal can be more modern. Choose based on your style and budget.

Felt colour is another design choice. Green is traditional, but black felt is growing in popularity. Consider how the colour will match your room’s decor.

Pool Dining Tables for Multipurpose Use

Pool dining tables offer a smart solution for small spaces. These tables have a removable top that converts them from a pool table to a dining table.

When choosing a pool dining table, check the quality of both the pool and dining surfaces. The dining top should fit snugly and be sturdy enough for regular use.

Some pool dining tables come with matching benches or chairs. This creates a cohesive look and saves you from buying separate seating.

Installation and Maintenance

Setting up a slate-top pool table requires expertise and care. Proper installation and upkeep are key to enjoying your table for years to come.

Professional Installation for Optimal Play

A slate-top pool table needs expert setup. Pros have the tools and know-how to ensure a level surface. They’ll assemble the frame, place the slate, and secure it properly. The felt is then stretched tight to avoid wrinkles or bubbles.

Correct installation affects gameplay. A level table lets billiard balls roll true. Pros will test the roll and make adjustments. They’ll also set up accessories like the cue rack.

The process can take several hours. It’s not a DIY job. Trying to install it yourself might lead to problems. These could hurt your game or damage the table.

Routine Maintenance and Care

Regular cleaning keeps your table in top shape. Use a soft-bristled brush to sweep the felt. Do this weekly or after each use. This removes dust and chalk that can affect ball movement.

Vacuum the felt gently every month. Use a low-suction setting to avoid stretching the fabric. Wipe the rails and frame with a slightly damp cloth.

A quality cover protects your table when not in use. It keeps dust off and guards against spills. Remove the cover now and then to let the felt breathe.

Check for loose screws or bolts every few months. Tighten them if needed. This keeps the table stable and level.

Avoid eating or drinking near the table. Food crumbs and spills can stain or damage the felt.

Warranty and After-Sales Support

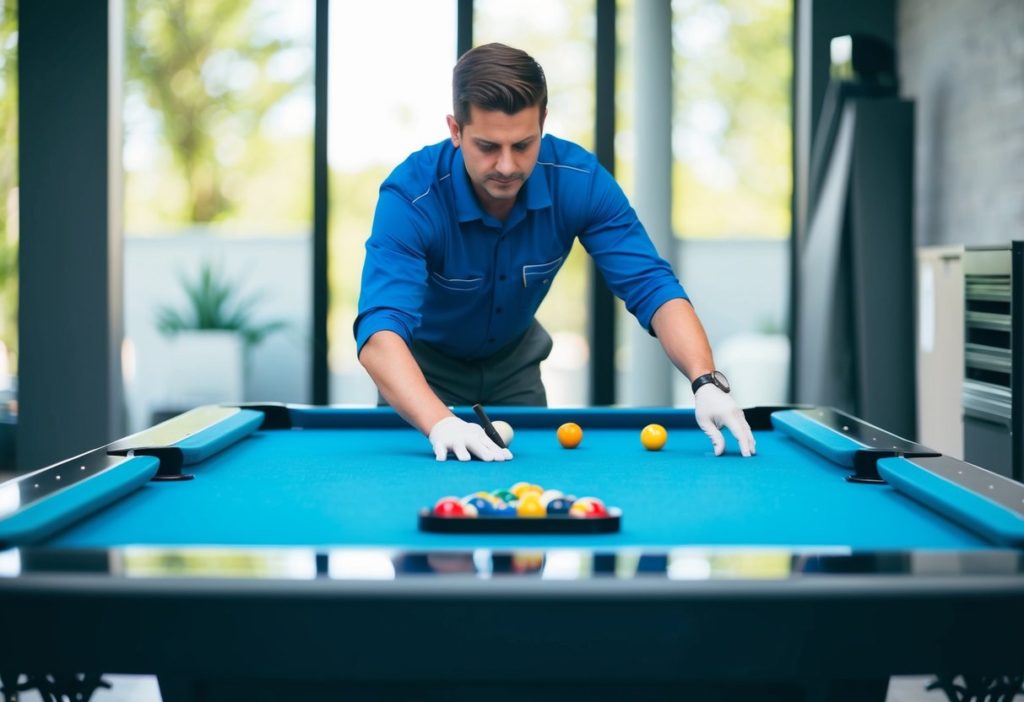
A pool table technician checking consistency of the playing area

Most slate top pool tables come with a warranty. The length and coverage can vary between manufacturers.

Typical warranties last 1 to 5 years. They often cover defects in materials and workmanship. This might include issues with the slate, frame, or pockets.

Some key points to look for in a warranty:

  • Length of Coverage
  • What’s included and excluded
  • How to make a claim
  • If it’s transferable to new owners

After-sales support is also important. Good companies offer help with:

  • Assembly instructions
  • Troubleshooting tips
  • Replacement parts
  • Repairs

It’s wise to check reviews about a company’s customer service. Fast response times and helpful staff can make a big difference if issues come up.

Some manufacturers have online resources. These might include videos, FAQs, and user forums. These can be handy for quick fixes or advice.

Keep all paperwork and proof of purchase. This helps if you need to use the warranty or get support later on.

Remember, proper care of your table can prevent many problems. Follow the maker’s guidelines for maintenance to keep your table in top shape.

Why Choose a Slate Top Pool Table?

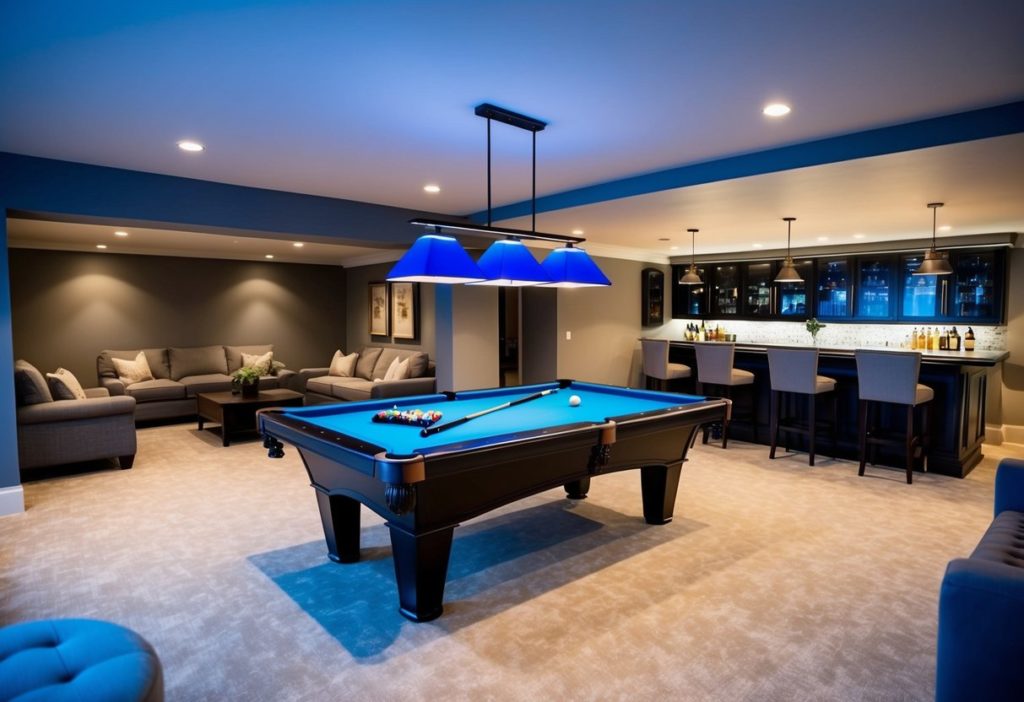
slate top table in sleek, well designed games room

Slate-top pool tables offer the best playing surface for serious billiards enthusiasts. They provide a smooth, flat surface that ensures accurate ball rolls and consistent gameplay.

Comparing Slate to Other Materials

Slate is the top choice for pool tables because of its unique properties. It’s dense, smooth, and doesn’t warp over time. Other materials like compressed wood or AccuSlate can’t match slate’s performance.

Compressed wood tables are cheaper but tend to sag or warp. This leads to uneven play and shorter table life. AccuSlate, a synthetic option, tries to mimic slate but falls short in feel and durability.

Slate tables stay flat and true for decades. They allow for precise shots and predictable ball movement. This is why pros and serious players always pick slate.

The Investment in Quality

A slate pool table costs more upfront but pays off in the long run. It’s a premium choice that lasts for generations with proper care.

The initial price might seem high, but slate tables hold their value well. They don’t need replacing every few years like cheaper options.

For home use, a slate table adds a touch of class to any game room. It’s not just a game; it’s a piece of furniture that can become a family heirloom.

In bars or pool halls, slate tables stand up to heavy use. They keep players coming back for the best possible game experience.

Brand Profiles

A sleek slate top pool table with the Brand Profiles logo prominently displayed

Slate pool tables offer premium playing surfaces for billiards enthusiasts. Two notable brands stand out for their quality and craftsmanship in this space.

Legacy Billiards Tables

Legacy Billiards creates top-notch slate pool tables known for their accurate ball movement. Their tables come in various sizes to fit different spaces. The company uses high-grade slate for smooth gameplay.

Legacy offers customization options for felt colour and wood finishes. This lets buyers match tables to their decor. The brand focuses on durability, using solid hardwoods in construction.

Assembly is straightforward with Legacy tables. Most models include detailed instructions and necessary tools. The brand provides good customer support for setup questions.

Regal Billards

Regal Billiards specializes in slate-top tables that blend style and function. Their designs range from classic to modern, suiting various tastes. The brand uses a three-piece slate for optimal levelling and play.

Regal tables feature precise pocket cuts for consistent ball drop. The rails use K66 rubber for true rebounds. This helps players improve their skills over time.

The brand offers tables in standard sizes like 7-foot and 8-foot options. They also make oversized models for larger game rooms. Regal’s tables often include accessories like cues and ball sets.

Frequently Asked Questions

Slate-top pool tables are popular choices for serious players and home game rooms. Let’s address some common questions about these high-quality tables.

How much does a slate-top pool table typically cost in Ontario?

Slate-top pool tables in Ontario usually range from $2,000 to $10,000. The price depends on size, brand, and features. Basic models start around $2,000, while custom designs can exceed $10,000.

What should I look for when buying a slate-top pool table?

Check the slate thickness, which should be at least 1 inch. Look for solid wood construction and sturdy legs. Make sure the felt is high-quality and properly stretched. Ask about warranty coverage and delivery options.

What are the benefits of choosing a slate pool table over a non-slate?

Slate tables offer better ball roll and consistency. They stay level over time and provide a professional playing experience. Slate tables are more durable and can last for decades with proper care.

How do I properly maintain a slate-top pool table?

Brush the felt regularly to remove dust and chalk. Use a cover when not in use. Keep the table level and avoid moving it often. Clean balls and cues after each use. Have a professional re-felt the table every few years.

Can slate pool tables be damaged by standing on them?

Yes, standing on a slate pool table can cause damage. The slate can crack or the frame may warp. Always use the table for playing pool only. Avoid placing heavy objects on the playing surface.

What are the weight considerations for installing a slate-top pool table?

Slate tables are very heavy, often weighing 700 to 1,000 pounds. Ensure your floor can support this weight. Ground floor or basement installations are best. Upstairs locations may need extra floor support.

best billiard table slate is represented by the Harpeth pool table by Legacy
This is the Harpeth Billiard Table. Browse the different styles of pool tables

Billiards tables come in many different sizes and appearances. Traditional tables have natural hardwood frames and green felts, while some modern designs boast grey and green felts with dark-painted frames. Likewise, you can find billiards tables in assorted sizes to fit all homes and spaces.

Which is the best type of slate pool table?

The Need for a Solid Frame

Regardless of the look, table composition changes between manufacturers, too. High-end tables consist mostly of hardwood. Consumer-grade tables mix in some softwood like plywood and particleboard.

The more solid the frame, the less maintenance and fewer repairs. Always, hardwood offers better stability—but this also depends on assembly.

Types of Billiards Slates Available

A billiards table needs a strong foundation to bear the weight of its slate. For professional tournaments, the only acceptable material is rock. The ball rolls accurately on concrete. It also promises the highest durability, stability, and straightness.

Slate comes in two weaker varieties: core and wood. Core combines both wood and concrete, whereas wood is simply plywood or particleboard.

The slate core often sags near the rails because of the weight and pressure applied by players. This affects how balls roll nearest the pockets. Slate wood—although susceptible to warping, too—poses a unique disadvantage. The roll of the ball itself is different, which aggrieves experienced players. This is due to how far the ball sinks into the wood and the resistance of the grain.

The minimum width of any slate is 1 inch. That said, the length differs as pure and core slates often come in as many as three pieces for easier portability. Consequently, such slates are harder to level. But when properly installed, the difference between a one and three-piece is undetectable. Slate wood often comes in a single piece, too, usually on smaller recreational tables.

The post The Slate Top Pool Table: Premium Choice for Serious Players first appeared on Canadian Home Leisure.

source https://canadianhomeleisure.ca/slate-top-pool-tables/

Hot Tub Leak Repair Tips for Fast, Permanent Fixes

A leaking hot tub doesn’t have to mean expensive service calls or weeks of downtime; you can often locate and fix the problem yoursel...