Candian Home Leisure is the leading provider of hot tubs, pool tables, patio furniture and all of your home leisure goods. Anything you need for your entertainment room can be found here!
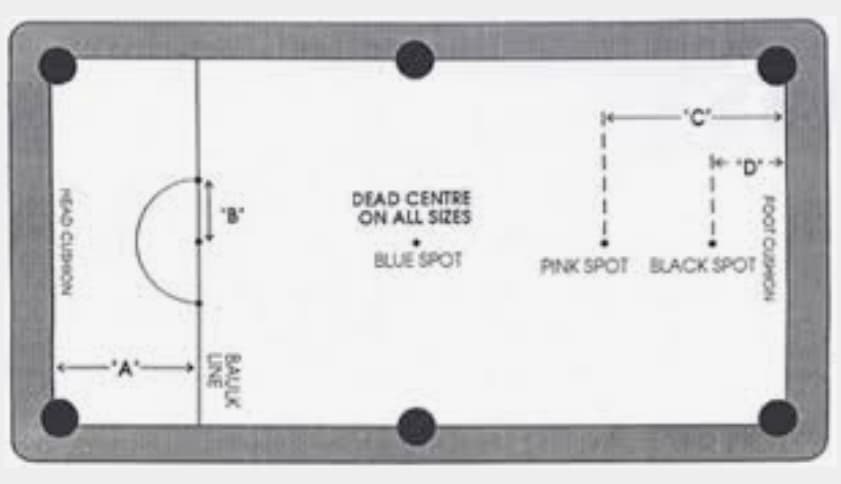
Some billiards tables come marked with spots and lines for popular games like pool and snooker. The markings on a snooker table allow for both gameplays—but not vice versa.
Want to Mark Your Own Lines on a Pool Table?
If you buy a virgin table, we recommend hiring a pro to decorate it. Doing it yourself with stickers and markers is difficult. A single slip can be costly and irreversible!
Whether or not you choose to mark the table yourself, you’ll need to understand a few terms.
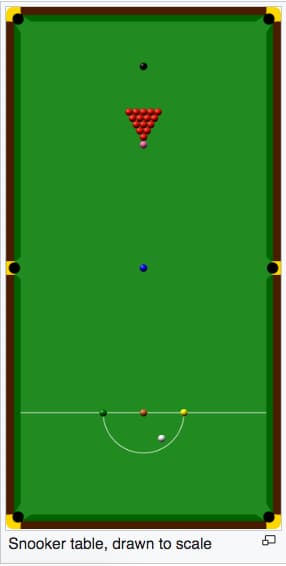
Figure: An illustrated snooker table, marked with the appropriate lines and spots. Image courtesy of Wikipedia.
Strings: Imaginary lines that divide the pool table into quadrants. One string runs lengthwise, touching the head and foot rains; one runs widthwise, connecting the two side pockets.
Spots: Marked points along the strings. Many tables have a single spot where the two primary strings intersect—the center.
Lines: Drawn lines that segment the table. The baulk line appears in most games, identifying the breaking boundary. For snooker, the “D” line connects with the baulk line, forming a semicircle near the head of the table.
Popular Billiards Line and Spot Placements
The game of pool requires a single spot – the apex. It lies halfway between the foot and the center of the table. It is plotted on the longest string.
Another way to calculate the apex is to imagine a string between a side pocket and the left or right foot pocket. Where this string intersects with the one running lengthwise marks the spot.
Other common spots include (see figure):
The pyramid for the pink snooker ball (23 inches from the foot);
The spot for the black snooker ball (1/11th of the length of the table from the foot rail);
The spot for the blue snooker ball (centered between the side pockets);
The spots for the yellow, green, and brown snooker balls are at each end of the “D” line and along its semicircle.
The balkline, behind which the player shoots, is at the head of the table. It runs widthwise at roughly one-fifth of the table’s length. This equals 21 ¾ inches from the headrail on a standard 4 ½ by the 9-foot table. Many tables only include the balk line and center point.
Pool balls get dirty over time. Chalk, oils, and grime build up on their surface. This can affect how they roll and interact on the table. Choose one of the options on how to clean pool balls to prolong your billiard equipment and step up your gameplay.
Clean pool balls improve game performance and the overall playing experience. Proper cleaning removes dirt and restores the balls’ original shine. This helps them move smoothly across the felt.
Regular cleaning keeps pool balls in top shape. It’s a simple task that makes a big difference. With the right method, anyone can keep their pool balls looking and performing like new.
The Basics About Pool Balls
Pool balls are key to the game of billiards. They come in different colours and numbers. The balls’ materials and how they get dirty affect their care.
Materials and Composition
Pool balls are made of phenolic resin. This material is tough and lasts a long time. It resists chips and cracks well. The balls are smooth and shiny when new. They weigh about 170 grams each.
Standard pool ball sets have 16 balls. There’s a white cue ball and 15 numbered balls. The numbered balls are in solid colours or stripes. Balls are 57 mm wide, give or take 0.127 mm.
Some cheap balls are made of polyester. These don’t last as long as phenolic resin balls. They can get marks more easily.
Common Causes of Dirt and Stains
Pool balls get dirty from normal play. Chalk from cue tips leaves marks on the balls. Players’ hands can leave oils on the surface. The felt on the table can also leave marks.
Drinks spilled on the table can stain balls. Food crumbs might stick to them too. Dust in the air settles on balls over time.
Improper storage can lead to dirt build-up. Balls left out might get extra dusty. Storing them in a damp place can cause mould spots.
Some cleaning products can harm pool balls. Harsh chemicals might dull the shine. They can also leave a film that attracts more dirt.
Preparing to Clean Pool Balls
Getting ready to clean your pool balls is simple. You’ll need a few basic items and a cleaning solution. Let’s go over what you need to do.
Gathering Your Materials
To clean pool balls, you’ll want these things:
A bucket or sink
Warm water
Mild dish soap
A microfiber cloth
A towel for drying
Make sure your sink or bucket is clean before you start. You don’t want to add dirt to the balls while cleaning them. The microfiber cloth is great for scrubbing without scratching. Pick a soft towel for drying to avoid leaving lint on the balls.
Creating the Cleaning Solution
Mix warm water with a small amount of mild dish soap. Don’t use harsh cleaners, as they might damage the balls. Here’s how to make the solution:
Fill a bucket or sink with warm water.
Add a few drops of mild dish soap.
Mix gently to create suds.
The water should feel warm to the touch, but not hot. Too much heat can harm the balls. Stir the water to spread the soap evenly. This mix will clean the balls without being too harsh on their surface.
Options on the Cleaning Process
Pool balls get dirty with regular use. There are several ways to clean them and restore their shine.
Use Billiard Ball Cleaner
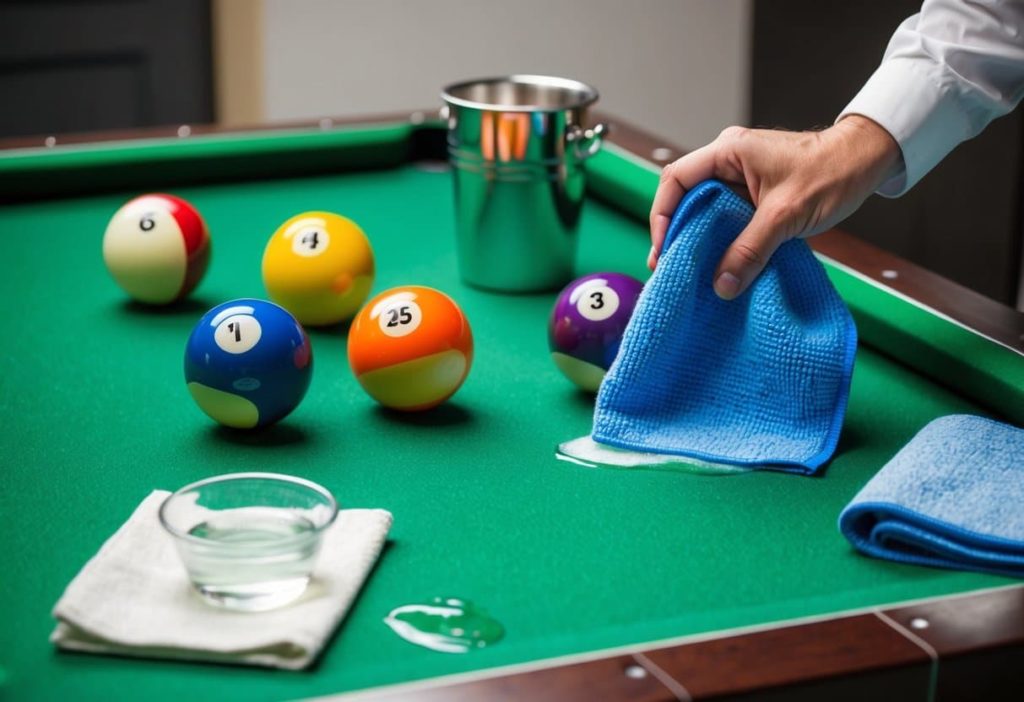
Billiard ball cleaner is made for this task. It’s easy to use and effective. Pour some cleaner onto a microfiber cloth. Rub each ball gently to remove dirt and oils. Wipe off any extra cleaner with a clean part of the cloth.
This method is quick and doesn’t need much effort. The cleaner helps remove tough stains and marks. It also leaves a protective layer on the balls. This can help them stay clean longer.
Make sure to follow the product instructions. Some cleaners may need to sit on the balls for a short time before wiping.
Hand Washing the Balls
Hand washing is a simple way to clean pool balls. Fill a bucket or sink with warm water and mild dish soap. Put the balls in the soapy water. Use a soft cloth to clean each ball.
Rub gently to remove dirt and grime. Pay extra attention to any stains or marks. Rinse the balls well with clean water. Dry them right away with a microfiber towel to prevent water spots.
This method is good for regular cleaning. It’s cheap and uses items you likely have at home. Be careful not to use harsh soaps or scrubbers. These can damage the balls’ surface.
Using an Electric Cleaner for Pool Balls
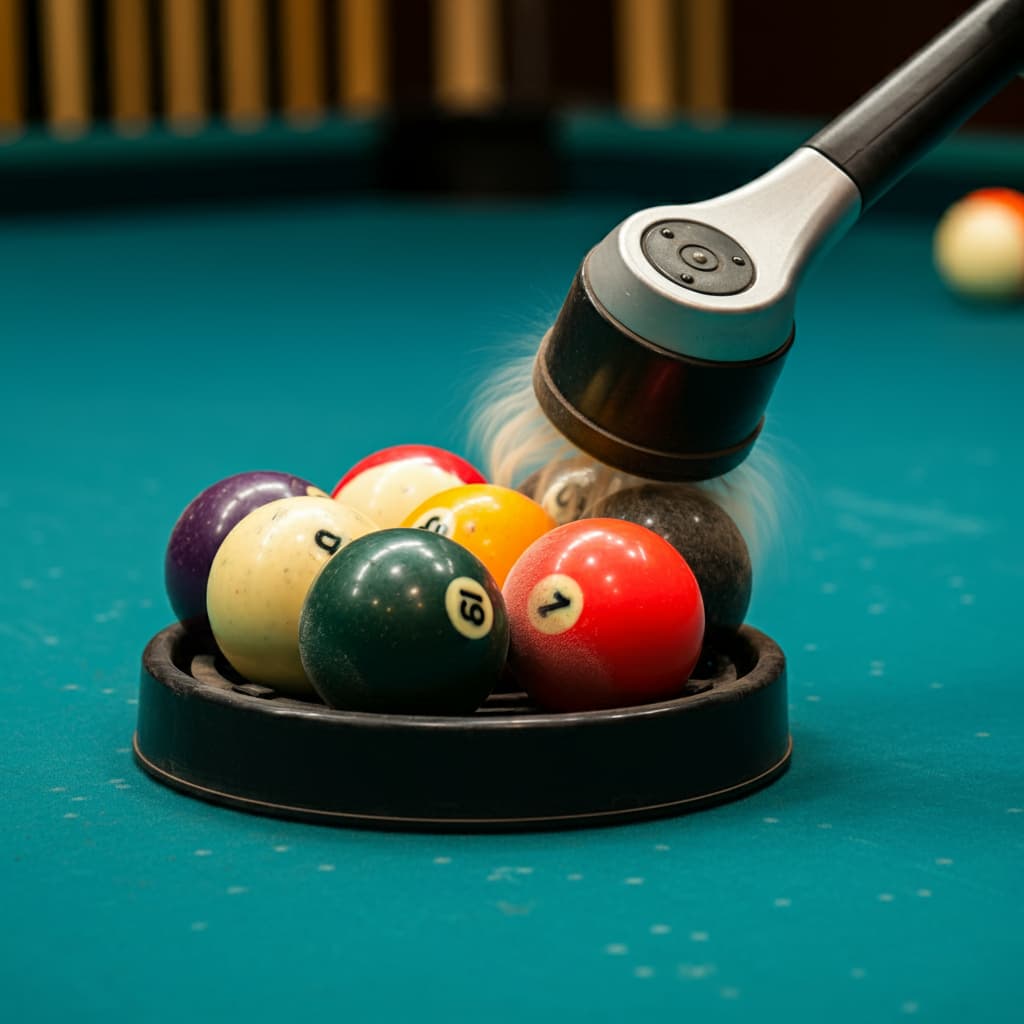
Electric cleaners offer a hands-off approach. They’re good for deep cleaning or large sets of balls. Add the cleaning solution to the machine as directed. Place the balls inside and turn it on.
The machine spins the balls in the solution. This removes dirt without any scrubbing. Most units take about 5-10 minutes to clean a full set. After cleaning, rinse the balls with clean water.
Dry them well with a microfiber cloth. Electric cleaners can save time and effort. They’re a good choice for frequent players or pool halls. The downside is they cost more than other methods.
Polishing Pool Balls
Polishing pool balls keeps them smooth and shiny. This helps them roll better during games. Two key steps are picking the right polish and using the proper technique.
Choosing the Right Polish
Pool ball polish comes in many types. Look for a polish made just for billiard balls. These work best and won’t harm the balls. Avoid car waxes or furniture polishes. They can leave a slick coating that affects play.
Some polishes need water, while others are dry. Water-based ones are easier to use but may not last as long. Dry polishes give a longer-lasting shine but take more effort to apply.
Check if the polish works for your ball type. Phenolic resin balls need different care than polyester ones. The wrong polish can damage the surface.
The Polishing Technique
Start with clean, dry balls. Use a soft cloth to apply the polish. Microfiber works well and won’t scratch. Put a small amount of polish on the cloth, not directly on the ball.
Rub the polish in small circles. Cover the whole ball evenly. Don’t press too hard or you might damage the surface. Keep polishing until the ball feels smooth.
Let the polish dry as directed. This can take a few minutes to an hour. Once dry, buff the ball with a clean cloth. This brings out the shine.
Polish your balls every few months. More often if you play a lot. Regular care keeps them in top shape for better play.
Caring for Your Pool Balls
Pool balls need proper care to stay in top shape. Regular cleaning and careful storage keep them looking great and playing well.
Regular Maintenance Tips
Clean your pool balls after each use. Wipe them with a soft, damp cloth to remove chalk and dirt. For tougher stains, use a mild soap and water solution. Rinse the balls well and dry them right away with a lint-free towel.
Every few weeks, give your balls a deep clean. Use a special billiard ball cleaner for the best results. These cleaners remove tough grime without harming the ball’s surface. Follow the product instructions carefully.
Check your balls often for chips or cracks. Small damages can affect gameplay. Replace damaged balls to keep your set in good condition.
Storing Your Pool Balls
Keep your pool balls in a cool, dry place when not in use. Avoid leaving them in direct sunlight or near heat sources. This can cause the balls to warp or fade.
Store the balls in their original case or a special billiard ball case. These cases have spots for each ball, keeping them from bumping into each other. This prevents scratches and chips.
Don’t stack heavy items on top of your pool ball case. Too much weight can damage the balls over time. Handle the case with care to avoid dropping or banging the balls inside.
Troubleshooting Common Issues
Pool balls can develop tricky problems over time. Here are some fixes for common issues you might face when cleaning your billiard balls.
Dealing with Stubborn Stains
Yellow stains on pool balls can be a real pain. Try using a mix of warm water and vinegar to tackle these tough marks. Soak the balls for 15 minutes, then scrub gently with a soft cloth.
For extra stubborn stains, make a paste with baking soda and water. Apply it to the dirty spots and let it sit for 5 minutes. Rinse well after.
If these methods don’t work, you can try a specialized pool ball cleaner. Follow the product instructions carefully.
Remember to dry the balls fully after cleaning to prevent water spots.
Addressing Scratches and Chips
Small scratches on pool balls can often be buffed out. Use fine-grit sandpaper to gently smooth the scratch. Be careful not to sand too much or you’ll change the ball’s shape.
For deeper scratches, you might need a pool ball polishing compound. Apply it with a soft cloth and buff it in circular motions.
Chips are trickier to fix at home. For badly damaged balls, it’s best to replace them. Using chipped balls can affect gameplay and damage your table’s felt.
Regular cleaning and careful handling can help prevent scratches and chips in the first place.
Enhancing the Gaming Experience
Clean billiard balls make pool and snooker more enjoyable. They roll smoothly and look great on the table. Players can step up their game with the right cleaning methods and tools.
The Impact of Clean Billiard Balls
Clean balls improve play in many ways. They roll straighter and more predictably on the felt. This helps players make better shots. Dirt and grime can throw off a ball’s path, leading to missed shots.
Clean balls also stick less to each other and the cue ball. This means better control over spin and ball placement. Players can pull off trickier shots with ease.
Shiny, clean balls look great too. They add to the classy feel of a billiards room. Guests will be impressed by the well-kept equipment. It shows care and respect for the game.
Upgrading to Professional Cleaning Equipment
A ball-washing machine is a game-changer for serious players. These machines clean balls quickly and thoroughly. They use special cleaning solutions to remove tough dirt and oils.
Ball washers come in different sizes. Small ones clean a few balls at a time. Larger ones can wash a full set in minutes. Some even dry and polish the balls after cleaning.
While pricey, these machines save time and effort. They’re great for busy pool halls or clubs. Home players might find them worth it too, especially if they play often.
Regular use of a ball washer keeps balls in top shape. This means less wear on the felt and better play overall.
Why You Need to Clean Your Billiards Balls Often
Just as you brush your table and chalk your cues, you should clean your billiard balls regularly. Besides enhancing the sheen, keeping your billiard balls dust-free has a few benefits.
#1. Cleaning ensures consistent playability
Clean, polished billiard balls roll smoothly. With an even surface—not raised or bumpy with dust—your strokes are cleaner.
#2. It reduces table maintenance
Chalk from the pool cue powders the cue ball. During its travels, some of that chalk falls onto the table. Consequently, object balls collect this debris and transport it during gameplay. Such chalk is abrasive and can damage the table.
We recommend wiping your billiards set with a microfiber cloth between uses. Occasionally, you should give the entire set a thorough cleaning.
Washing Your Billiards Balls
Balls made from phenolic resin require special cleaning products. Regular detergents often leave an unwanted film around the surface. That said, phenolic resin is a slick and durable substance that needs little attention. A simple wipe-down should be sufficient.
You can always purchase Aramith Ball Cleaner or a similar product from your local billiards store to refresh your set. Hot water, too, can dissolve dried chalk and buff out minor imperfections.
For other materials like plastic and polyester, avoid harsh liquid detergents. The wrong product can lead to scratches—worse it can remove the finish! Of course, ensure your balls are dry and rinsed before placing them back onto the table. As harmful as chalk can be to cloth, residual detergent is a far greater threat.
You can buy billiards balls of various materials, and each set may demand a different cleaning agent. Always consult the manual in the box or swing by the manufacturer’s site for advice. Do not assume regular detergent works without doing a little research first!
Frequently Asked Questions
Pool ball cleaning can be simple with the right methods and products. Here are answers to common questions about keeping billiard balls in top shape.
What is the recommended method for cleaning discoloured pool balls?
For discoloured pool balls, a mix of warm water and mild dish soap works well. Scrub gently with a soft cloth or sponge. Rinse the balls with clean water and dry them right away with a lint-free towel.
Can you effectively wash pool balls by hand, and if so, how?
Yes, washing pool balls by hand is very effective. Fill a sink with warm water and add a bit of dish soap. Clean each ball with a soft cloth, rinse well, and dry them off quickly.
What household products can be safely used to clean pool balls?
Safe household products for cleaning pool balls include dish soap, white vinegar, and baking soda. These are gentle yet effective at removing dirt and grime. Avoid harsh chemicals that might damage the balls.
Are there any specific techniques for cleaning Aramith pool balls?
Aramith pool balls need gentle care. Use a soft cloth with warm water and mild soap. Don’t use strong chemicals or abrasive materials. Dry the balls right away to keep their shine.
Is there a particular machine designed for cleaning pool balls?
Yes, there are special machines for cleaning pool balls. These machines use water and cleaning solutions to wash many balls at once. They’re often found in pool halls and are great for regular cleaning.
How often should pool balls undergo cleaning for optimal maintenance?
Clean pool balls after every few games or at least once a week if used often. Regular cleaning keeps them looking good and playing well. For less frequent use, monthly cleaning is fine.
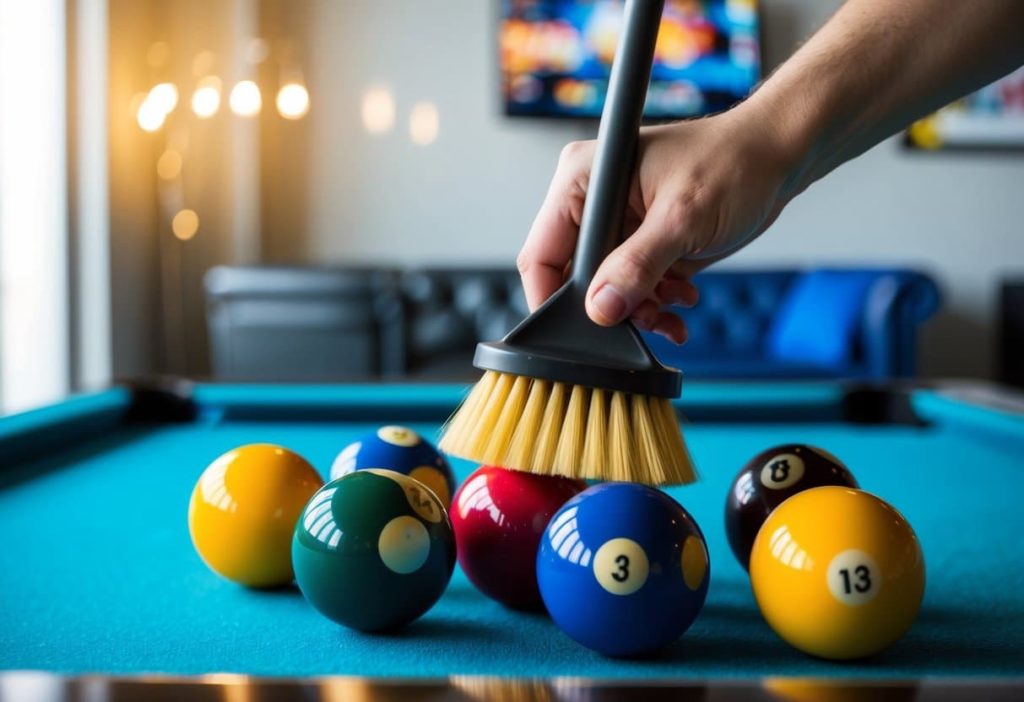
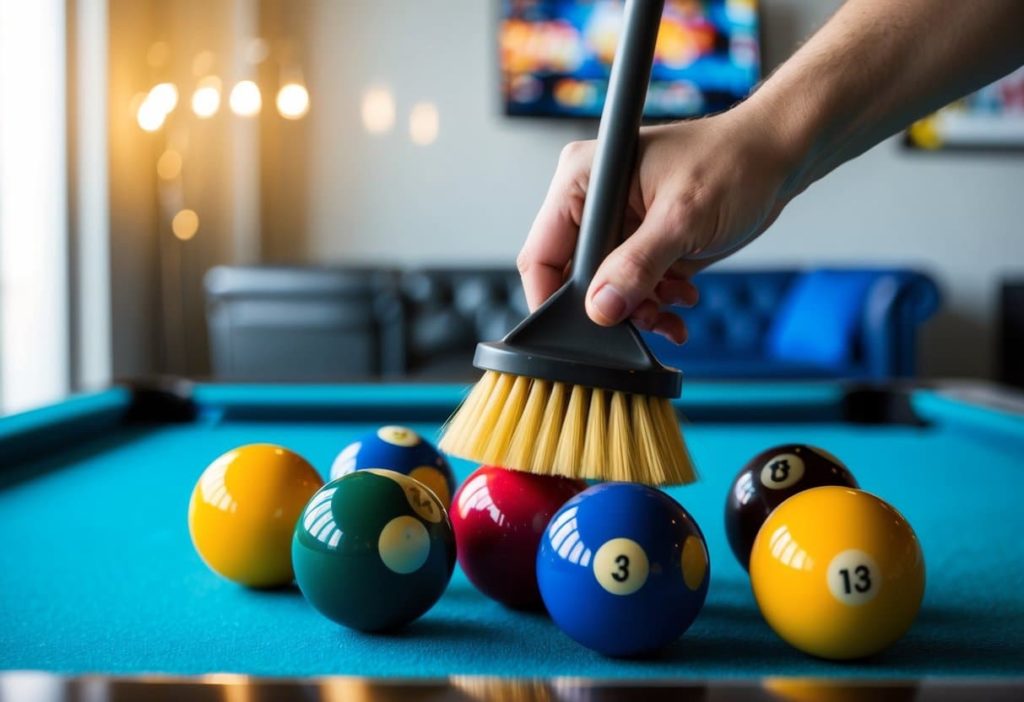
Brushing a pool table might seem small, but it can make a huge difference in how the game plays. Regular brushing keeps the surface smooth, enhancing the playing experience and promoting optimal gameplay. Dust, chalk, and debris from games can affect the way the balls roll, leading to unexpected outcomes and possibly unfair gameplay.
To maintain the quality of a billiards table, it’s important to understand the right way to brush it. Using short, gentle strokes will effectively remove particles without damaging the felt. This ensures longevity and maintains the table’s performance. A well-maintained table can enhance any player’s experience, making each game more enjoyable.
Investing time in this simple maintenance task can pay off with every game. Pool enthusiasts often notice how a good brush can transform their playing experience. By learning this easy skill, players can ensure the best conditions for every shot they take.
Delve Into Pool Table Maintenance
Caring for a pool table involves consistent upkeep to ensure smooth gameplay and longevity. Regular maintenance helps prevent wear and tear. Different types of pool tables have specific needs, and using the right tools is key.
Importance of Regular Maintenance
Regular maintenance keeps a pool table in prime condition, ensuring it remains a centrepiece for recreation. Dust, chalk particles, and debris accumulate on the felt. A dirty surface can affect how balls roll and the overall playing experience. Routine cleaning prevents these problems and extends the lifespan of the table.
Dusting the table regularly, at least once a week if used often, is advisable. Using a table brush with soft, gentle bristles helps remove dirt without damaging the felt. Opt for brushes with nylon or horsehair bristles, as these are less abrasive and won’t harm the table surface. A weekly routine also involves vacuuming beneath the table where dust collects.
Types of Pool Tables
Pool tables come in different styles and materials, impacting how they are maintained. Slate tables, common in professional settings, require regular levelling to remain smooth. Wooden tables need careful attention to prevent warping, especially in humid environments. Understanding the specific needs of each table type ensures effective care.
Each type has unique features and care requirements. Heavier tables may need more support when moving to avoid damaging the frame. Knowing the materials used in the table’s construction helps decide the best cleaning and maintenance practices.
Tools for Pool Table Care
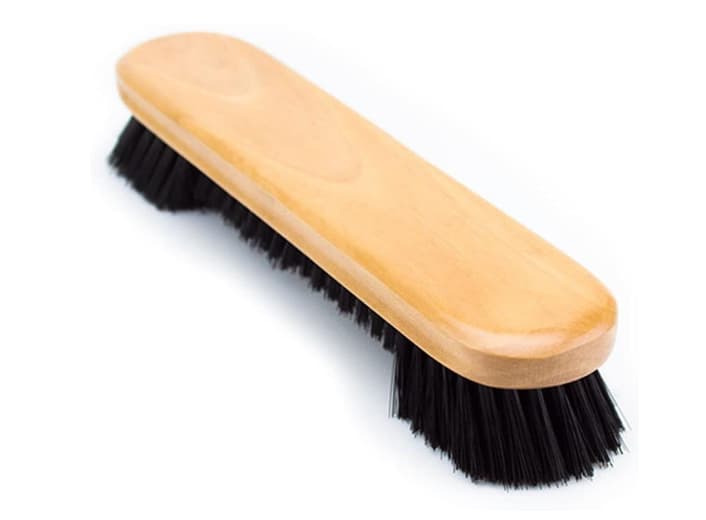
Having the correct tools is crucial for pool table maintenance. A proper table brush is essential for cleaning the felt. Brush choice matters as it impacts the fabric’s integrity. Soft-bristled brushes such as those made from horsehair or nylon are best to avoid damaging the felt.
Vacuum cleaners with a gentle suction setting help remove dust from hard-to-reach areas. A specialized vacuum brush attachment can be used for a more thorough cleaning. Additionally, cover the table when not in use, protecting it from dust and sunlight. Investing in quality maintenance tools ensures a clean and well-kept playing surface for years to come.
Selecting the Appropriate Brush
Proper maintenance of a pool table involves choosing the right type of brush. The choice depends on factors like brush material and style for effective cleaning. An understanding of different brush options can help in maintaining the table’s surface.
Types of Brushes
Different brushes are designed for specific purposes on pool tables. Nylon brushes are common due to their durability and effectiveness in sweeping away dust and dirt. They maintain a bristle shape over time, ensuring consistent performance. However, they may not be as gentle on certain cloth types compared to natural fibre brushes.
Some brushes feature a dual-level design. This style helps in reaching the harder-to-access areas, like corners and under the rails. Using a variety of brushes ensures a comprehensive clean, preserving the table’s playing condition.
Material Considerations
The material of the brush determines its impact on the cloth. Natural fibre brushes, often made from horsehair, are gentle on the table’s surface. They prevent excess wear, making them ideal for high-quality and sensitive cloths. They might be more expensive but justify the cost with their delicate handling.
Nylon brushes are an economical option and offer durability. While effective, they can be slightly abrasive. It’s essential to know the cloth type before choosing materials, as some fabrics are more resilient than others.
Best Pool Table Brush
Selecting the best pool table brush involves considering both quality and function. A popular choice is a dual-level horsehair brush, which combines gentle cleaning with comprehensive reach. This type ensures minimal impact on the cloth, extending the life of both the table and the brush.
Investing in a brush designed specifically for pool tables guarantees better care. Choosing a size compatible with the table’s width allows for efficient cleaning. By prioritizing quality, the table remains in optimal condition for gameplay.
The Brushing Process
Brushing a pool table keeps it in top shape. Ensuring smooth play involves preparing the table, brushing the felt, cleaning the rails, and finishing up.
Preparing the Table
First, clear the table of any accessories like balls and cues. Check for dirt or debris. Using a soft cloth, gently wipe the table to remove dust. Make sure the felt is dry because moisture can affect the brushing.
Look for any stains or marks. These may need special attention before brushing. A clean surface allows for effective cleaning later.
Gather the necessary materials: a table brush and a rail brush. Having everything ready makes the task more efficient and reduces interruptions during the process.
Brushing the Felt
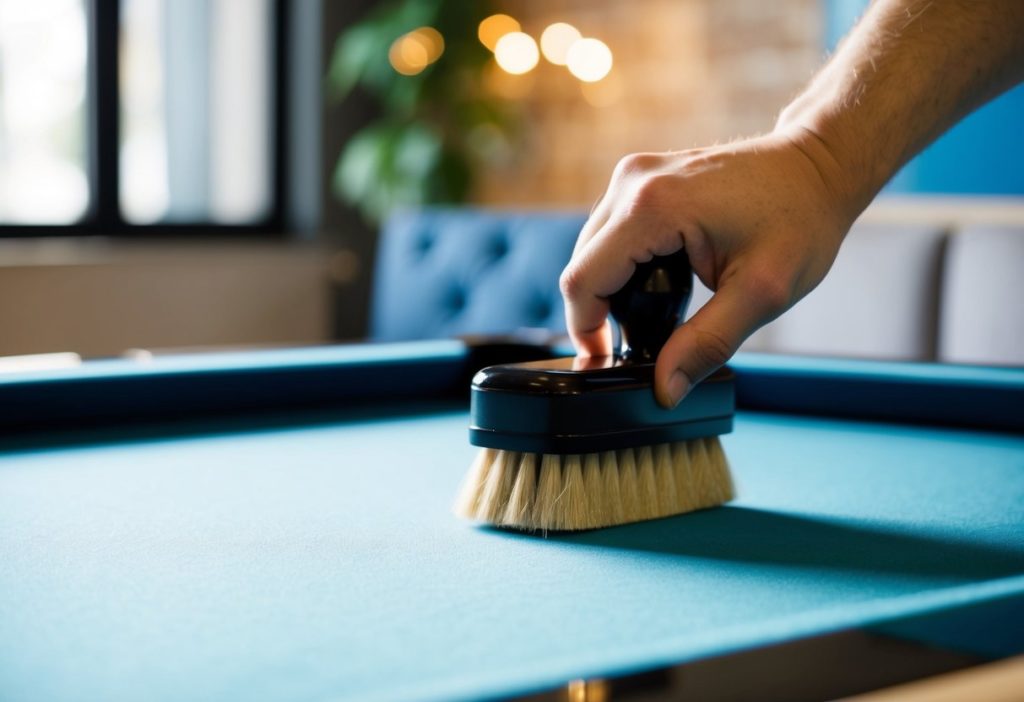
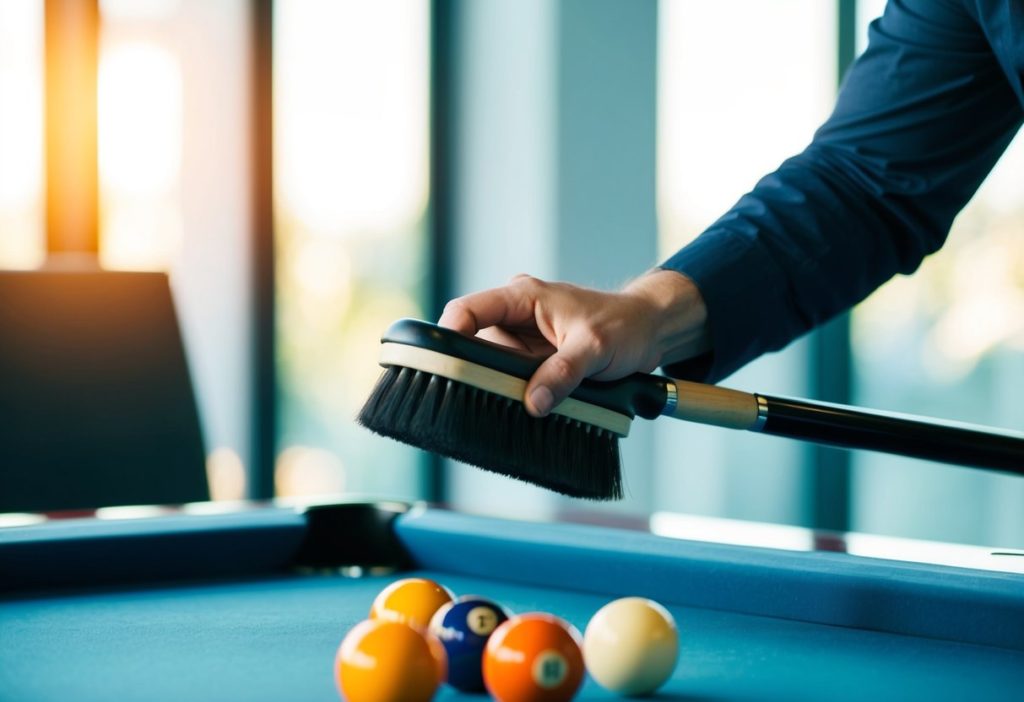
Start at one end of the table. Hold the brush tightly. Move it in straight lines, following the weave of the felt. This pattern ensures the felt remains smooth. Avoid circular motions as they can harm the fabric.
Short, gentle strokes are best. These help maintain the texture and appearance of the cloth. Pay special attention to areas that see more play, as they may hold more dust and chalk.
Be methodical in approach. Cover the entire surface steadily. Don’t rush, as careful brushing enhances the felt’s quality and extends its life.
Cleaning the Rails
Use the rail brush for this step. Like the felt, the rails gather dust and chalk. The rail brush has a design to fit these tight spots.
Swipe along the rails gently. This clears build-up without damaging the wood or finish. Rails are vital for bank shots, so proper cleaning keeps them responsive.
Inspect each rail as you go. Notice any damage or wear. If needed, call a professional to fix such issues.
Post-brushing Actions
Once brushed, use a vacuum to pick up loose dust. This ensures any debris from brushing doesn’t stay behind. Be gentle with the suction to avoid affecting the felt.
Replace the balls and other items on the table. Position them carefully to prevent marks or scrapes. Regular checks give insight into the table’s wear and can guide future maintenance.
Keep the brushes in a clean, dry place. Proper storage extends their life and keeps them ready for the next use.
Additional Pool Table Care
Proper upkeep is essential for maintaining a pool table. Using the right tools, caring for accessories, and taking protective measures can extend its life and provide a better playing experience.
Using a Vacuum Cleaner
Keeping the pool table clean is crucial. He or she can use a vacuum cleaner to remove dust and debris from the cloth. Choose a vacuum with a soft brush attachment to prevent any damage. The gentle suction will clean the surface without stretching or scratching the fabric.
Regular vacuuming keeps the surface smooth and ensures a consistent playing experience. Make sure to vacuum not just the top but also the corners and edges. This helps to prolong the life of the felt. Cleaning once a week is usually sufficient for frequent players. A clean table enhances overall performance in any game room.
Managing Table Accessories
Care for pool table accessories to maintain quality. Clean cues, balls, and racks regularly. A soft, damp cloth works well for cleaning balls, removing smudge marks and chalk dust. Cues benefit from periodic wiping to prevent dirt buildup, maintaining a smooth stroke.
Store cues in a cue rack to keep them straight and protected. This also helps in organizing them and keeping the game room neat. Check leather components, like pockets, and condition them with a suitable leather conditioner to avoid cracking. Proper care ensures accessories remain in top shape. By doing so, each item contributes to a better, more enjoyable game.
Protective Measures
To protect the table, use a pool table cover when it’s not in use. A cover shields the table from dust and sunlight, which can fade and damage the felt. It’s a simple yet effective way to prolong the table’s life.
Consider placing the table away from direct sunlight or in a controlled environment. Excess moisture or dryness can warp the wood and weaken the structure. If the pool table is in a game room, regulate temperature and humidity levels.
These measures ensure a longer-lasting, high-quality experience. Proper protection also means less frequent repairs or maintenance, adding to the table’s longevity.
Incorporating Pool Table Care into Your Routine
Taking good care of a pool table ensures optimal gameplay and extends the table’s life. Begin with regular maintenance to keep it in excellent condition. Regular brushing helps remove dust and chalk, keeping the surface smooth and clean. This enhances the playing experience by allowing balls to roll smoothly.
Dusting should also be part of the routine. Use a soft cloth to wipe corners and pockets. Among the essential tools are a brush and a vacuum with a soft brush attachment for the felt. Regularly vacuuming the felt helps remove fine debris that brushes might miss.
Make a habit of checking the table’s level weekly. An unlevelled table affects gameplay, causing balls to roll unpredictably. Also, inspect and tighten loose bolts or screws occasionally. Keeping these in check maintains the table’s stability and balance.
Consider creating a simple schedule to track regular activities. For instance, brush and vacuum the table every week, and clean the pockets monthly. Replace worn-out parts like cues or felt as needed. These steps help maintain the table and enhance the overall playing experience.
Lastly, keep food and drinks away from the table. Spills can damage the felt and influence gameplay. Encourage all players to follow this rule to ensure the table stays in prime condition for all matches.
Frequently Asked Questions
Pool table felt needs special care to stay in good condition. From removing stains to choosing the right cleaning kits, the following sections provide insight into the best practices for maintaining pool table felt.
What is the recommended method to remove stains from pool table felt?
To remove stains, gently blot the area with a clean cloth. Use a mixture of cold water and a mild detergent. Avoid scrubbing, as this can damage the felt. Let the area air dry completely.
Is it possible to clean pool table felt with a homemade solution?
Yes, a mild detergent mixed with cold water works well. Avoid harsh chemicals that can harm the felt. Ensure the cloth used is soft to prevent damage. Pat the area instead of rubbing it.
Can you safely steam-clean the felt of a pool table?
Steam cleaning is not recommended for pool table felt. The heat and moisture can cause the felt to shrink or become loose. Stick to dry cleaning methods to maintain the condition of the felt.
What are the essential items included in a pool table cleaning kit?
A good cleaning kit includes a soft brush, a clean cloth, and a specialized felt cleaner. These items help keep the felt free from dust and dirt. Brushes should have gentle bristles to avoid damaging the felt.
Which product is considered the best for cleaning pool table felt?
There are several products made specifically for pool table felt. Simoniz and Quick-Clean are popular because they remove dirt without leaving residue. Choose products made for pool table felt to ensure safety and effectiveness.
How do you find a professional pool table cleaning service?
Look for services that specialize in pool table maintenance. They should have a good reputation and experience with similar tables. Reviews and recommendations from other pool table owners can be helpful in finding a reliable service.
Are You Brushing Your Pool Table Often Enough?
To prolong the life of the felt on your pool table, you should brush after every session. Doing so keeps chalk from settling and damaging the fabric. In fact, if untreated, it can change the table’s roughness and alter the cue ball’s path.
Likewise, you should cover your table after games to protect it from sunlight, dust, and other debris. Regular maintenance will be easier and less abrasive because of it. Rigorous cleaning, like brushing too hard or vacuuming, can stretch fabric and produce ripples. Worse, it can lead to thinning and ripping.
Pool balls have come a long way since their early days. These small, round objects are essential for playing pool, snooker, and other cue sports. But what are pool balls made of? What are billiard balls made of? Are they the same thing?
Modern billiard balls are typically made of synthetic plastic and phenolic resin. This substance offers excellent durability and consistency. It allows for precise manufacturing to meet strict size and weight standards.
Billiard balls have been made from different materials in the past. Ivory was once popular but is no longer used due to ethical concerns. Other materials like wood, clay, and celluloid have been tried over the years. Today’s phenolic resin balls provide players with reliable performance and long-lasting quality.
Historical Evolution of Billiard Balls
Billiard balls have changed a lot over time. In the early days, people made them from wood. These wooden balls weren’t very good and didn’t last long.
In the 1600s, ivory became the top choice for billiard balls. Ivory came from elephant tusks. It was smooth and heavy, perfect for the game. But getting ivory meant killing elephants, which was bad for elephant populations.
By the 1800s, ivory was getting harder to find. John Wesley Hyatt tried to make a new material to replace it. In 1869, he created celluloid. This was one of the first synthetic plastics.
Celluloid wasn’t perfect, though. It could catch fire easily and didn’t last as long as ivory. In 1907, Leo Baekeland made a new plastic called Bakelite. It worked better than celluloid for billiard balls.
Today, most billiard balls are made from phenolic resin. This material is strong, lasts a long time, and rolls smoothly. It’s also much cheaper than ivory and safer for elephants.
The switch from ivory to plastics was good for the game of billiards. It made balls more affordable and helped save elephants. Now, players can enjoy the game without harming animals.
Materials and Composition
Billiard balls have evolved from natural materials to advanced synthetic compounds. Their composition impacts performance, durability, and cost.
Ivory and Early Materials
Ivory was the top choice for billiard balls in the 19th century. It came from elephant tusks. Ivory balls were prized for their feel and sound. But they had problems. They cracked easily and were costly. Other natural materials like wood and clay were tried. None matched the ivory’s quality.
As elephant numbers dropped, makers looked for new options. This search led to the birth of plastic.
Introduction to Synthetic Materials
In 1869, John Wesley Hyatt created celluloid. It was the first synthetic plastic. Celluloid balls were cheaper than ivory. They also played well. But they had a big flaw. They could catch fire easily.
Makers kept working on better materials. They wanted balls that were safe, long-lasting, and felt good to play with.
Phenolic and Polyester Resins
Phenolic resin became the go-to material in the early 1900s. It’s made from phenol and formaldehyde. These balls are hard and dense. They last a long time and resist impacts well.
Polyester resin is another popular choice. It’s made from organic compounds. Polyester balls are known for their shine and colour. They also keep their shape well over time.
Both resins can be mixed with fillers. This changes how the balls perform.
Emerging Composite Materials
New materials are always being tested. Some makers use acrylic or epoxy resins. Others try mixing different plastics.
Composite materials are gaining ground. They blend various substances to get the best traits of each. Some use tiny bits of rubber or ceramic in the mix.
These new balls aim to play like classic ivory. But they’re tougher and more consistent. They also come in a wide range of colours and styles.
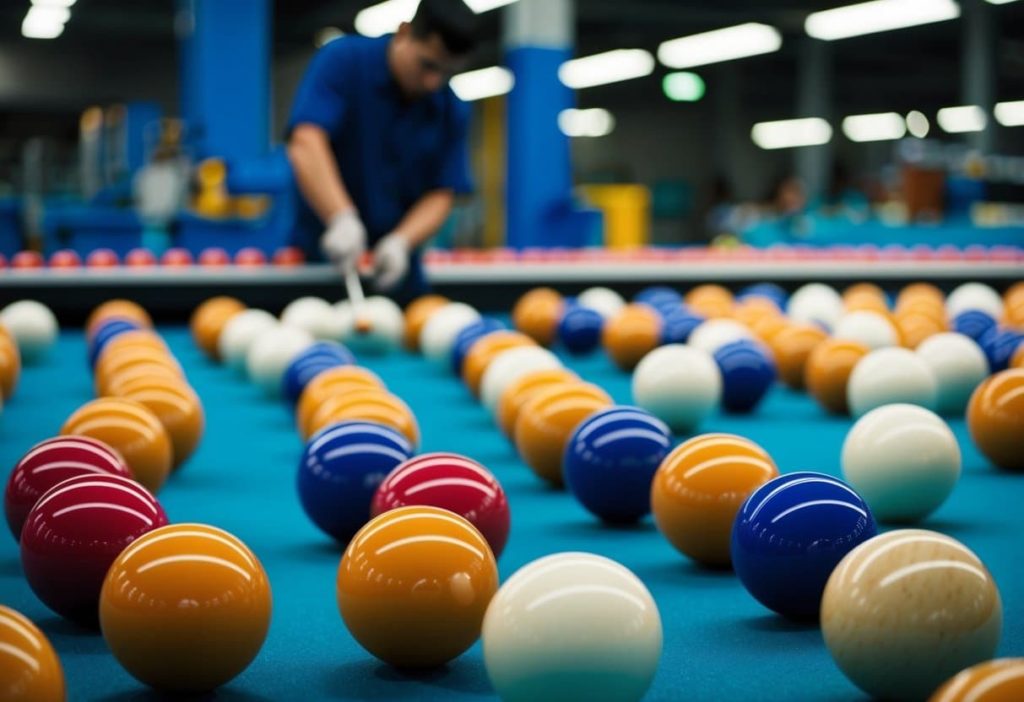
Manufacturing Process and Quality Control
Billiard ball production involves precise techniques to create high-quality spheres. Manufacturers use specialized methods to ensure balls meet strict standards for size, weight, and finish.
Casting and Molding Techniques
The process starts with phenolic resin or polyester. Workers heat the material until it melts. They pour the liquid into metal moulds shaped like spheres. The moulds have two halves that fit tightly together.
As the resin cools, it hardens into a rough ball shape. After cooling, machines remove the balls from the moulds. At this stage, the balls are not yet perfect spheres.
Precision and Tolerances
Makers grind the balls to exact sizes. They use special machines with very fine abrasives. These machines remove tiny amounts of material from the surface.
The goal is to create balls within 0.127 mm of the target diameter. This tight tolerance ensures fair play. Balls also must weigh between 156 and 170 grams.
Careful testing checks each ball. Any that don’t meet the standards are rejected.
Polishing and Finishing
The final step is polishing. Machines use progressively finer abrasives to smooth the surface. This creates a glossy finish.
Workers inspect each ball by hand. They look for tiny flaws or marks. Only perfect balls pass this check.
Lastly, machines add numbers and logos to the balls. They use special inks that won’t chip or fade during play.
Physical Properties and Performance
Billiard balls have unique physical traits that affect how they behave on the table. These properties are key to the game’s precision and enjoyment.
Density and Weight
Billiard balls are dense and heavy for their size. A standard ball weighs between 156 and 170 grams. This weight gives them momentum when struck. The density is uniform throughout the ball. This ensures they roll smoothly and predictably.
Different ball sets may vary slightly in weight. But all balls in a set must be within 0.5 grams of each other. This tight range keeps play fair and consistent.
The material used affects density. Phenolic resin, a common choice, has a density close to that of ivory. This helps maintain traditional playing characteristics.
Hardness and Resilience
Billiard balls are very hard. This hardness helps them keep their shape and size over time. It also affects how they react when hit.
The hardness is measured on the Rockwell R scale. Most balls rate between 85 and 100. This high rating means they won’t dent or scratch easily.
Resilience refers to how well the balls bounce back after impact. High-quality balls have good resilience. They transfer energy well between balls and maintain their bounce over many games.
Impact Resistance and Durability
Billiard balls face constant impacts. They must withstand these forces without chipping or cracking.
Modern balls are made to last for thousands of games. They resist damage from cue strikes and collisions with other balls.
The outer layer of a ball is often tougher than its core. This protects against surface damage while keeping the ball’s overall properties intact.
Regular cleaning and care can extend a ball’s life. But even with good care, pros may replace balls after a few years of heavy use.
Balance and Roll
A billiard ball must be perfectly round and balanced. Any flaw in shape can cause it to roll off course.
The balance of a ball is checked by floating it in a salt solution. A well-made ball will not favour any side as it floats.
The surface finish of a ball affects its roll. A smooth surface reduces friction with the tablecloth. This allows for more predictable movement.
The coefficient of friction between the ball and the cloth is crucial. It’s typically around 0.2, allowing for controlled rolls and spins.
Environmental and Ethical Considerations
Billiard balls have a complex history when it comes to their materials. In the past, ivory was the top choice for making these balls. This led to serious ethical issues.
Elephants were hunted for their tusks to produce ivory billiard balls. This practice put elephant populations at risk. It also raised concerns about animal welfare and conservation.
The shift away from ivory was a big win for elephants. Synthetic materials took over as the main ingredient for billiard balls. This change helped protect elephants and their habitats.
Today’s billiard balls are often made from plastic resins. These materials are more eco-friendly than ivory. They don’t require harming animals to produce.
Still, plastic has its environmental drawbacks. It can take a long time to break down in landfills. Some companies are looking into more sustainable options for the future.
The move to synthetic materials shows how product design can affect wildlife. It’s a good example of how changing manufacturing can help solve ethical problems.
Gameplay Experience and Maintenance
The materials used in billiard balls impact how they behave on the table and how long they last. Players need to understand these factors to get the most out of their game.
Influence on Spin and Speed
Phenolic resin balls offer excellent spin control. Their slightly textured surface grips the cue tip well. This allows players to apply English and create curved shots more easily. The density of phenolic resin also helps maintain ball speed after impact.
Polyester balls have a smoother surface. This can make it trickier to add spin, but they roll very true. Their lighter weight means they can travel faster initially but may slow down more quickly.
The cue ball often uses a different material than the other balls. This impacts how it reacts to shots and affects gameplay strategy.
Consistency and Playability
High-quality billiard balls maintain their shape and weight over time. This keeps gameplay fair and predictable. Aramith balls are known for their consistency. They stay round even after thousands of impacts.
Cheaper balls may become unbalanced with use. This leads to unpredictable rolls and bounces. Pros and serious players prefer balls that perform the same way every time.
Temperature can affect how balls behave. Some materials expand or contract more than others as temperatures change. The best balls stay consistent in different conditions.
Cleanliness and Longevity
Regular cleaning keeps billiard balls in top shape. A soft cloth removes chalk dust and oils from hands. This helps the balls roll smoothly and prevents staining of the cloth.
Harsh chemicals can damage ball surfaces. Mild soap and water is often enough for routine cleaning. Special billiard ball cleaners are also available.
Proper storage protects balls when not in use. A case or rack keeps them from getting scratched or chipped. Extreme heat or cold should be avoided to prevent material stress.
With good care, quality billiard balls can last for many years. Some players even pass down well-maintained sets through generations.
Regulations and Standards
The World Pool-Billiard Association (WPA) sets the rules for billiard balls in cue sports. These rules cover games like eight-ball, nine-ball, and blackball.
WPA specs say billiard balls must be:
57.15 mm (2 1/4 inches) in diameter
Between 156 and 170 grams in weight
Made of phenolic resin or other approved materials
Balls need to be perfectly round. They can’t have any dents or scratches. The numbers and stripes on the balls must be clear and easy to see.
For snooker, different rules apply. Snooker balls are smaller than pool balls. They measure 52.5 mm in diameter and weigh about 142 grams.
Many tournaments use Aramith balls. These meet all WPA standards. Some players prefer them for their durability and consistent play.
Local leagues might have their own rules. But most follow WPA guidelines. This helps keep the game fair for everyone.
Frequently Asked Questions
Billiard balls have changed a lot over time. Different materials have been used to make them. Let’s look at some common questions about billiard ball materials.
What materials were originally used to manufacture billiard balls?
The first billiard balls were made of wood. Later, ivory became the top choice. Ivory balls were prized for their smoothness and weight. But ivory was expensive and hard to get.
What substances are contemporary billiard balls typically composed of?
Today, most billiard balls are made of phenolic resin. This is a type of plastic. It’s strong and can be made to look like ivory. Some cheaper balls are made of polyester resin.
How do the compositions of premium billiard balls differ from less expensive ones?
Premium balls often use better phenolic resin. They have more precise size and weight. Cheap balls might use polyester or lower-grade phenolic resin. They may not be as round or balanced.
What impact did the introduction of synthetic materials have on the production of billiard balls?
Synthetic materials changed everything. They made balls cheaper to produce. The new balls were more uniform in size and weight. This led to better play. It also helped protect elephants by reducing ivory use.
Can you elaborate on the differences between standard pool balls and Aramith balls?
Aramith balls are top-quality phenolic resin balls. They’re known for being very round and having perfect balance. Standard balls might not be as precise. Aramith balls also tend to last longer and keep their shine better.
How have the materials used for billiard balls evolved over the last century?
A century ago, ivory was still used for high-end balls. In the early 1900s, makers started using celluloid. By the mid-1900s, phenolic resin took over. The move to synthetics made balls more affordable and consistent.
What Types of Billiard Balls Can You Buy?
You can play an assortment of games on your billiards table with different balls and rules. The colour and diameter change most often, though some games call for different weights. The hardness (density) and polish (friction) affect playability, too. These properties can alter accuracy, reflectivity, and rolling distance.
The material of the ball also impacts gameplay. Most commonly, billiards balls are made of phenolic resin or a similar plastic. That said, some sets are made from wood, clay, and ivory.
American 8-Ball Pool Set
Balls in this set measure 2 ¼ inches in diameter. They come in two numbered suits—solids and stripes. There are 15 object balls in total (cue ball excluded). The weight of each ball depends on its material, though the standard range is between 5 ½ and 6 ounces.
Snooker Ball Set
Snooker involves one cue ball, 15 red balls, and 6 object balls. The object balls include the following colours: yellow, green, brown, blue, pink, and black. Each ball is approximately 2 1⁄8 inches in diameter.
Carom Billiards Balls
Carom billiards sets come with the fewest balls. In fact, carom tables do not even have pockets! There are three balls in total: one yellow, one red, and one white. Each is 2 7/16 inches in diameter.
British-Style Blackball
This English variant comes with seven yellow and seven red balls, each 2 1/8 inches in diameter. Balls in this set are unnumbered besides the 8-ball (the black ball).
Training Balls
Many manufacturers sell balls not intended for real gameplay. These come in different sizes, colours, and weights, depending on their purpose. For example, some cue balls have rings as targets for new players. Different rings produce unique shots like the backspin or “English”.
Let’s face it: You plan to get wet in a hot tub, so why fret over a few raindrops? Hot tubs offer relaxation and enjoyment year-round. Many people wonder if they can use their hot tub in the rain or snow. The short answer is yes, you can.
Unless you hear thunder or see lightning, kicking back to the sound of raindrops pattering on the patio can be peaceful. In fact, some people find these moments some of their favourite times in the hot tub. Using a hot tub in rain or snow is safe and can be a unique experience. The warm water creates a cozy contrast to the cool air and falling precipitation. It’s a great way to enjoy nature while staying comfortable.
There are a few things to keep in mind when using a hot tub in wet weather. Safety is key, so be careful on slippery surfaces around the tub. It’s also wise to have a towel and robe nearby for when you get out. With these simple precautions, you can make the most of your hot tub no matter the weather.
How to prepare for a pleasant soak in the rain
Tumble Dry the Towels
Toss the towels and robes into the dryer to warm them up before using the tub. Although your internal temperature will stay high underwater, the moment you step into the brisk rain, your temperature will begin falling.
Counter the cold with a warm towel. Without one you might catch a chill.
Wear Sandals to and from the Spa
If a deck surrounds your hot tub, consider wearing rubber sandals out of the water. The rain can make decks slippery and falling can lead to serious injury. Escort children and the elderly from the home to the tub for further safety.
Put up an Umbrella
Some bathers like to wear hats in the rain or open umbrellas around the spa. Unless propped on a stand, holding an umbrella can counter the relaxed state hot tubs induce.
Instead, if you plan on sitting in the rain often, invest in a gazebo or some form of enclosure. You can buy gazebos with open and closed rooftops.
Drink a Warm Beverage
In the evening or during cold seasons, the rain might feel uncomfortable after a few minutes of being outside.
If you prepare some warm drinks like hot chocolate or tea ahead of time, you can counter the cold and warm the parts of your body exposed to the air.
Keep in mind your hot tub should be around 104 degrees. This raises your internal body temperature so you have some time to dry off and prepare your beverage.
Safety First
Understanding Hot Tub Use in Various Weather Conditions
Hot tubs can be enjoyed year-round, even when it’s raining or snowing. The key is to know how different weather affects your soak and take proper safety steps.
Effects of Rain on Hot Tub Use
Rain doesn’t have to stop your hot tub fun. The warm water keeps you cozy even in a downpour. But rain can affect the water chemistry. More frequent testing may be needed to keep things balanced.
Heavy rain can cause the water level to rise. This might lead to overflow. Keep an eye on the water line and drain a bit if needed.
Lightning is the main danger during storms. If you hear thunder, it’s best to get out of the tub right away. Wait until the storm passes before getting back in.
Benefits of Using a HotUb in the Snow
A hot soak in the snow can be magical. The mix of hot and cold creates a special feeling. Steam rises off the water, making a pretty scene.
The contrast between the cold air and warm water boosts circulation. This can help sore muscles feel better. It might also give your immune system a boost.
Snow on your head while your body is warm is an odd but fun feeling. Just be careful not to slip on icy areas around the tub.
• Wear a warm hat to keep your head toasty • Have warm towels and robes ready for when you get out • Keep drinks cool by setting them in the snow
Safety Precautions for All-Weather Hot Tubbing
Safety comes first when using a hot tub in any weather. Always have a buddy with you. This is extra important in harsh weather.
Check that paths to and from the tub are clear and not slippery. Use mats or salt to prevent falls on icy spots.
Keep the hot tub cover nearby. Put it on as soon as you’re done to keep heat in and debris out. This saves energy and keeps the water clean.
Don’t stay in too long. Even in cold weather, you can get too hot. Set a timer for 15-20 minutes. Get out if you feel dizzy or very sleepy.
Have a glass of water handy. It’s easy to get dehydrated in a hot tub, no matter the weather outside.
Hot Tub Maintenance Across Seasons
Proper care of your hot tub throughout the year keeps it running smoothly and ready to enjoy. Regular upkeep, chemical balancing, and plumbing checks are key tasks that change with the seasons.
Regular Upkeep to Ensure Clean Water
Clean water is vital for a safe and enjoyable soak. Check and clean filters weekly. Rinse them with a hose or soak in a filter cleaner solution. Replace filters every 12-18 months.
Drain and refill the tub every 3-4 months. This prevents buildup of dissolved solids. When refilling, use a hose filter to remove impurities.
Scrub the tub’s shell and jets monthly with a non-abrasive cleaner. Pay extra attention to the waterline where scum can build up.
Keep the cover clean and free of debris. Wipe it down regularly and use a vinyl protectant to prevent cracking.
Managing Chemical Balance in Diverse Temperatures
Hot tub chemistry changes with the seasons. Test water 2-3 times per week and adjust as needed.
In summer:
Chlorine breaks down faster in heat and sunlight
Add chemicals more often
Run the pump longer to circulate water
In winter:
Chemical use slows down
Test less often, about once a week
Maintain proper pH (7.2-7.6) to prevent scale buildup
Use test strips to check pH, alkalinity, and sanitizer levels. Adjust chemicals in small amounts. Wait a few hours, then retest.
Addressing Plumbing and Leaks Before Winter
Inspect plumbing connections and jets for leaks in autumn. Tighten any loose fittings. Replace worn gaskets or O-rings.
Flush the lines to remove biofilm buildup. Use a line flush product or a mixture of white vinegar and water.
Check the heater element for scale. Clean if needed to ensure efficient heating.
If winterizing:
Drain the tub completely
Blow out water from jets and lines
Add antifreeze to prevent freezing
For year-round use, maintain the water level above the skimmer. This prevents air from entering the pump and causing damage.
Enhancing Energy Efficiency During Colder Months
Hot tub owners can take steps to reduce energy use and costs when temperatures drop. Proper insulation and smart heating practices help keep the water warm while saving money.
Insulating Hot Tubs for Heat Retention
A well-insulated hot tub cover is key for energy efficiency. Thick, tight-fitting covers trap heat and prevent water evaporation. Foam core covers with a vapour barrier work best.
Checking the cover’s condition is important. Replace worn or waterlogged covers that have lost insulating power. Adding a floating thermal blanket under the main cover boosts insulation further.
Insulating the hot tub cabinet also helps. Foam insulation panels can be added inside the cabinet to reduce heat loss. Some owners wrap the outside with an insulating blanket for extra protection.
Optimizing Heating Costs With Energy-Efficient Practices
Setting the right water temperature saves energy. Lowering it by just a few degrees can cut costs. Many users find 38°C comfortable and energy-efficient.
Using a timer to heat the tub only when needed is smart. Heating it for a few hours before use, then letting it cool, works well for some. Others prefer keeping a steady lower temp and boosting it before use.
Regular maintenance improves efficiency. Clean filters allow better water flow and less pump strain. Fixing leaks promptly prevents energy waste. Proper chemical balance reduces the need for extra heating and filtering.
Wind blocks like fencing or landscaping cut heat loss on blustery days. Placing the tub in a sheltered spot also helps. These steps keep hot tubs cozy while trimming energy bills.
Accessorizing for Comfortable Hot Tub Experiences
The right accessories can make hot tub use in rain or snow much more enjoyable. Proper towels, footwear, and shelter add comfort and safety to outdoor soaking.
Choosing the Right Towels and Footwear
Thick, absorbent towels are a must for wet-weather hot tubbing. Look for large bath sheets made of soft cotton or microfibre. These fabrics dry quickly and feel cozy against damp skin. Keep extra towels handy in a waterproof container near the tub.
For footwear, non-slip sandals or water shoes work best. They protect feet from cold surfaces and prevent slips on wet decks. Choose styles with good traction and drainage holes. Avoid cloth slippers that can get waterlogged.
A warm robe is nice for the walk between indoors and the hot tub. Pick a thick terry cloth or fleece robe that’s easy to slip on and off.
Creating Shelter for Protection Against Elements
A shelter over your hot tub keeps rain and snow off while you soak. Gazebos and pergolas offer permanent protection. For a cheaper option, try a large patio umbrella or pop-up canopy.
Make sure any shelter is securely anchored to withstand wind. It should be tall enough to allow easy access to the tub. Good airflow is important to let steam escape.
Add outdoor heating like a patio heater or fire pit nearby. This warms the air around the tub and provides a cozy spot to dry off. A small table for drinks and snacks adds comfort. Hot tea or cocoa tastes great while relaxing in a steamy tub on a cold day.
Preparing Your Hot Tub for Winter Use
Winter doesn’t have to stop you from enjoying your hot tub. With proper preparation, you can keep using it even in snowy weather. Here are some key tips to get your hot tub ready for cold months.
Effective Snow Management Strategies
Keep your hot tub cover clear of snow. Use a soft-bristled broom or brush to gently sweep snow off. Don’t use metal shovels, as they may damage the cover.
Create a path to your hot tub. Shovel snow away to make a safe walkway. This prevents slips and falls when getting in and out.
Check the cover regularly. Heavy snow can strain the cover. Remove snow often to avoid damage.
Consider adding a gazebo or canopy over your hot tub. This will help keep snow off and make winter use more comfortable.
Preventing Freezing in Pumps and Pipes
Keep your hot tub running. Circulating water is less likely to freeze. Set the pump to run for short periods if you’re not using the tub daily.
Maintain proper water levels. Low water can lead to freezing in pumps and pipes. Check and top up water weekly.
Insulate exposed pipes. Wrap foam pipe insulators around any visible plumbing to guard against freezing.
Set the right temperature. Keep your hot tub at least 37°C (98.6°F) to prevent freezing. This also makes it more inviting on cold days.
Check your hot tub’s freeze protection settings. Most modern tubs have built-in systems to prevent freezing. Make sure yours is working properly.
Frequently Asked Questions
Hot tub use in different weather conditions raises some common questions. Proper safety measures and maintenance are key for enjoying your hot tub year-round.
Is it safe to operate my inflatable hot tub during rainy conditions?
Yes, it’s safe to use an inflatable hot tub in the rain. The electrical components are designed to be water-resistant. Make sure the power outlet is protected from water and has a ground fault circuit interrupter (GFCI).
Keep the cover on when not in use to prevent rainwater from diluting the chemicals. Check the water chemistry more often during rainy periods.
What measures should be taken to safeguard a hot tub from snow accumulation?
Use a sturdy, well-fitted cover to prevent snow from entering the tub. Clear snow off the cover regularly to avoid excess weight.
Install a cover lift to make removing snow easier. Consider a shelter or gazebo for added protection. Keep the area around the tub clear of snow and ice for safe access.
How does precipitation affect the water quality in my hot tub?
Rain and snow can alter the water’s pH and chemical balance. Test the water more frequently during wet weather. Adjust chemicals as needed to maintain proper levels.
Heavy rain may dilute the sanitizer, requiring more frequent additions. Use a quality cover to minimize water contamination from precipitation.
Can I leave my hot tub running throughout the winter season?
Yes, you can keep your hot tub running all winter. This prevents freezing and damage to the pipes and equipment. Set the temperature between 37°C and 39°C to reduce energy costs.
Check the water level regularly, as evaporation can occur faster in cold, dry air. Ensure the cover is secure to retain heat and prevent snow from entering.
What is the lowest temperature at which a hot tub can be safely used?
Hot tubs can be used safely in very cold temperatures, even below freezing. The water temperature should be between 37°C and 40°C for comfort and safety.
Pay attention to the air temperature when entering and exiting the tub. Limit soak time in extreme cold to prevent hypothermia. Keep a robe and towel nearby for quick drying.
Are there any specific covers or shelters recommended for hot tub use in inclement weather?
Insulated, locking covers are best for protecting hot tubs in bad weather. Look for covers with high R-value insulation and strong, marine-grade vinyl.
Gazebos or pergolas provide shelter from rain and snow. Retractable awnings offer flexible protection. For portable options, consider pop-up canopies or umbrellas designed for hot tub use.
Hot tub wiring is a crucial task for anyone looking to install a new spa at home. It requires careful planning and attention to safety. Proper hot tub wiring ensures your spa runs smoothly and safely for years to come.
Many homeowners wonder if they can wire a hot tub themselves. While it’s possible for those with electrical experience, most people should hire a licensed electrician. Hot tubs need a dedicated circuit and special wiring to handle their power demands.
The wiring process involves running the right gauge wire from your home’s electrical panel to the spa. It also includes installing a disconnect switch near the hot tub for safety. Getting the wiring right is key to enjoying your new hot tub without worries.
Hot Tub Wiring Basics
Hot tub wiring is a crucial aspect of installing these relaxing backyard fixtures. It’s important to get it right for safety and proper function.
Most hot tubs need a dedicated 240-volt circuit. This high voltage powers the heater and pumps effectively. The circuit should be separate from other household electrical systems.
A thick cable carries electricity from the main panel to the hot tub. The size of this cable depends on the tub’s power needs and distance from the panel.
Water and electricity don’t mix well. That’s why hot tub wiring must be watertight and follow strict codes. Special waterproof connectors and conduits protect the wires.
A ground fault circuit interrupter (GFCI) is a must. It cuts power quickly if it detects a problem, keeping people safe from shocks.
The disconnect box is another key part. It lets you turn off power to the hot tub for maintenance or emergencies. It should be easy to reach but not too close to the water.
Proper grounding is essential. It helps prevent electric shocks by giving excess current a safe path to the ground.
Hot tub wiring isn’t a DIY job. It needs a licensed electrician to ensure it meets all safety standards and local codes.
Safety Regulations and the National Electrical Code
Proper wiring for hot tubs is crucial for safety and legal compliance. The National Electrical Code (NEC) sets key standards that guide electricians and homeowners in safe installation practices.
Importance of Complying with the NEC
The NEC is the benchmark for electrical safety in North America. It outlines rules for hot tub wiring to prevent shocks, fires, and other hazards. Following the NEC is not just a good idea – it’s often the law.
Permits and inspections are typically needed for hot tub installations. These checks make sure the work meets code requirements. A licensed electrician should handle the job to ensure it’s done right.
The NEC requires GFCI protection for hot tubs. This device cuts power if it detects a ground fault, reducing shock risks. Proper grounding is also essential for safety.
Identifying the Key Elements of Code Compliance
The NEC has specific rules for hot tub wiring:
Wire size and type
Disconnect location
Bonding and grounding methods
GFCI protection
A key part of code compliance is using the right materials. This includes waterproof conduits and outdoor-rated cables.
The disconnect switch must be visible from the hot tub and at least 1.5 metres away. This allows quick power cut-off in an emergency.
Bonding joins metal parts to create an equipotential plane. This prevents voltage differences that could cause shocks.
Proper grounding connects the system to the earth, providing a safe path for fault currents. This is critical for electrical safety in wet areas.
Choosing the Right Materials and Tools
Proper materials and tools are crucial for safe hot tub wiring. Quality components ensure a reliable electrical system that meets code requirements and functions well for years to come.
Selecting Quality Wires and Cables
Copper wire is the top choice for hot tub wiring. It’s durable and conducts electricity well. The wire gauge matters too. Thicker wire handles more current. Check local codes for the right size.
Insulation is key. Look for wire-rated for wet locations. THWN or XHHW insulation works well. Avoid aluminum wire. It’s not as reliable as copper for this job.
Buy wire from trusted suppliers. Cheap wire may not meet standards. It could overheat or fail, causing safety issues.
Finding Suitable Conduits and Connectors
PVC conduit is common for hot tub wiring. It’s waterproof and easy to work with. Metal conduit is an option too, but it costs more.
Choose the right conduit size. It should fit the wires without cramming. Allow some space for future upgrades.
Connectors join conduit pieces. Waterproof connectors are a must. They keep moisture out of the system.
For tools, you’ll need:
Screwdrivers
Wire strippers
PVC cutter or hacksaw
Measuring tape
Level
Quality tools make the job easier and safer. Don’t skimp on tool quality. Good tools last longer and work better.
Planning Your Hot Tub’s Electrical Supply
Setting up your hot tub’s power supply needs careful thought. It’s important to know how much power you need, where to put the tub, and how to run the wires safely.
Determining Power Requirements
Most hot tubs need 220-240 volts of power. Check your tub’s manual for exact specs. Look at the amp rating too. It’s often 50 or 60 amps.
You might need to upgrade your home’s electrical panel. An electrician can tell you if you have enough power. They’ll also make sure your system can handle the extra load.
Don’t forget about other backyard gadgets. Count up all the power they use. This helps avoid overloading your circuits.
Deciding on the Placement of the Hot Tub
Pick a spot that’s both comfy and close to power. The closer to your house, the less wire you’ll need. This can save money.
Think about privacy and views. You want to enjoy your soak without nosy neighbours.
Check local rules about how far the tub must be from property lines. Also, look for overhead power lines. Keep the tub far from those for safety.
Make sure the ground is level and can support the weight. A full hot tub is very heavy.
Mapping the Route for Wires and Conduits
Plan the path from your power source to the hot tub. It should be as short and straight as possible.
You’ll need to dig a trench for the wires. It must be deep enough to meet local codes. Usually, this is about 18 inches.
Use conduits to protect the wires. PVC pipes work well for this. They shield the wires from water and damage.
Avoid tree roots when digging. They can damage wires over time. Also, stay clear of other buried utilities like gas lines.
Plan for a disconnect box near the tub. This lets you cut power quickly if needed. It’s a key safety feature.
Installing Required Breakers and Disconnects
Proper electrical protection is crucial for safe hot tub operation. The right breakers and disconnects help prevent shocks and fires.
Integrating GFCI Breaker into the Service Panel
A GFCI breaker is essential for hot tub safety. It shuts off power if it detects a ground fault. Install the GFCI breaker in the main service panel. Choose a breaker that matches the hot tub’s amperage needs.
Turn off the main power before installation. Remove the panel cover carefully. Attach the GFCI breaker to an empty slot. Connect the hot wire to the breaker’s “LINE” terminal. The neutral wire goes to the “LOAD” terminal.
Test the GFCI after installation. Press the “TEST” button – it should trip. If it doesn’t, check the wiring and try again.
Setting Up a Proper Disconnect Device
A disconnect device lets you cut power to the hot tub quickly. Install it within sight of the hot tub, but at least 1.5 metres away. This placement allows for easy access in emergencies.
Choose a disconnect that matches your hot tub’s voltage and amperage. Weatherproof boxes work best for outdoor installs. Mount the box securely to a wall or post.
Wire the disconnect between the GFCI breaker and the hot tub. Connect the incoming power to the “LINE” side. The wires to the hot tub go on the “LOAD” side.
Label the disconnect clearly. This helps others find it in urgent situations. Test the disconnect to ensure it cuts power as intended.
Making Connections: Wiring and Grounding
Proper wiring and grounding are key to a safe hot tub setup. These steps ensure the tub works right and keeps users safe from electric shocks.
Connecting to the Main Electric Panel
To wire a hot tub, start at the main electric panel. Pick a free slot for a new breaker. The breaker size depends on the hot tub’s power needs. A 50-amp breaker is common for many tubs. Use thick wires that can handle the load. Run these wires from the panel to where the hot tub will go.
Make sure to use wires rated for outdoor use. They should be in a conduit to protect them. The conduit can be PVC or metal. Bury it at least 18 inches deep if it runs underground.
Leave enough extra wire at both ends. This makes it easier to connect things later. Always turn off the main power before working in the panel.
Executing Grounding and Bonding Procedures
Grounding and bonding keep people safe from electric shocks. Connect a ground wire from the panel to the hot tub’s ground point. This wire gives a safe path for stray currents.
Bond all metal parts of the hot tub. This means connecting them with a wire. Include pumps, heaters, and the tub shell if it’s metal. Use a thick copper wire for this job. It should be at least #8 gauge.
Connect this bond wire to the main ground wire. This makes sure all parts are at the same electric potential. It stops dangerous voltage differences.
Fulfilling Neutral and Ground Wire Requirements
Hot tubs need both neutral and ground wires. The neutral wire carries the current back to the panel. The ground wire is a safety feature.
Use a white wire for neutral. It should be the same size as the hot wires. The ground wire can be green or bare copper. It’s often one size smaller than the hot wires.
In the tub’s electrical box, connect these wires to the right spots. The neutral goes to the neutral bar. The ground wire attaches to the ground bar. Keep these wires separate in the box. Don’t mix them up or connect them.
Check all connections twice. Loose wires can cause big problems. Use the right size wire nuts for each connection. Wrap them with electrical tape for extra safety.
Special Considerations for Plug-and-Play Hot Tubs
Plug-and-play hot tubs offer convenience but require careful attention to electrical needs. These portable units have specific power requirements that differ from standard hot tubs.
Electrical Needs for Portable Hot Tubs
Plug-and-play hot tubs typically run on 120 V power, which is the standard household outlet voltage in Canada. This means they can be plugged into most existing outdoor outlets without extra wiring.
These tubs use less energy than their 240 V counterparts. They heat up more slowly and may struggle to maintain temperature in cold weather. The pumps and jets also tend to be less powerful.
Some plug-and-play models can be converted to 240 V for better performance. This upgrade requires a dedicated circuit and professional installation.
Lighting in plug-and-play tubs is often basic due to power limits. LED lights are common as they use less electricity.
During power outages, a small generator can run a plug-and-play hot tub. Always check the tub’s power needs against the generator’s output before connecting.
Finishing Touches and Safety Measures
Once the main wiring is done, a few key steps remain to ensure a safe and properly functioning hot tub setup. These final touches involve careful testing and labelling, as well as putting safeguards in place to prevent accidents.
Testing and Labeling Electrical Components
Use a voltage tester to check all connections before powering on the hot tub. This helps catch any wiring mistakes early. Test the fuse to make sure it’s working properly.
Label all electrical components clearly. Mark the main power switch, fuse box, and any other key parts. Use waterproof labels that won’t fade or peel off over time.
Keep a wiring diagram on hand for future reference. Store it in a safe, dry place near the hot tub. This can be helpful for troubleshooting or if repairs are needed later.
Check that all electrical work meets local building codes. Have it inspected by a licensed electrician if required in your area. Proper installation is crucial for maintaining the hot tub’s warranty.
Mitigating Risks of Electrocution and Fire
Install a ground fault circuit interrupter (GFCI) to prevent electric shock. This device quickly cuts power if it detects a current leak. Place the GFCI between the main electrical panel and the hot tub.
Keep all electrical outlets and switches at least 1.5 metres away from the water. Use weatherproof covers on any outdoor outlets near the hot tub area.
Make sure the hot tub has proper grounding. This helps direct any stray electrical current safely into the ground instead of through people.
Set up good lighting around the hot tub area. This reduces the risk of trips and falls, especially at night. Use low-voltage landscape lighting to minimize shock hazards.
Keep a fire extinguisher nearby, just in case. Make sure everyone who uses the hot tub knows where it is and how to use it.
Hiring Professionals vs. DIY Installations
Wiring a hot tub involves complex electrical work with safety risks. The choice between hiring a professional and doing it yourself depends on skills, experience, and legal requirements.
Reasons to Hire a Licensed Electrician
Licensed electricians have the training and tools to wire hot tubs safely. They know local codes and get permits. Electricians can spot and fix issues that DIYers might miss.
Hiring a pro saves time and stress. They work quickly and efficiently. If something goes wrong later, the electrician is responsible for fixes.
Licensed electricians carry insurance. This protects homeowners if accidents happen during installation. It also covers any damage to the home or hot tub.
Professional installs often come with warranties. This gives peace of mind for future problems. Luckily for you, we have one of the best electricians in Whitby! Scott Beetham. Here are his details:
DIY hot tub wiring is risky and often illegal. Most places require licensed pros for this job. DIYers might not know all the safety rules and codes.
Mistakes in wiring can lead to shocks, fires, or death. Even small errors can damage the hot tub or home’s electrical system.
DIY work might void warranties or insurance. It could also make selling the home harder.
Some tasks are okay for DIYers. These include prepping the site or running non-electrical lines. But the main wiring should be left to the pros.
DIY attempts often end up costing more. Fixing mistakes or redoing work adds up fast. It’s cheaper to hire a pro from the start.
Maintenance and Troubleshooting
Keeping your hot tub in top shape requires regular care and knowing how to fix common problems. These tasks help ensure safe operation and prevent costly repairs.
Regular Inspections and Maintenance Tips
Check your hot tub’s electrical connections monthly. Look for signs of wear or damage on wires and connections. Tighten any loose connections carefully.
Clean or replace filters as needed, usually every 3-4 weeks. This keeps water clean and reduces strain on the pump.
Test water chemistry weekly and adjust as needed. Proper pH and sanitizer levels protect both bathers and equipment.
Drain and clean the tub every 3-4 months. Scrub surfaces and refill with fresh water.
Inspect the cover for tears or damage. Replace if needed to maintain energy efficiency.
Always turn off the power before inspecting electrical parts. Call a pro for complex electrical repairs.
Enhancing Your Hot Tub Experience
A well-designed hot tub setup can take your relaxation to new heights. The right features and surroundings make all the difference in creating a perfect home spa retreat.
Innovative Features and Accessories
Modern hot tubs offer amazing options to boost your soaking experience. LED lighting systems add a fun ambiance, with colour-changing modes to suit your mood. Built-in speakers let you enjoy your favourite tunes while you unwind.
Powerful jets provide soothing hydrotherapy, targeting key muscle groups. Some models have adjustable jets so you can customize the pressure. Waterfall features create a peaceful backdrop of flowing water.
For convenience, look for models with touchscreen controls. These make it easy to adjust temperature, jets, and other settings. Wi-Fi connectivity lets you warm up the tub before you get home.
Creating an Inviting Hot Tub Environment
The area around your hot tub is just as important as the tub itself. Start with a sturdy, non-slip surface like textured concrete or decking. This gives safe footing when entering and exiting.
Add privacy with fencing, lattice, or tall plants. This creates a secluded feel, even in a busy neighbourhood. Strategically placed lighting sets the mood without being too bright.
Comfy seating nearby gives a spot to relax before and after soaking. A small table holds drinks and snacks. For chilly nights, a patio heater keeps the surrounding area cozy.
Plant fragrant flowers or herbs to engage your senses. The scent of lavender or jasmine adds to the calming atmosphere. A pergola or gazebo provides shade and shelter from rain.
Frequently Asked Questions
Hot tub wiring involves several key considerations. Proper materials, costs, codes, safety devices, and wire specifications are crucial for a safe and compliant installation.
What type of electrical conduit is required for a hot tub installation?
Rigid PVC conduit is often used for hot tub wiring. It’s durable and resistant to moisture. In some cases, metal conduit may be needed. Local codes may specify the required type.
How much does it typically cost to wire a hot tub?
The cost of wiring a hot tub ranges from $500 to $2,000. Factors affecting price include distance from the panel, labour rates, and materials needed. Complex installations may cost more.
Which electrical codes pertain to the installation of a hot tub?
The Canadian Electrical Code (CEC) governs hot tub wiring. Section 68 deals with pools, tubs, and spas. Local bylaws may add extra rules. It’s vital to check current codes before starting work.
Is a GFCI breaker necessary for hot tub wiring and if so, what amperage?
Yes, a GFCI breaker is required for hot tub wiring. The common amperage is 50 or 60 amps. The exact size depends on the hot tub’s power needs. Check the manufacturer’s specs for the right amperage.
What gauge of wire is recommended for connecting a hot tub?
For most hot tubs, 6 gauge copper wire is standard. Larger tubs may need 4 gauge wire. The wire size must match the breaker amperage and the tub’s power requirements.
Can I use aluminum wire for hooking up a hot tub, and what are the considerations?
Aluminum wire can be used but is not ideal for hot tubs. It’s cheaper but less conductive than copper. Aluminum needs larger gauge sizes and special connectors. It’s more prone to corrosion in damp areas.